Dual-boot Ubuntu on a secondary SSD 40 min
Install Ubuntu on a secondary NVMe SSD to create a dedicated environment for development, testing, or a fallback system without affecting Olares OS.
This dual-drive setup physically isolates the systems. This ensures Olares OS remains stable and secure while providing the flexibility to boot into either operating system natively.
Learning objectives
By the end of this guide, you will learn how to:
- Create a bootable Ubuntu USB drive.
- Install Ubuntu on a secondary SSD.
- Configure GRUB to detect both Olares OS and Ubuntu.
- Switch between the two systems at startup.
Prerequisites
Hardware
- A secondary NVMe M.2 SSD physically installed in Olares One.
- A USB flash drive (8 GB or larger) for Ubuntu installation media.
- A wired keyboard and mouse.
- A monitor connected to Olares One.
Step 1: Create a bootable Ubuntu USB drive
Download the Ubuntu ISO (26.04 LTS or later) from the official Ubuntu website. You can choose the Server or Desktop version.
Download and install balenaEtcher.
Insert the USB flash drive into your computer.
Open balenaEtcher and follow these steps:
a. Click Flash from file and select the ISO you downloaded.
b. Click Select target and select your USB drive.
c. Click Flash! to write the installer to the USB drive.
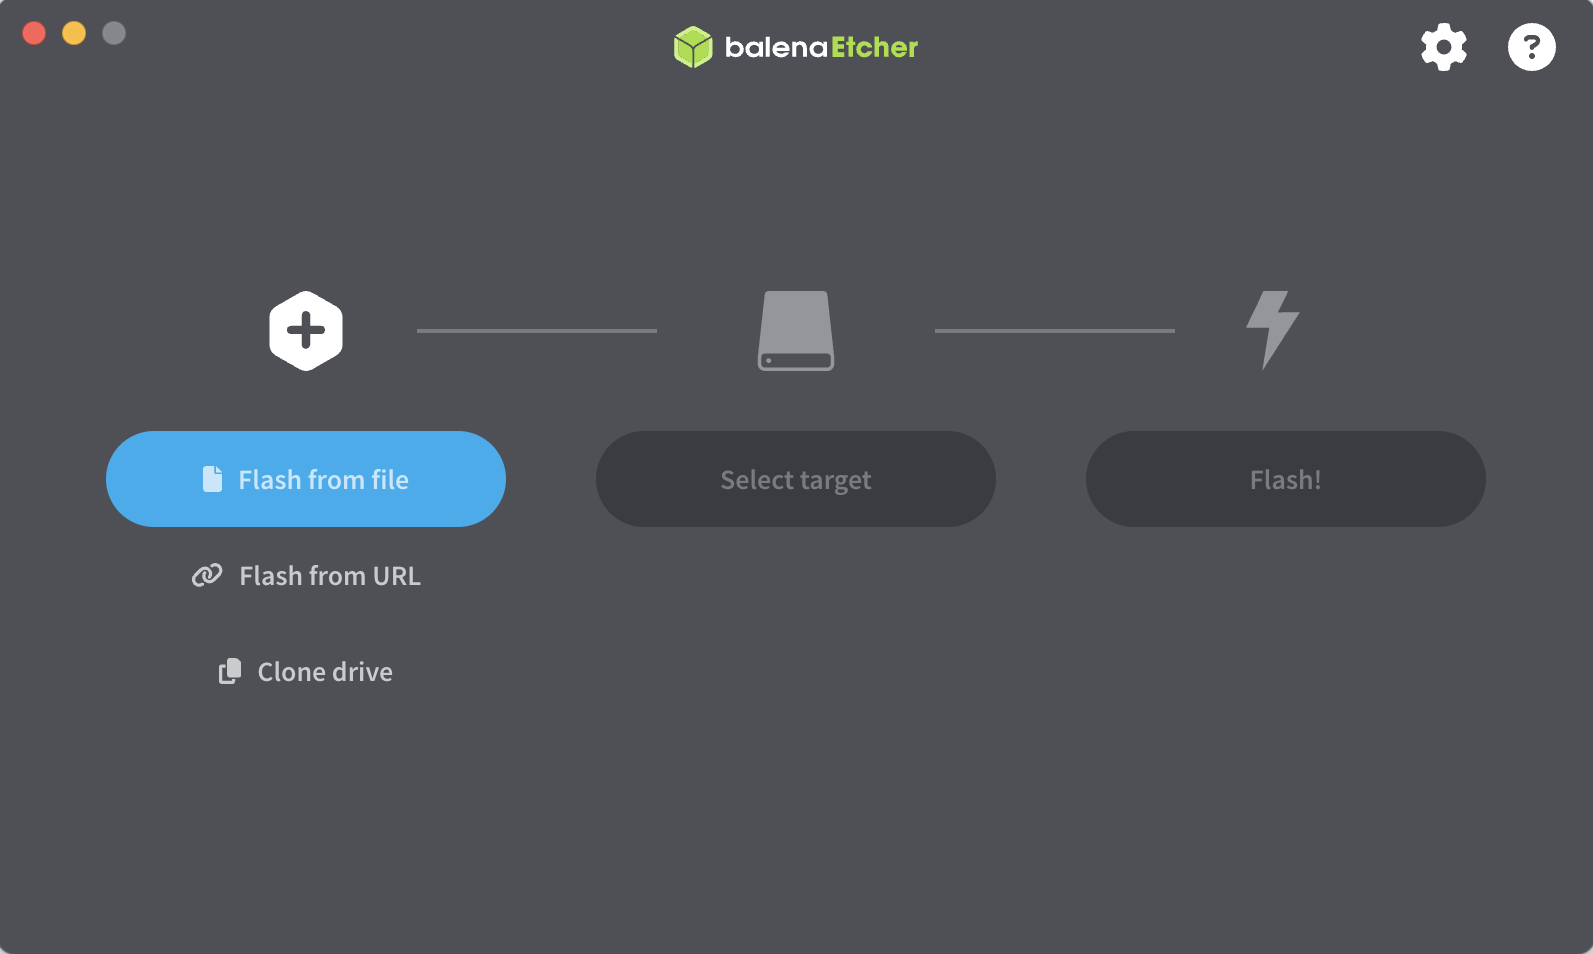
Wait for the flashing and validation to finish, and then safely eject the USB drive.
Step 2: Boot from the Ubuntu USB drive
Insert the Ubuntu USB drive into Olares One.
Power on Olares One, or restart it if it is already running.
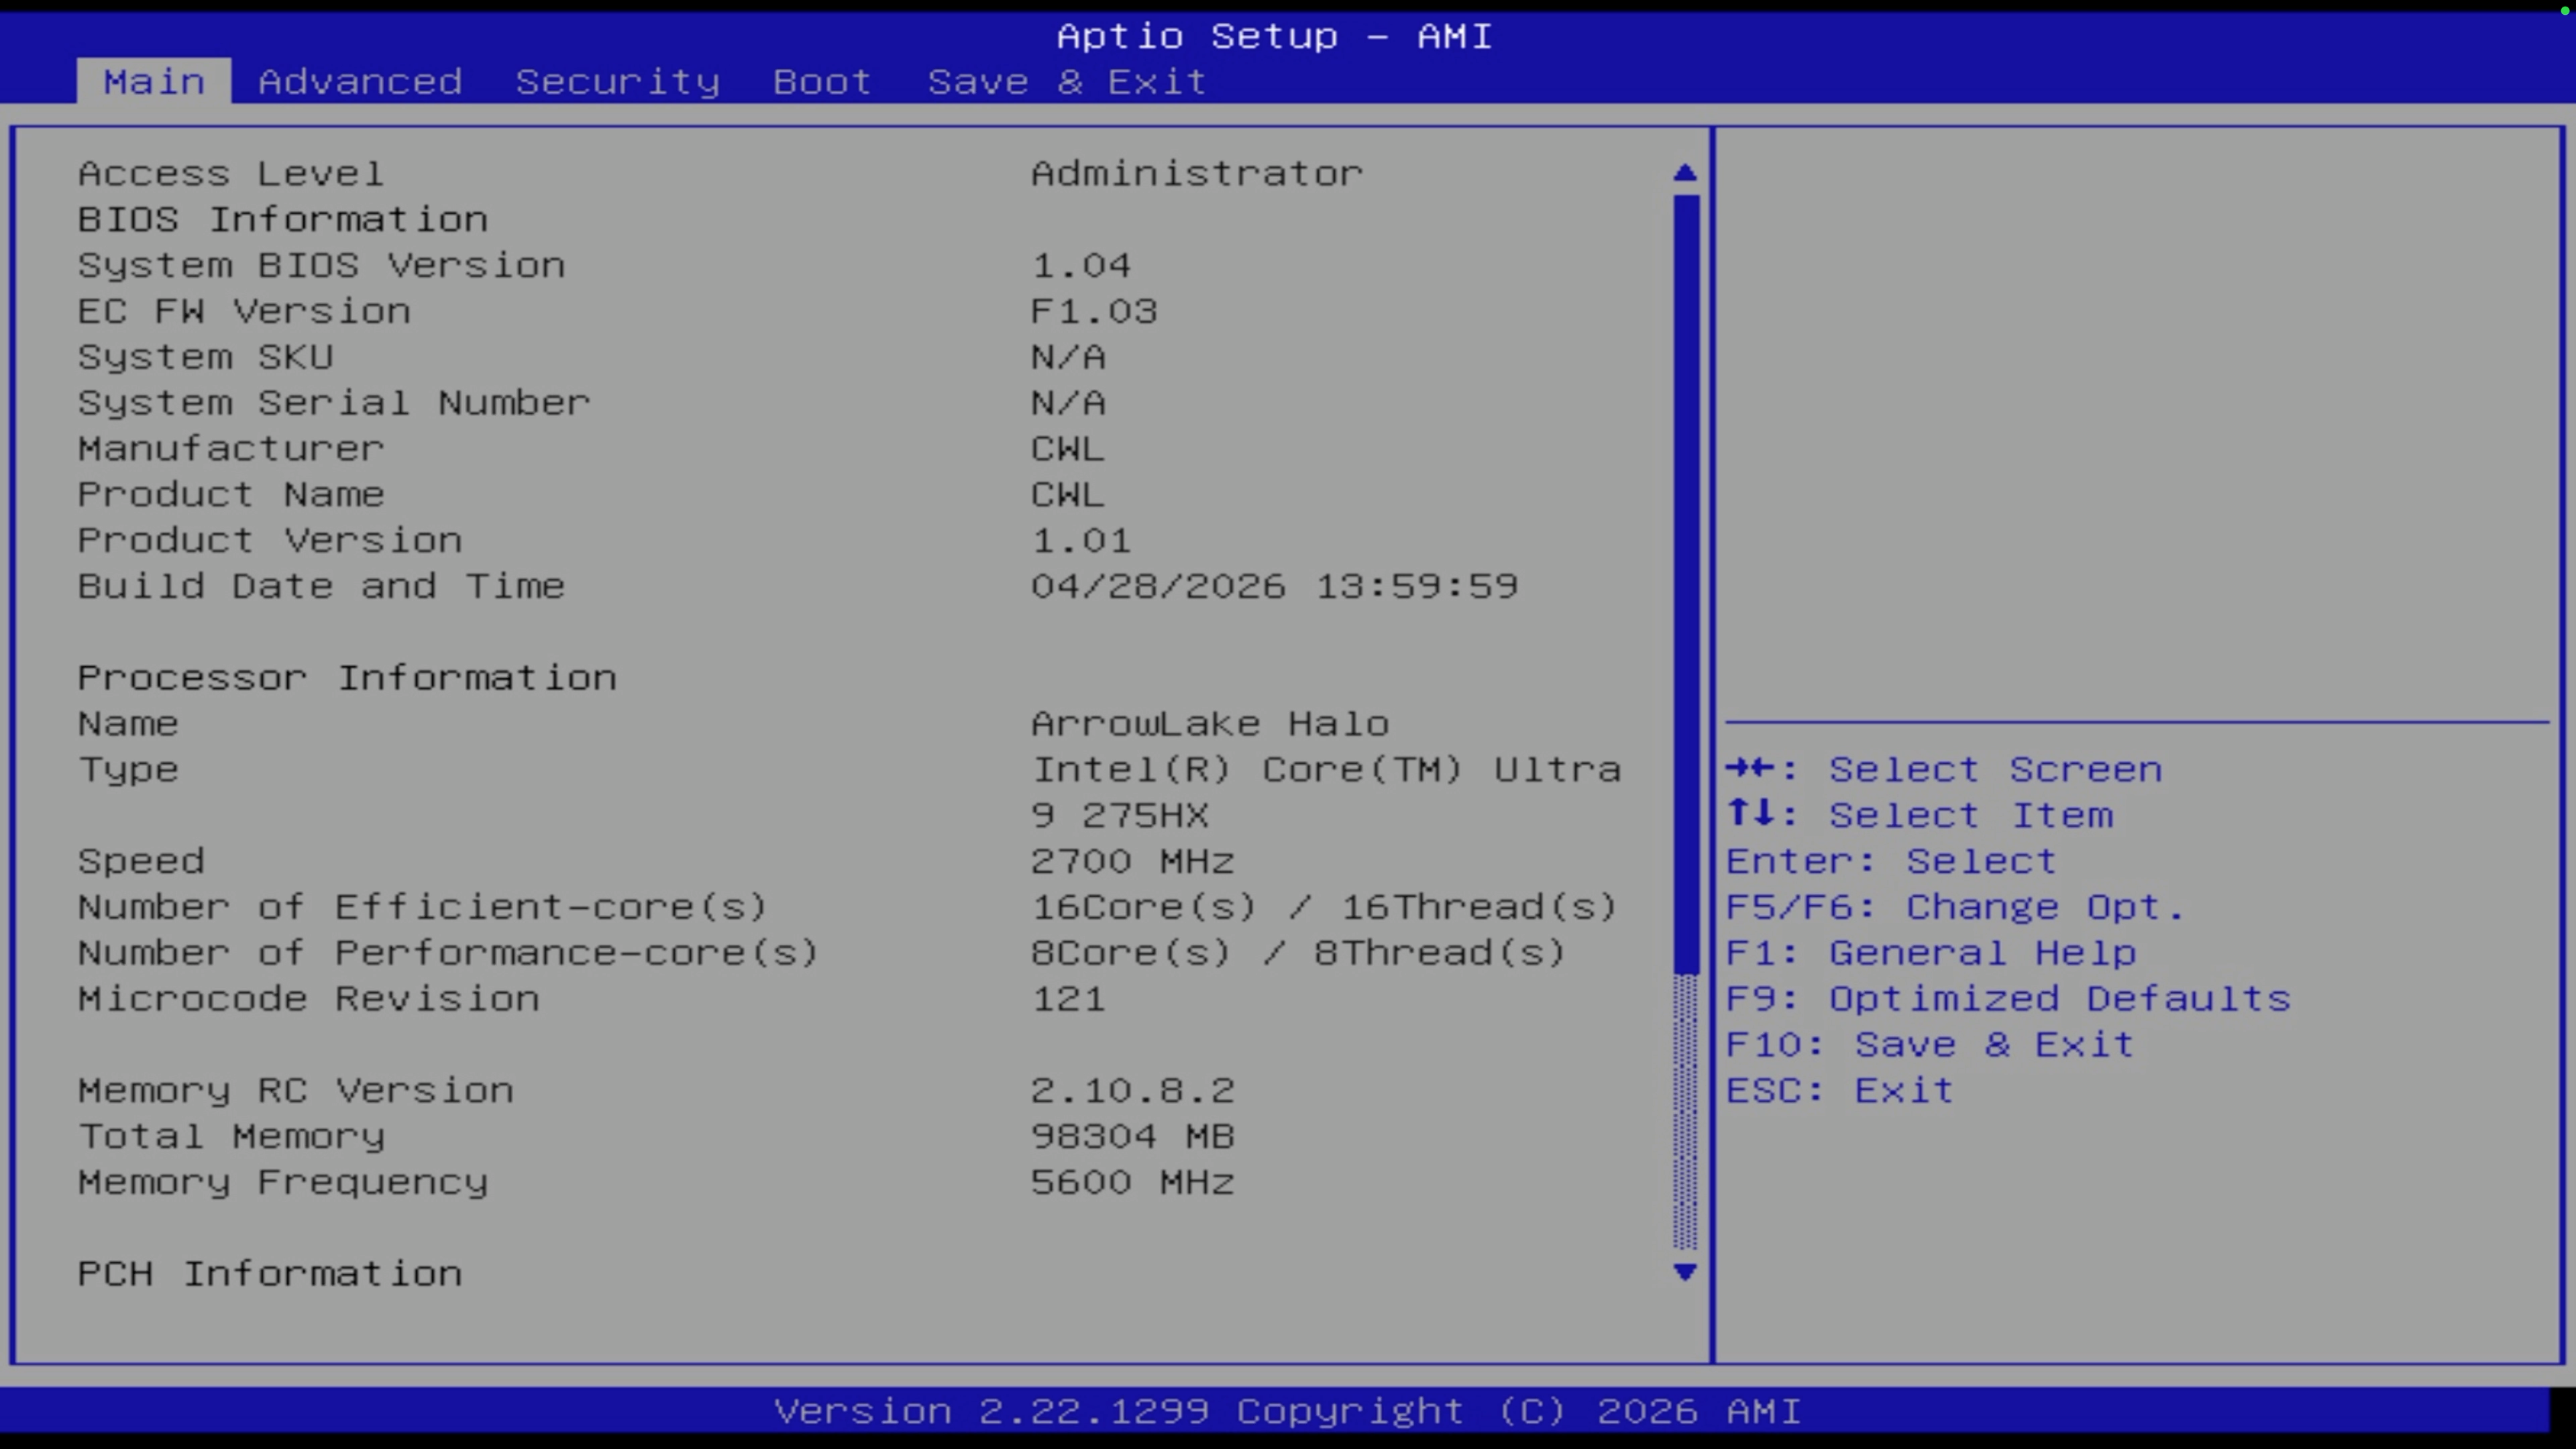
When the Olares logo appears, press the Delete key repeatedly to enter the BIOS setup.
Go to the Save & Exit tab, under Boot Override, select your USB drive from the list, and then press Enter.
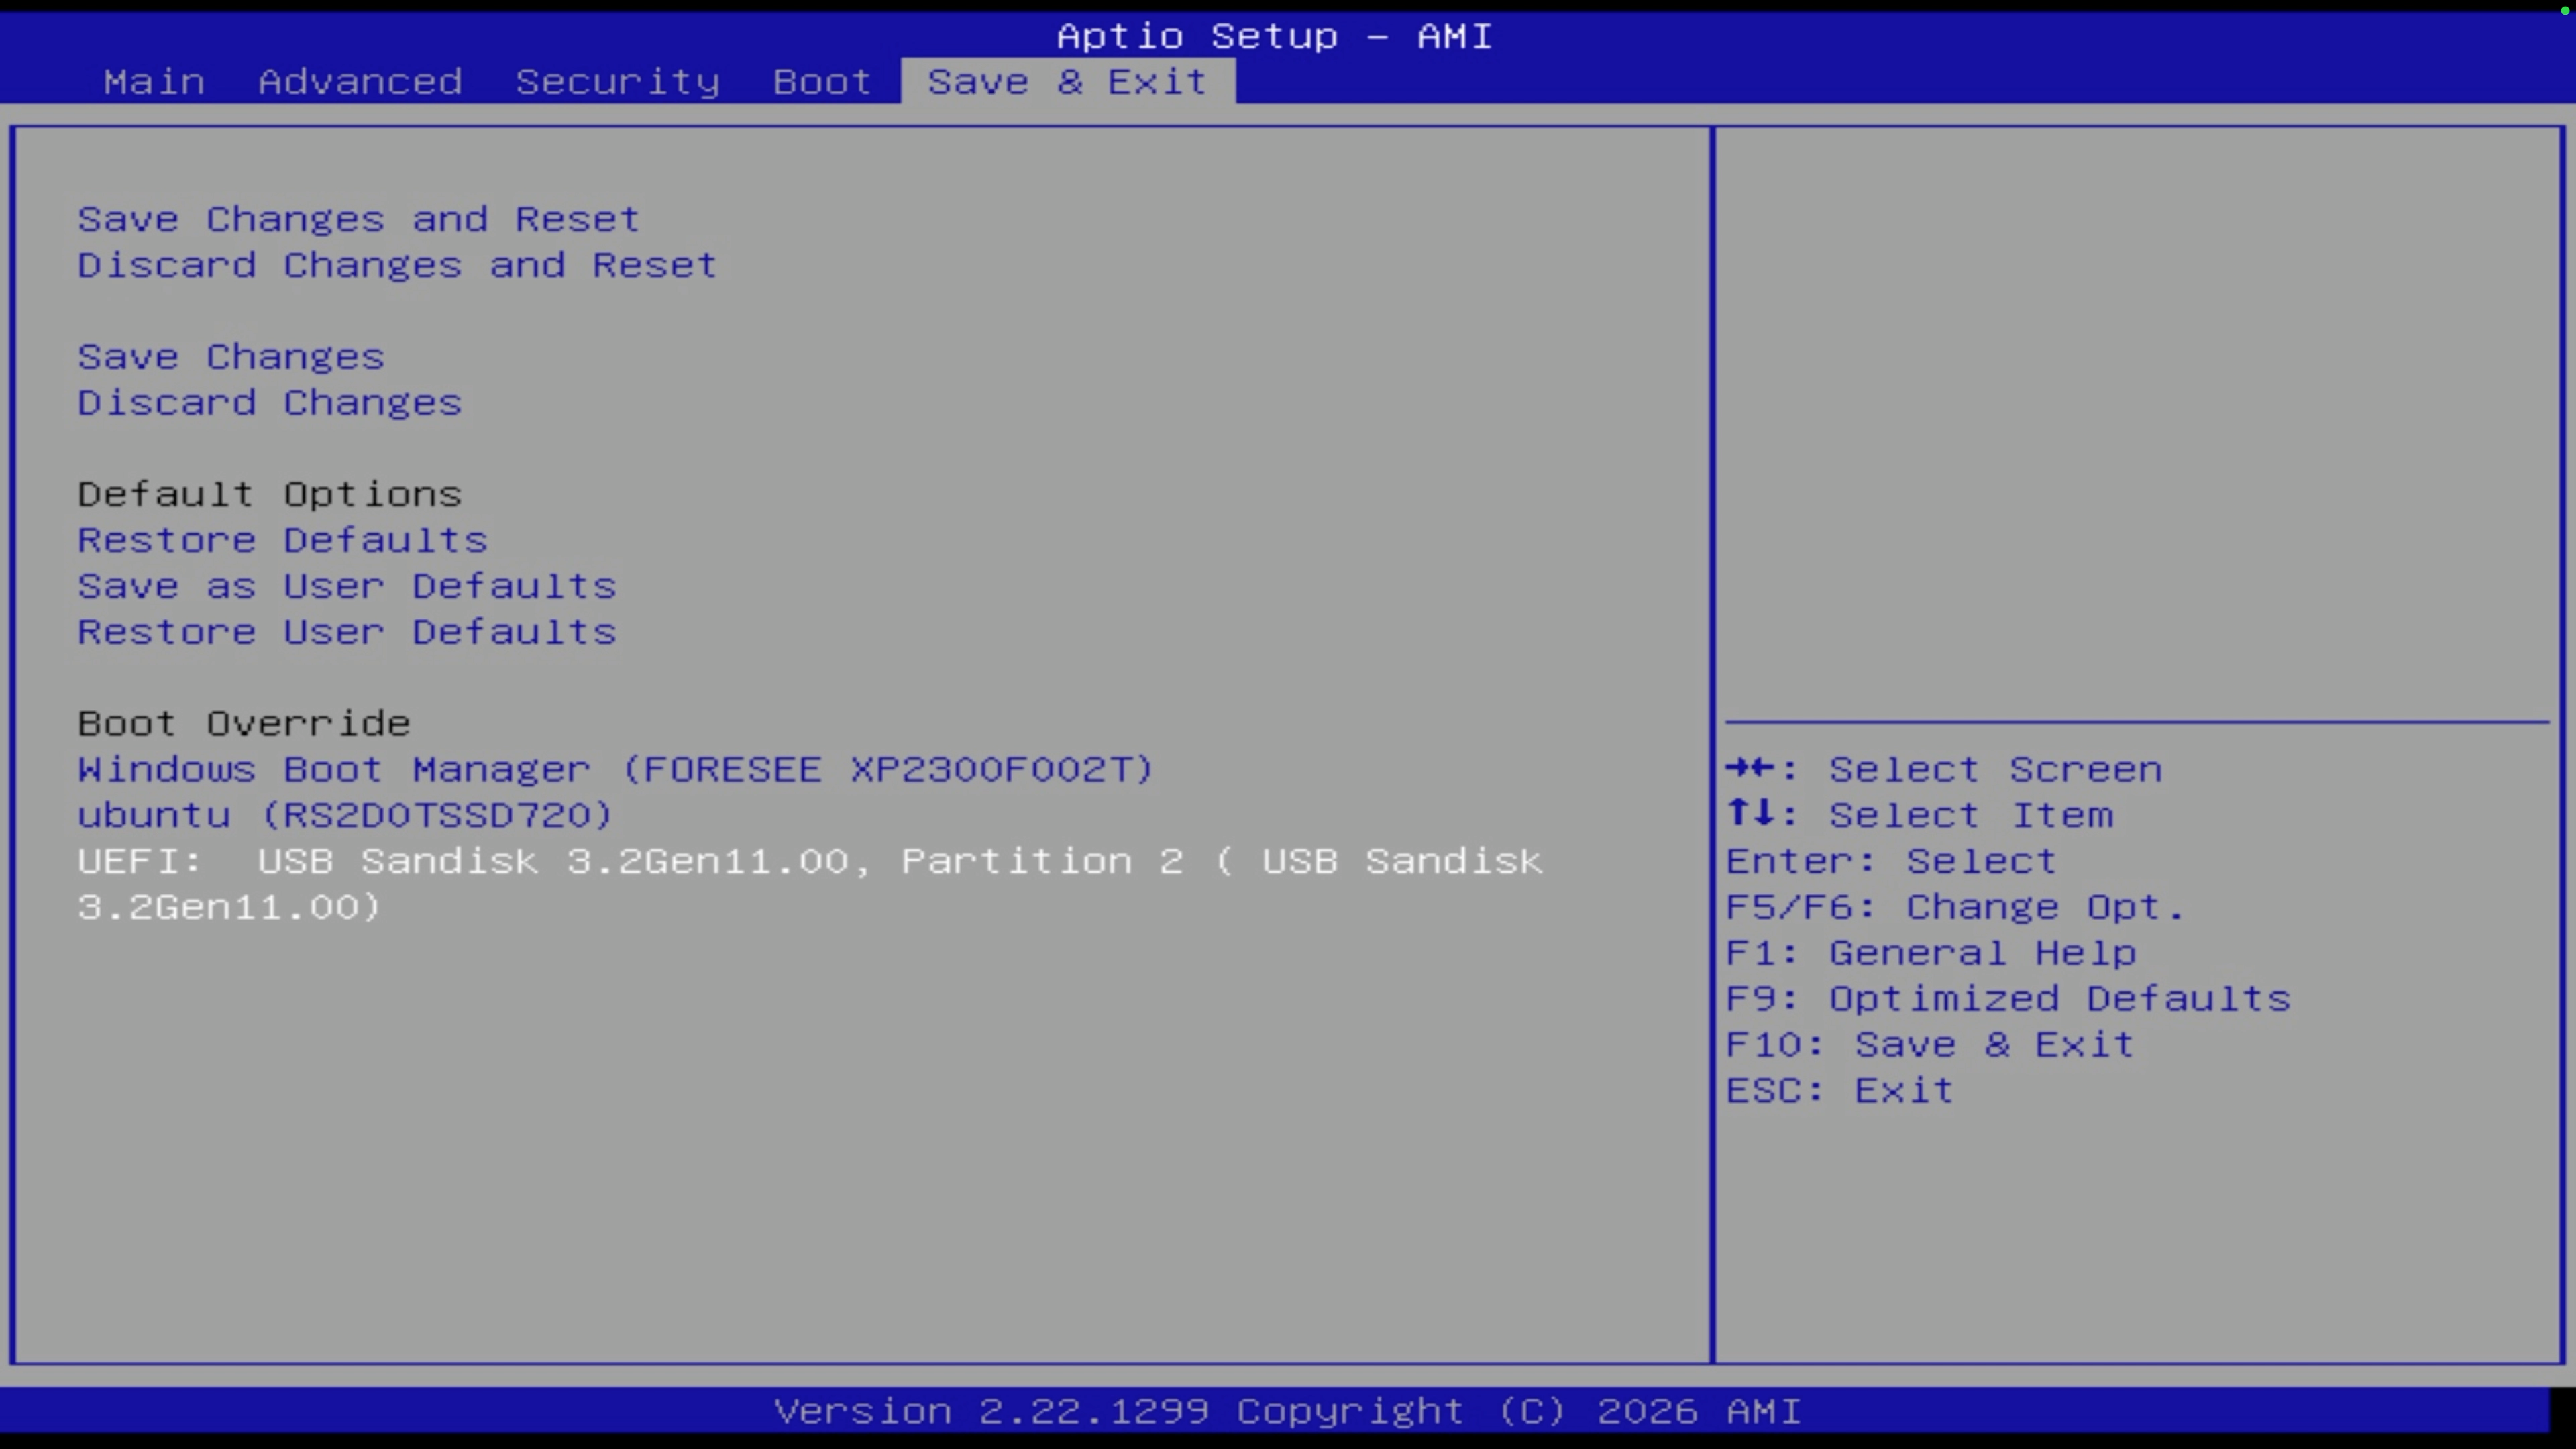
The system restarts and boots from the USB drive into the Ubuntu installation interface.
Step 3: Install Ubuntu on the secondary SSD
The following steps use Ubuntu Server 26.04 as an example. The process is similar for the Desktop version.
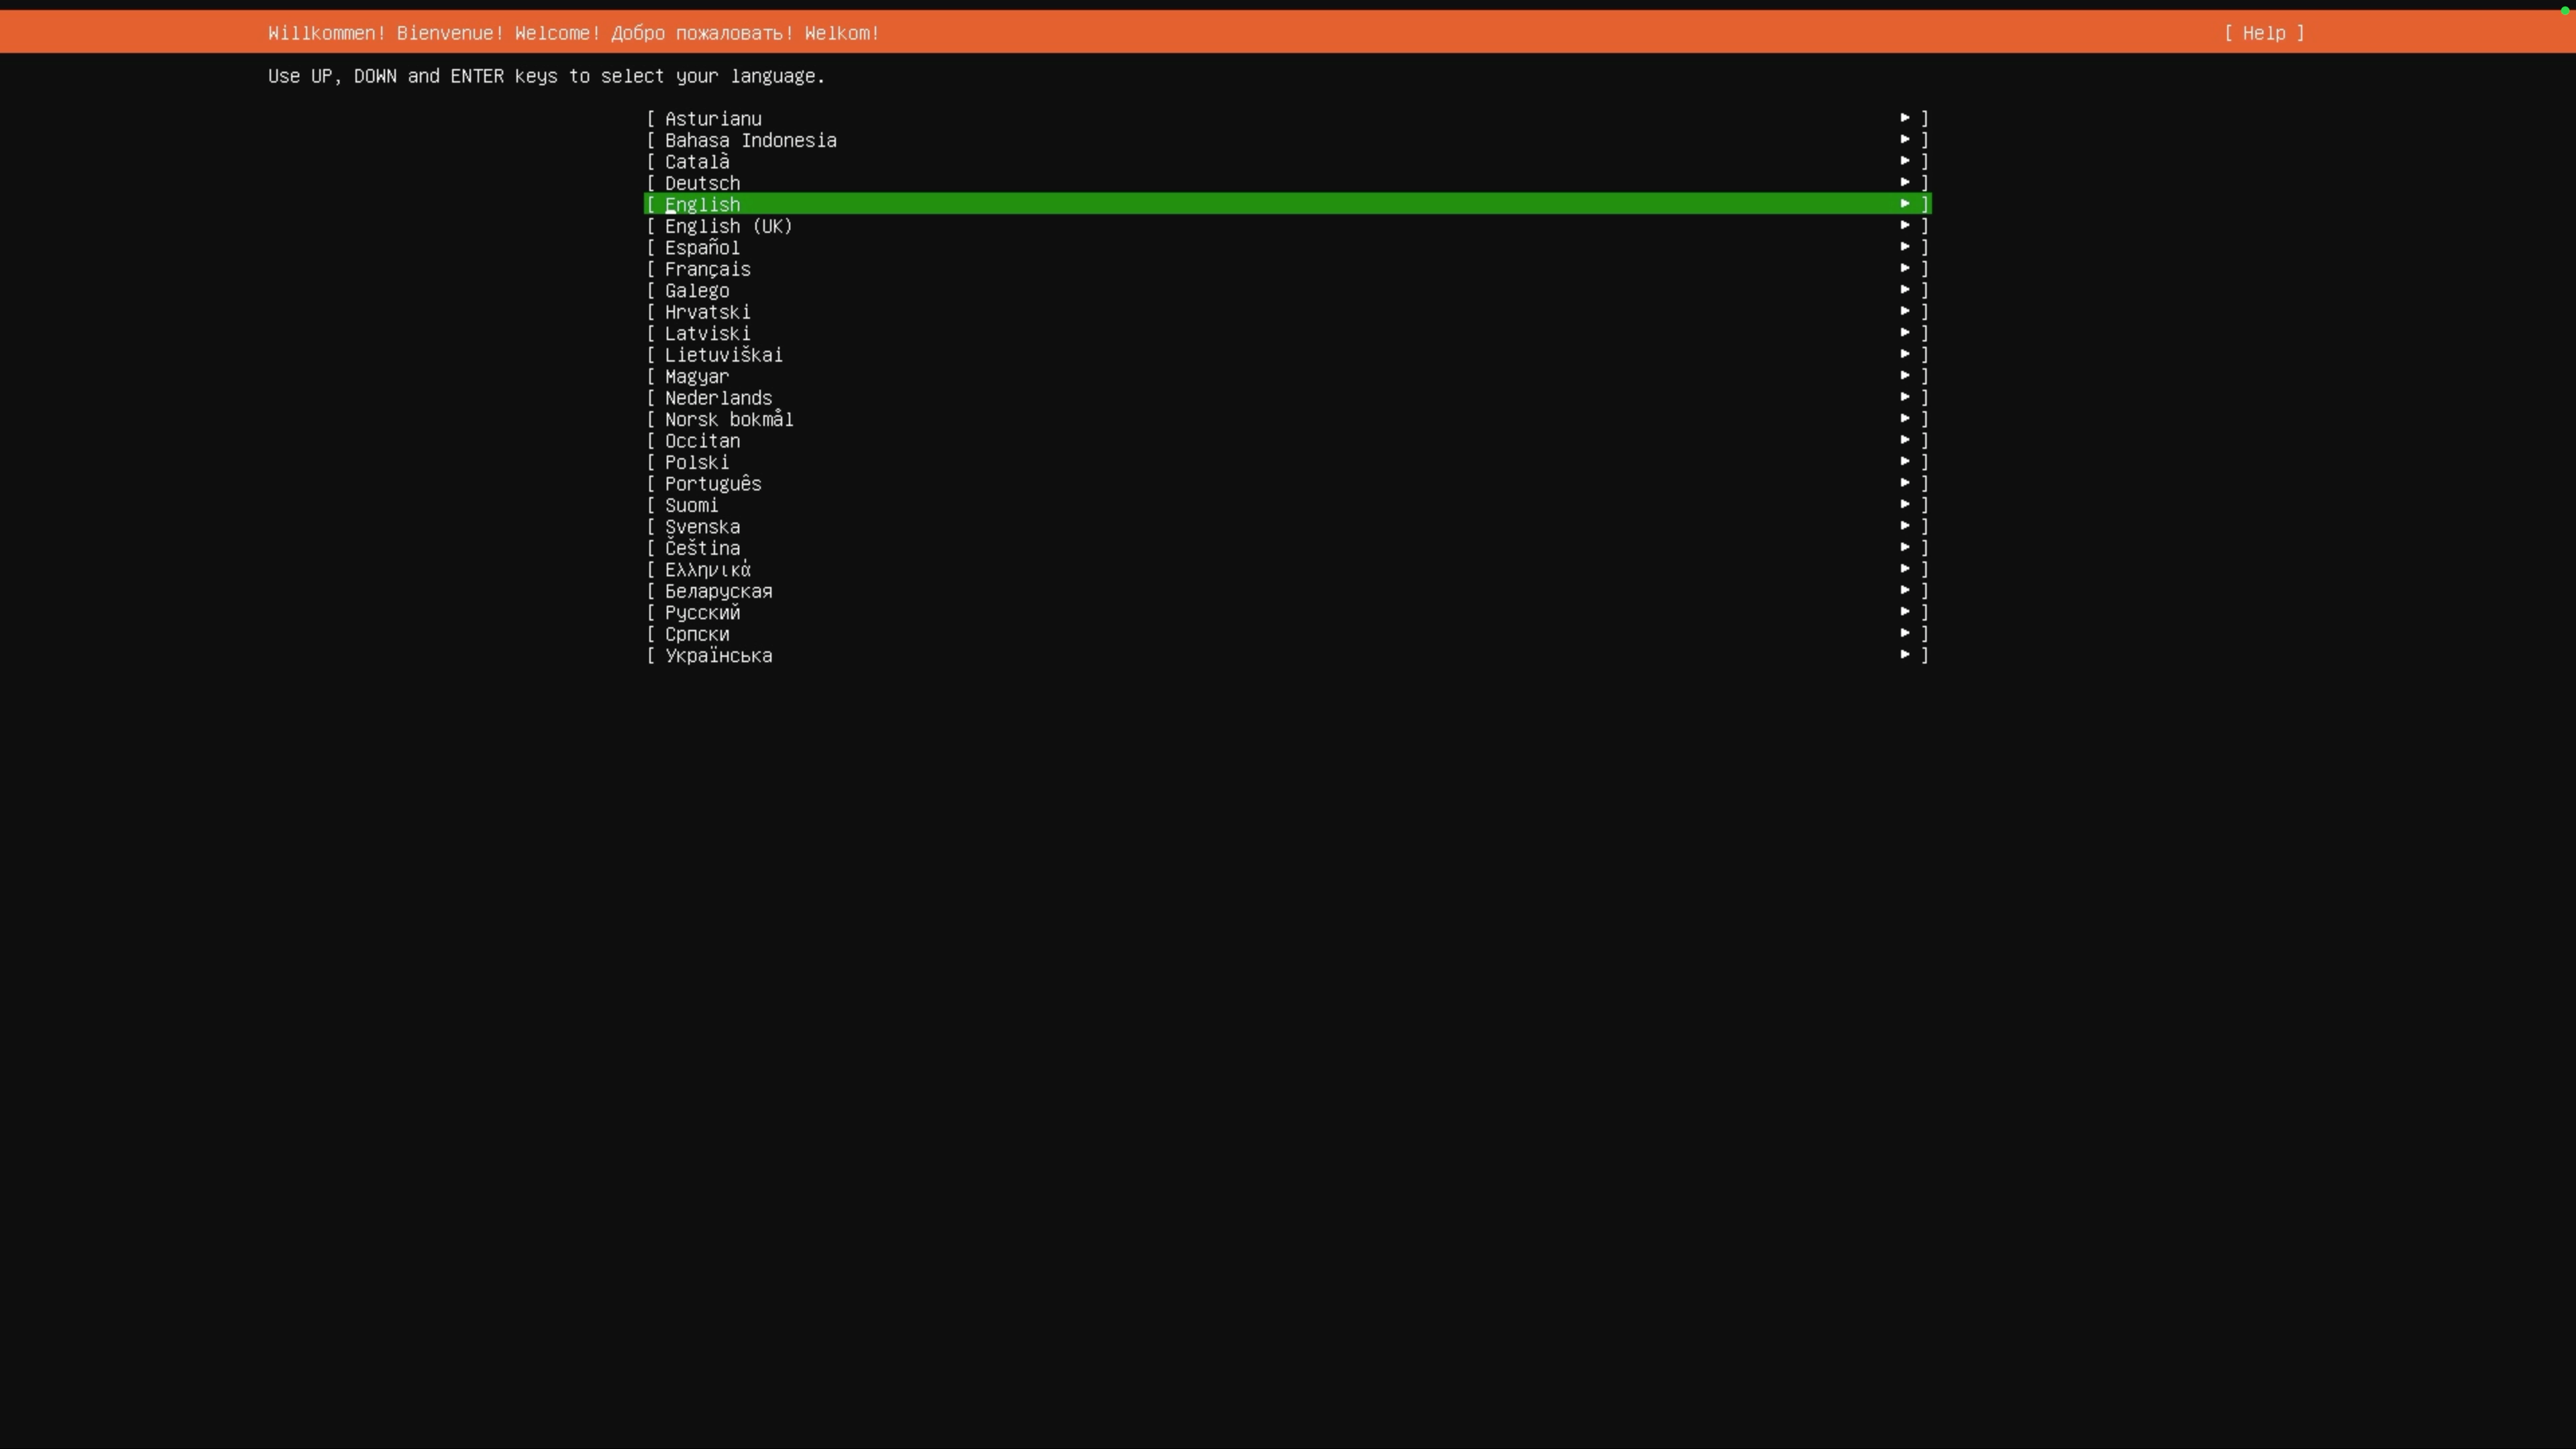
In GNU GRUB, select Try or Install Ubuntu Server. Wait for the initial loading sequence to finish and the language selection screen to appear.
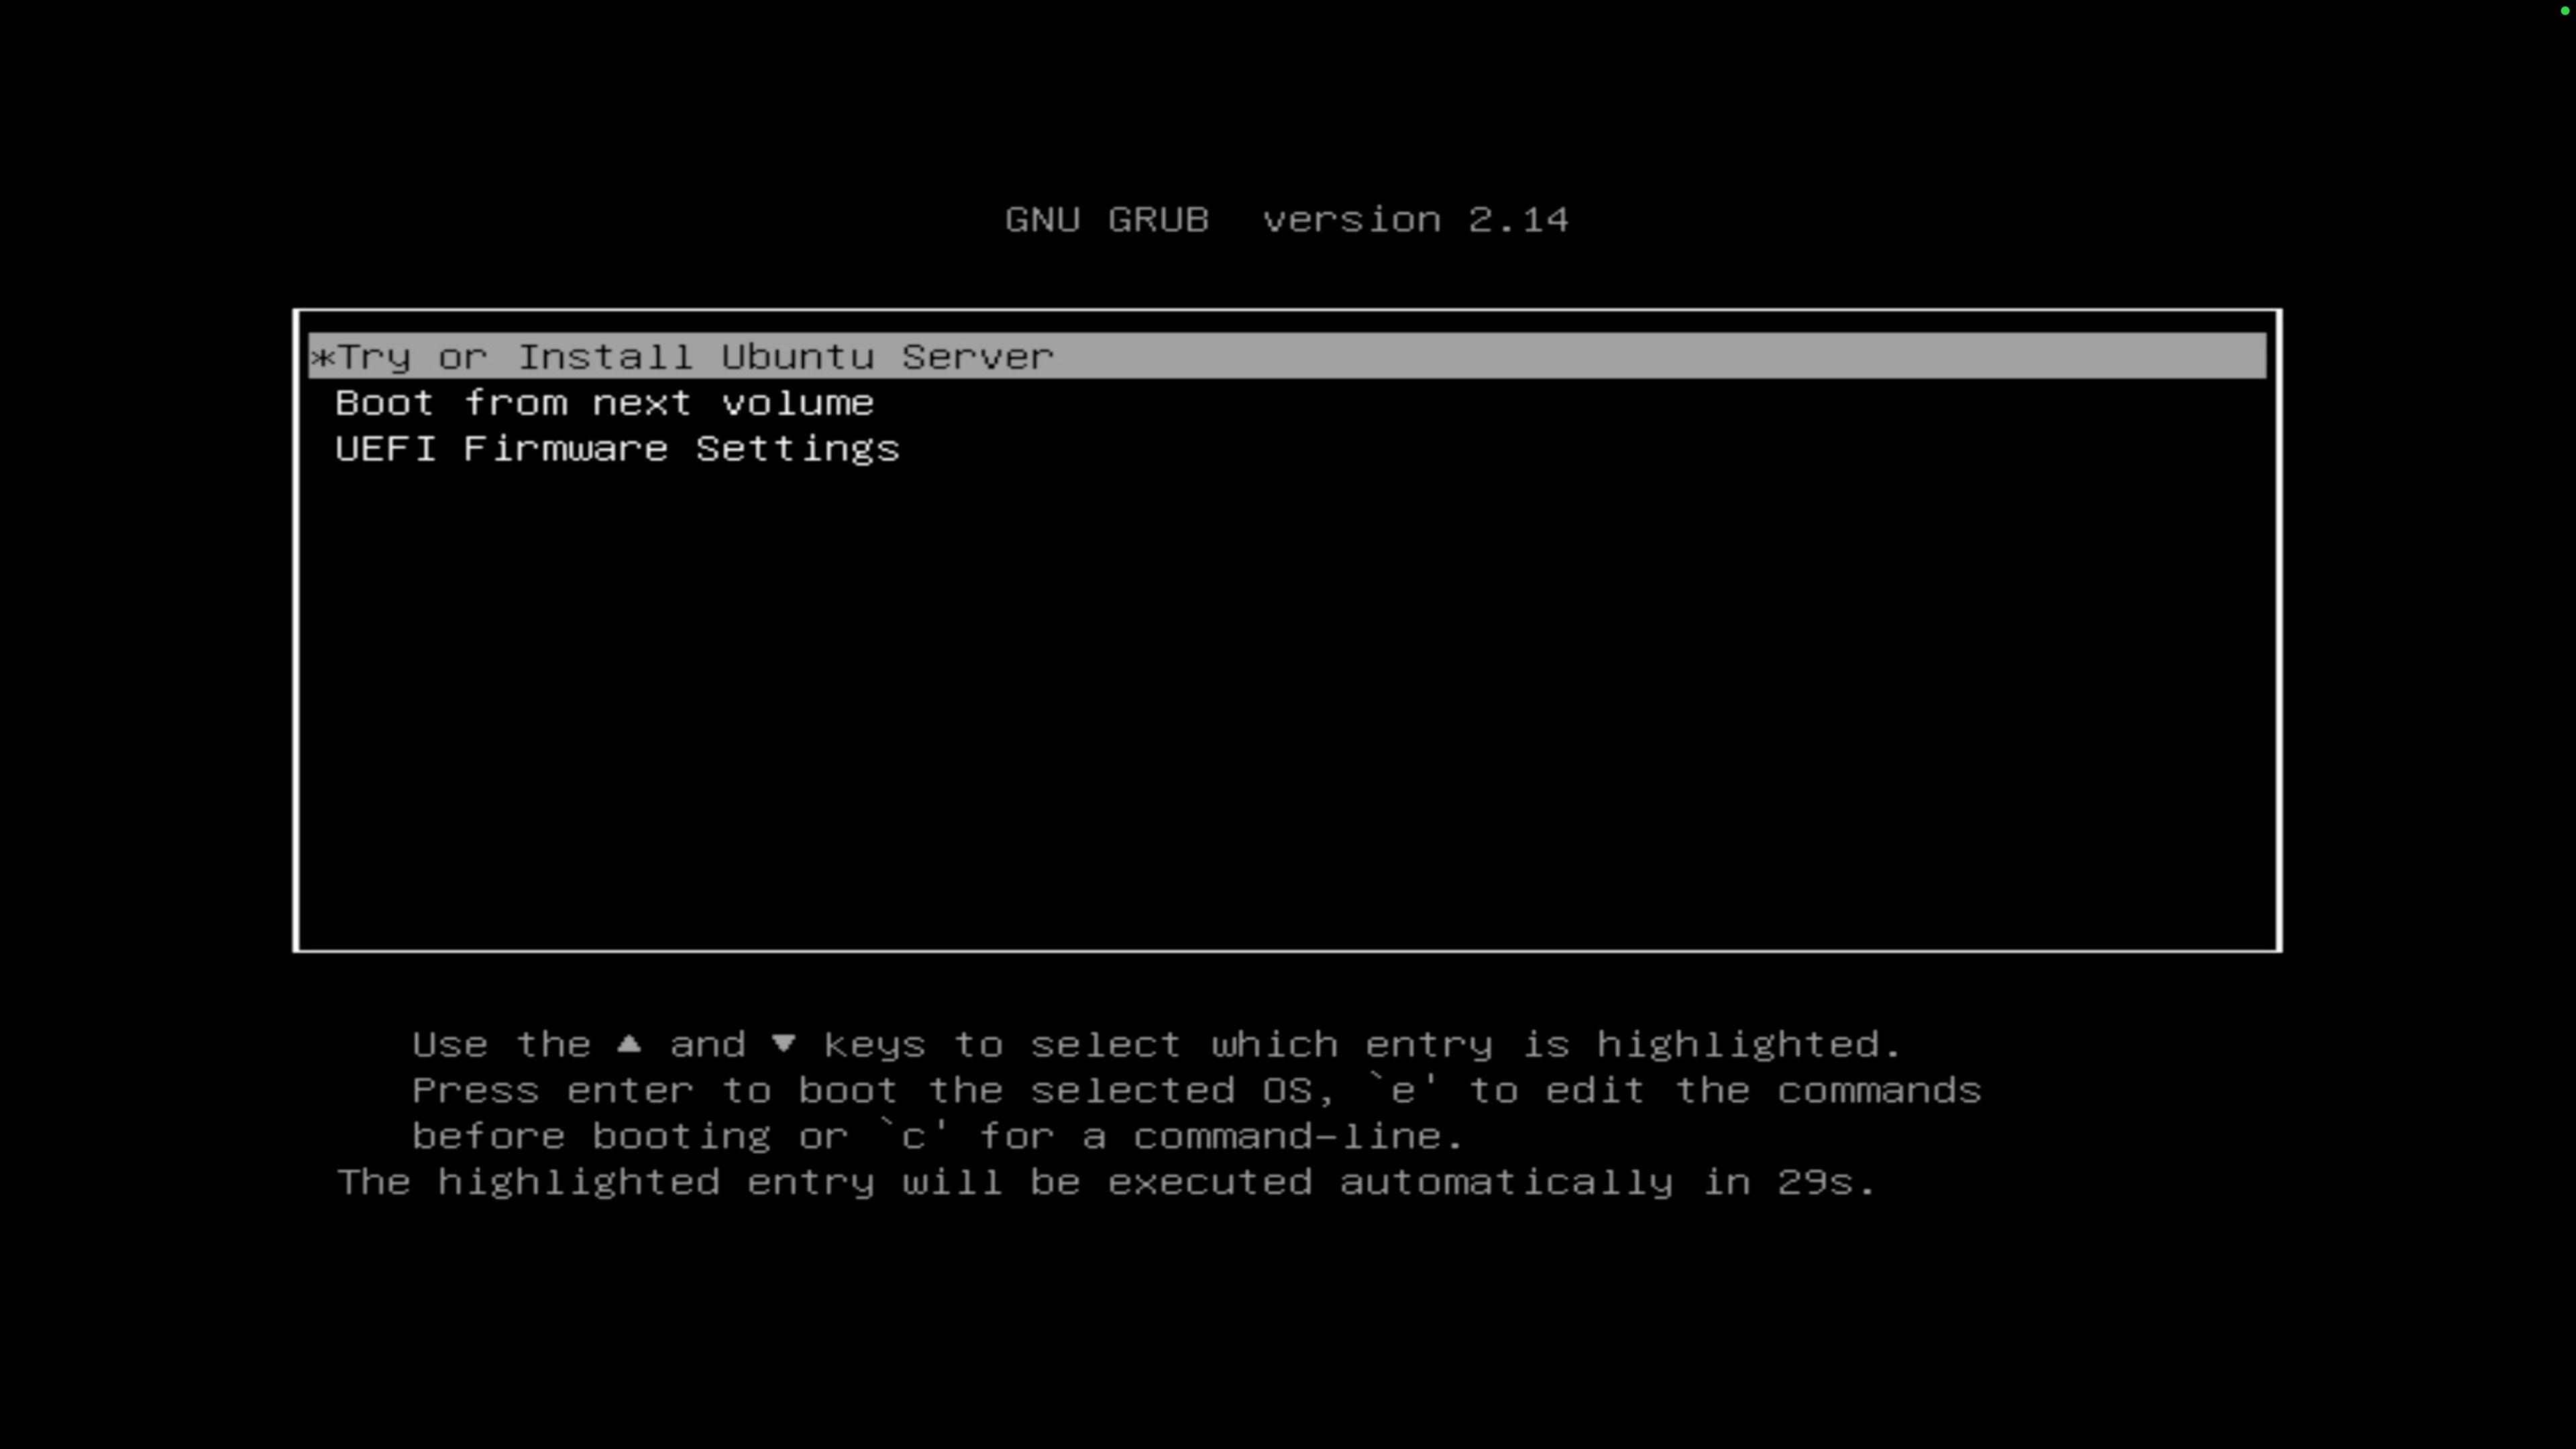
Select your language, and then press Enter.
Keep the default keyboard layout English (US), and then press Enter.
On the Choose the type of installation screen, select Ubundu Server, and then press Enter.
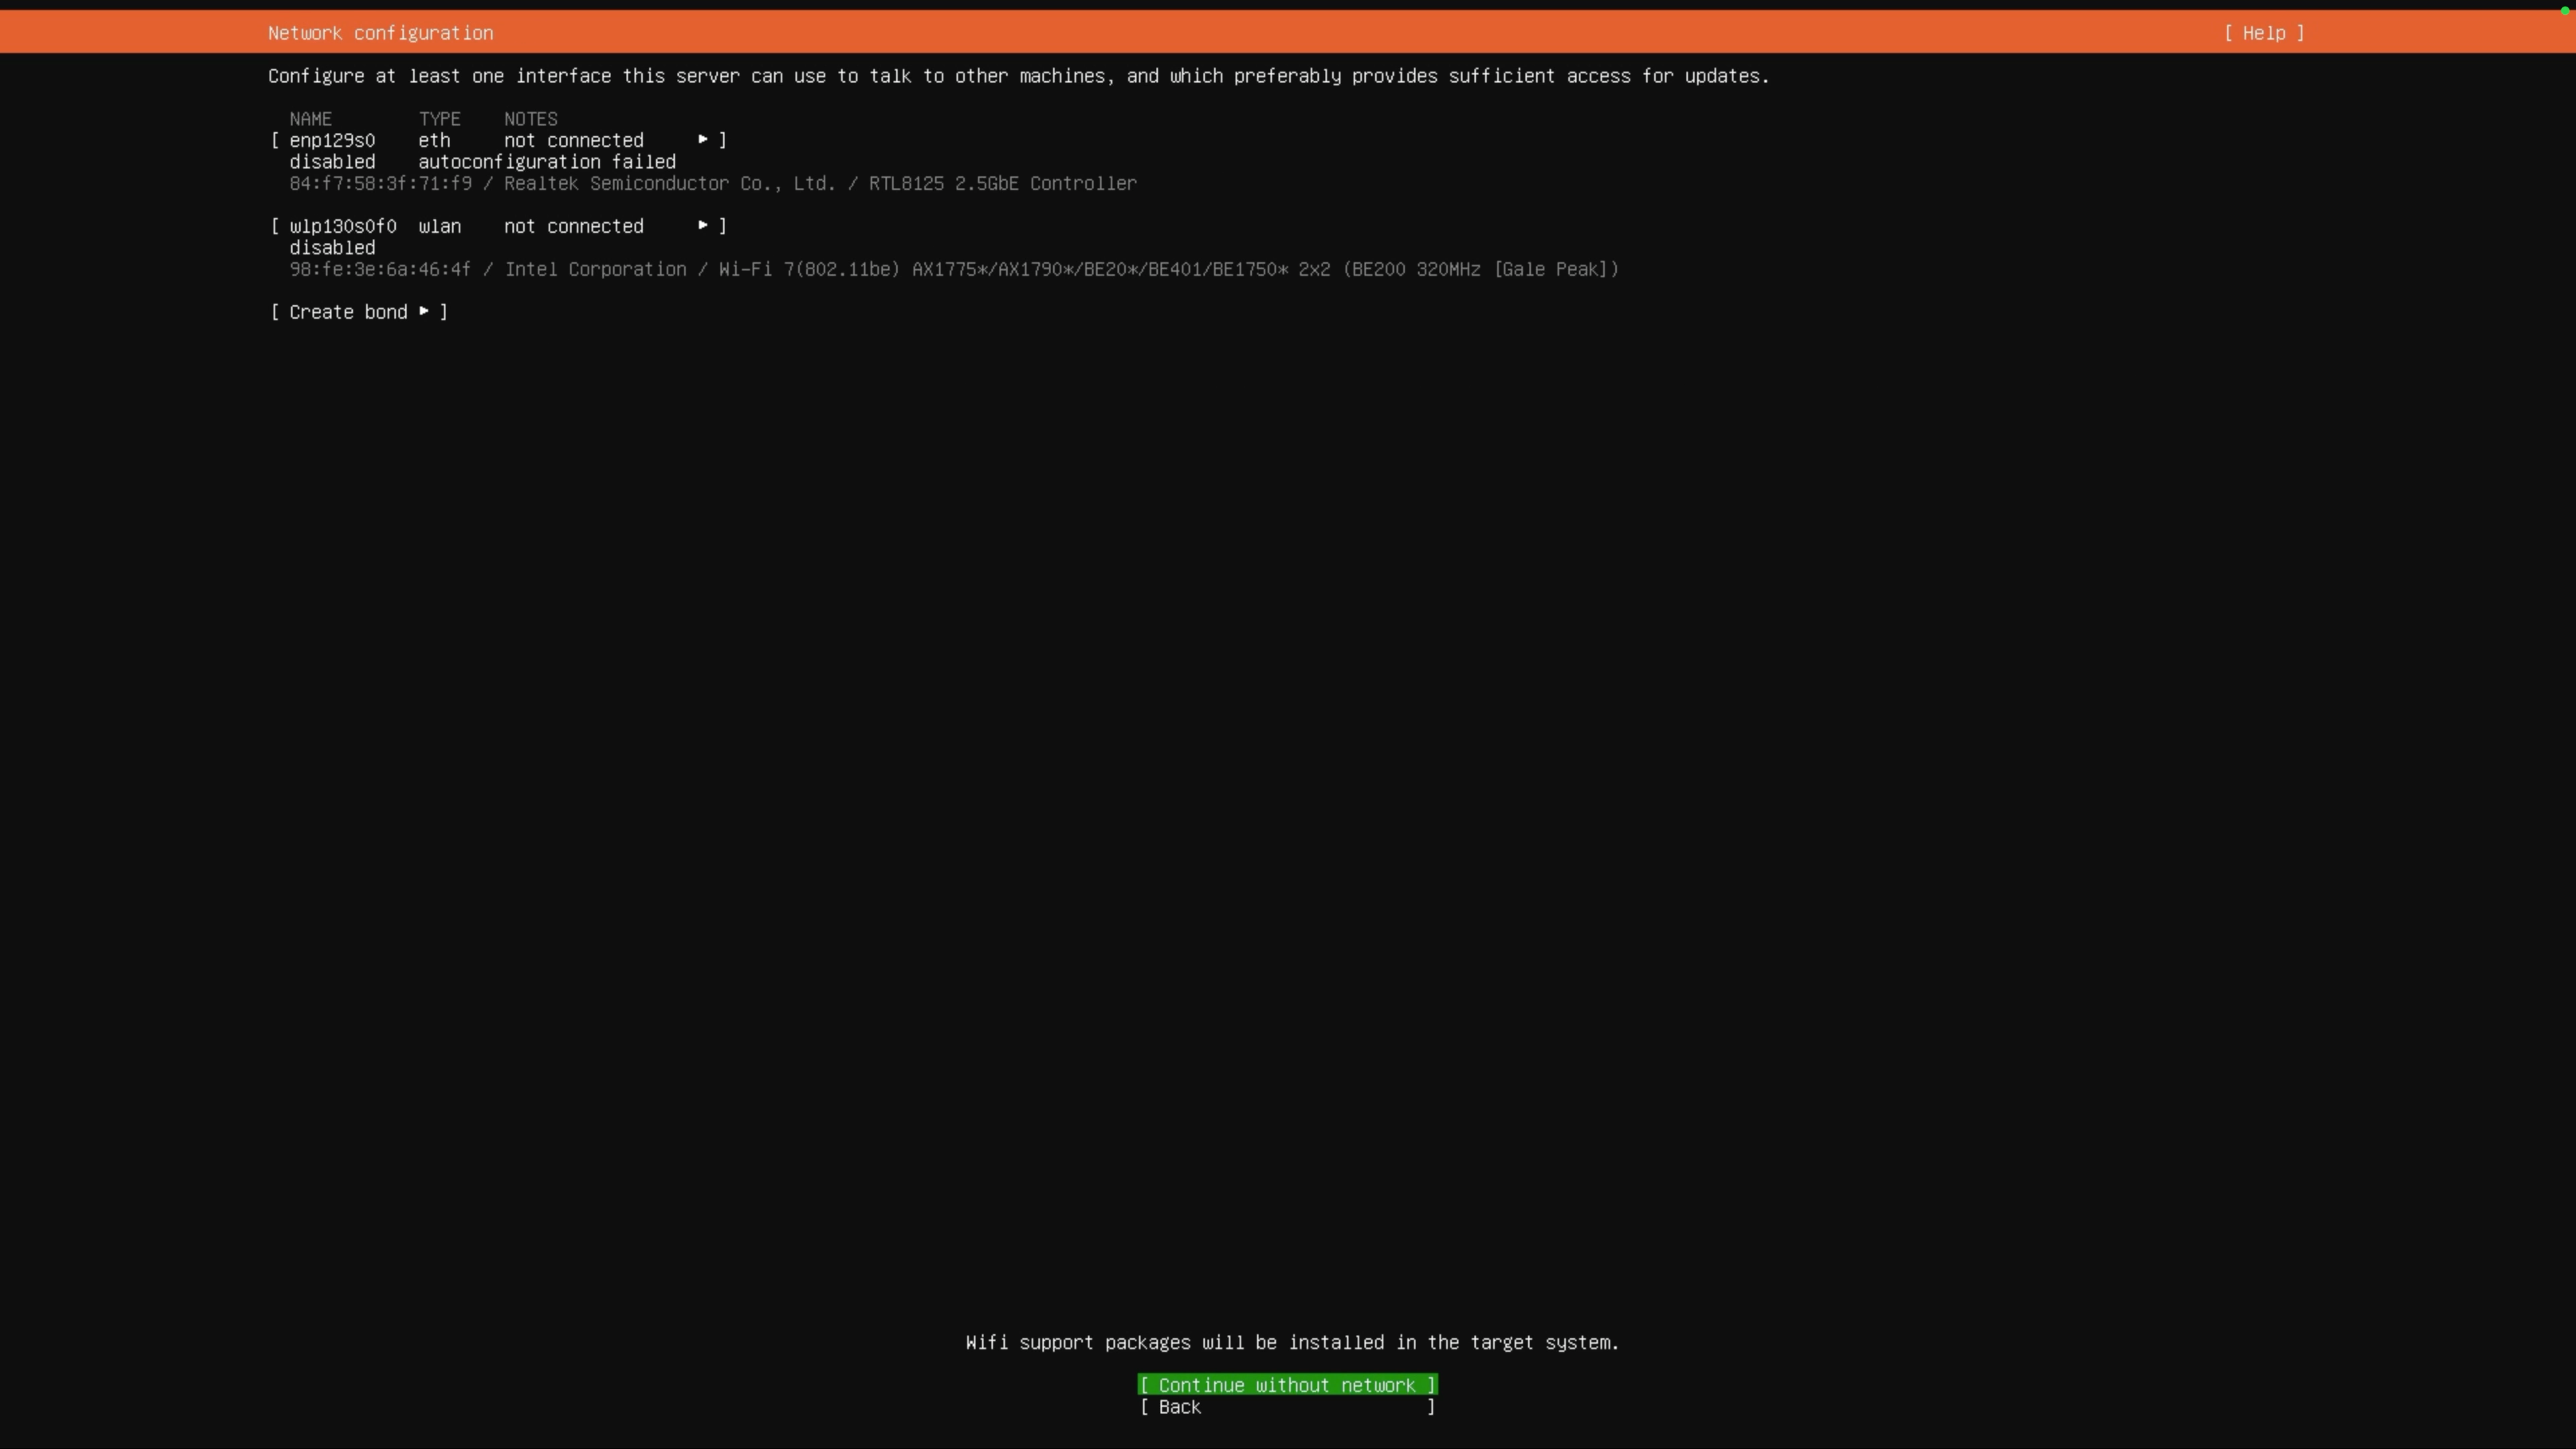
On the Network configuration screen, skip network configuration for now by selecting Continue without network at the bottom, and then press Enter.
TIP
Connecting to the network triggers automatic background downloads for patches and dependencies. This can significantly delay the installation and might cause the installer to hang due to network fluctuations. Skipping this ensures a rapid, completely local installation from the pure ISO image.
On the Proxy configuration screen, leave it blank unless your environment requires one, and then press Enter.
On the Ubuntu archive mirror configuration screen, keep the default Ubuntu archive mirror URL, ignore the "no network" warning, and then press Enter.
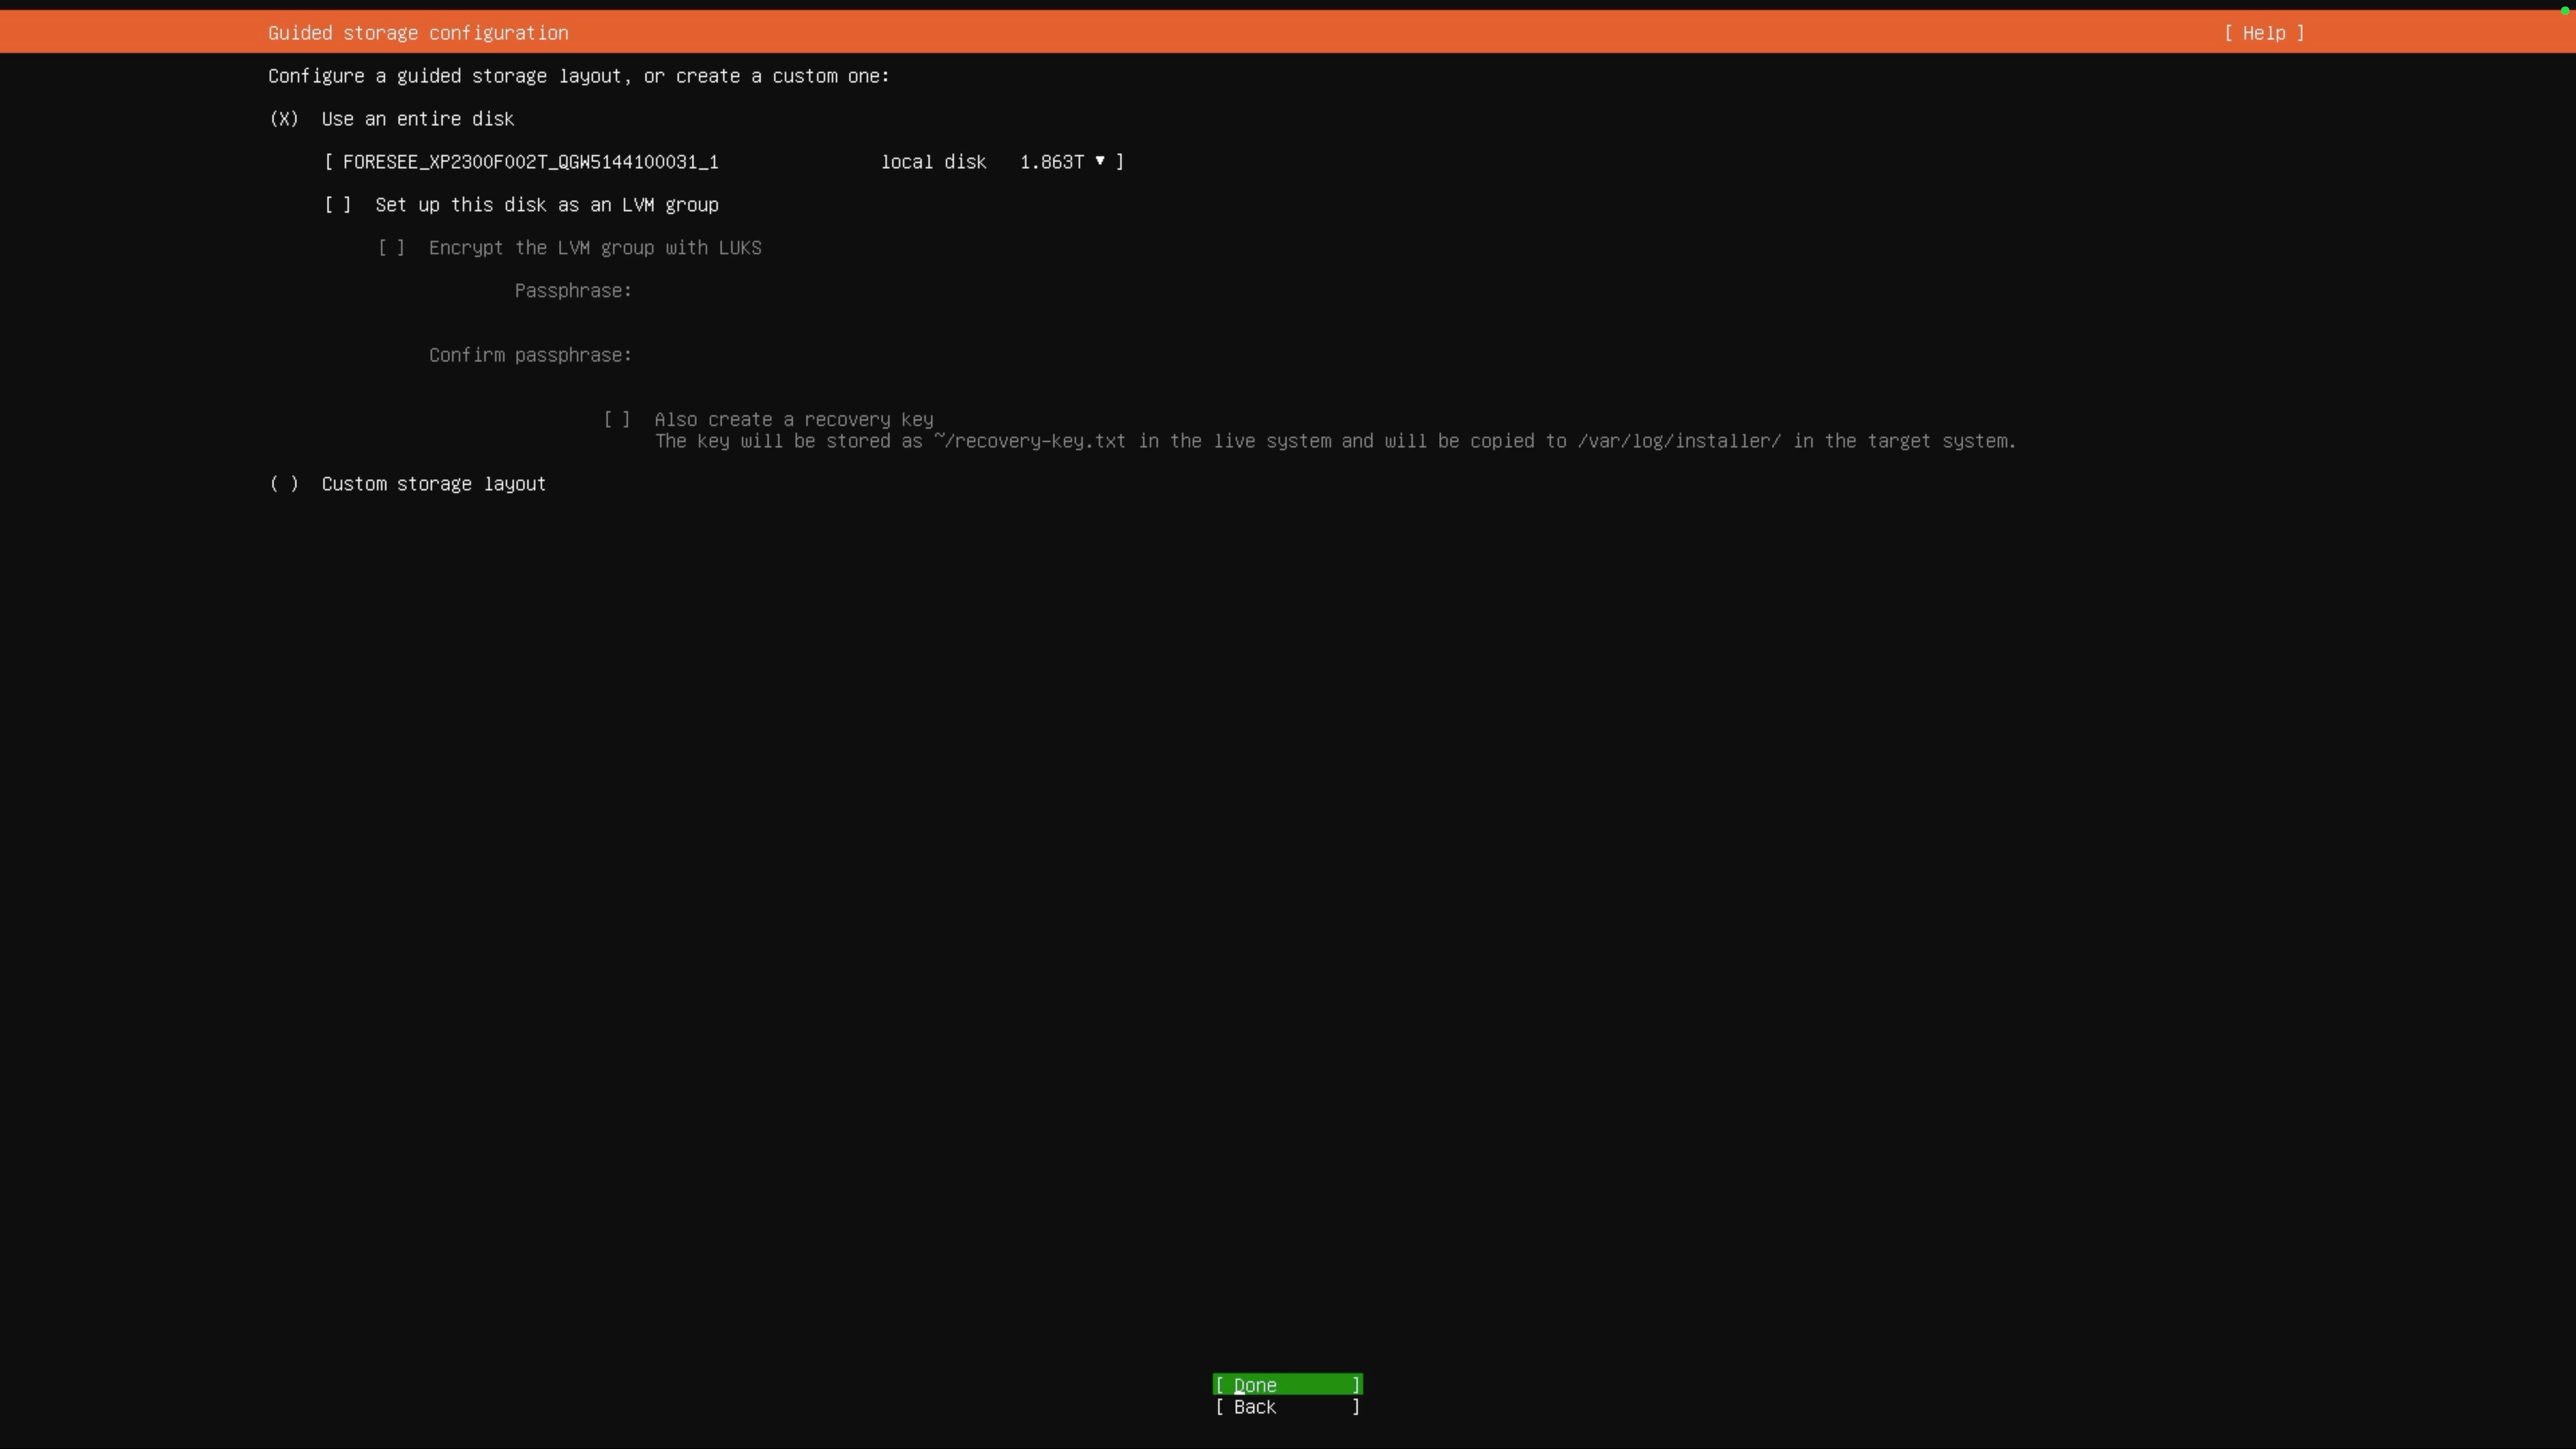
On the Guided storage configuration screen:
a. Ensure Use an entire disk is selected.
b. In the dropdown list below, verify the target disk is selected. For example, the FORESEE disk in this scenario.
c. Navigate down to Set up this disk as an LVM group and clear the selection using the Space key.
TIP
Disabling LVM forces the installer to automatically create stable, straightforward standard ext4 partitions. This eliminates the risk of future GRUB bootloader conflicts or errors in a multi-OS environment.
d. Navigate to the bottom of the page, select Done, and then press Enter.
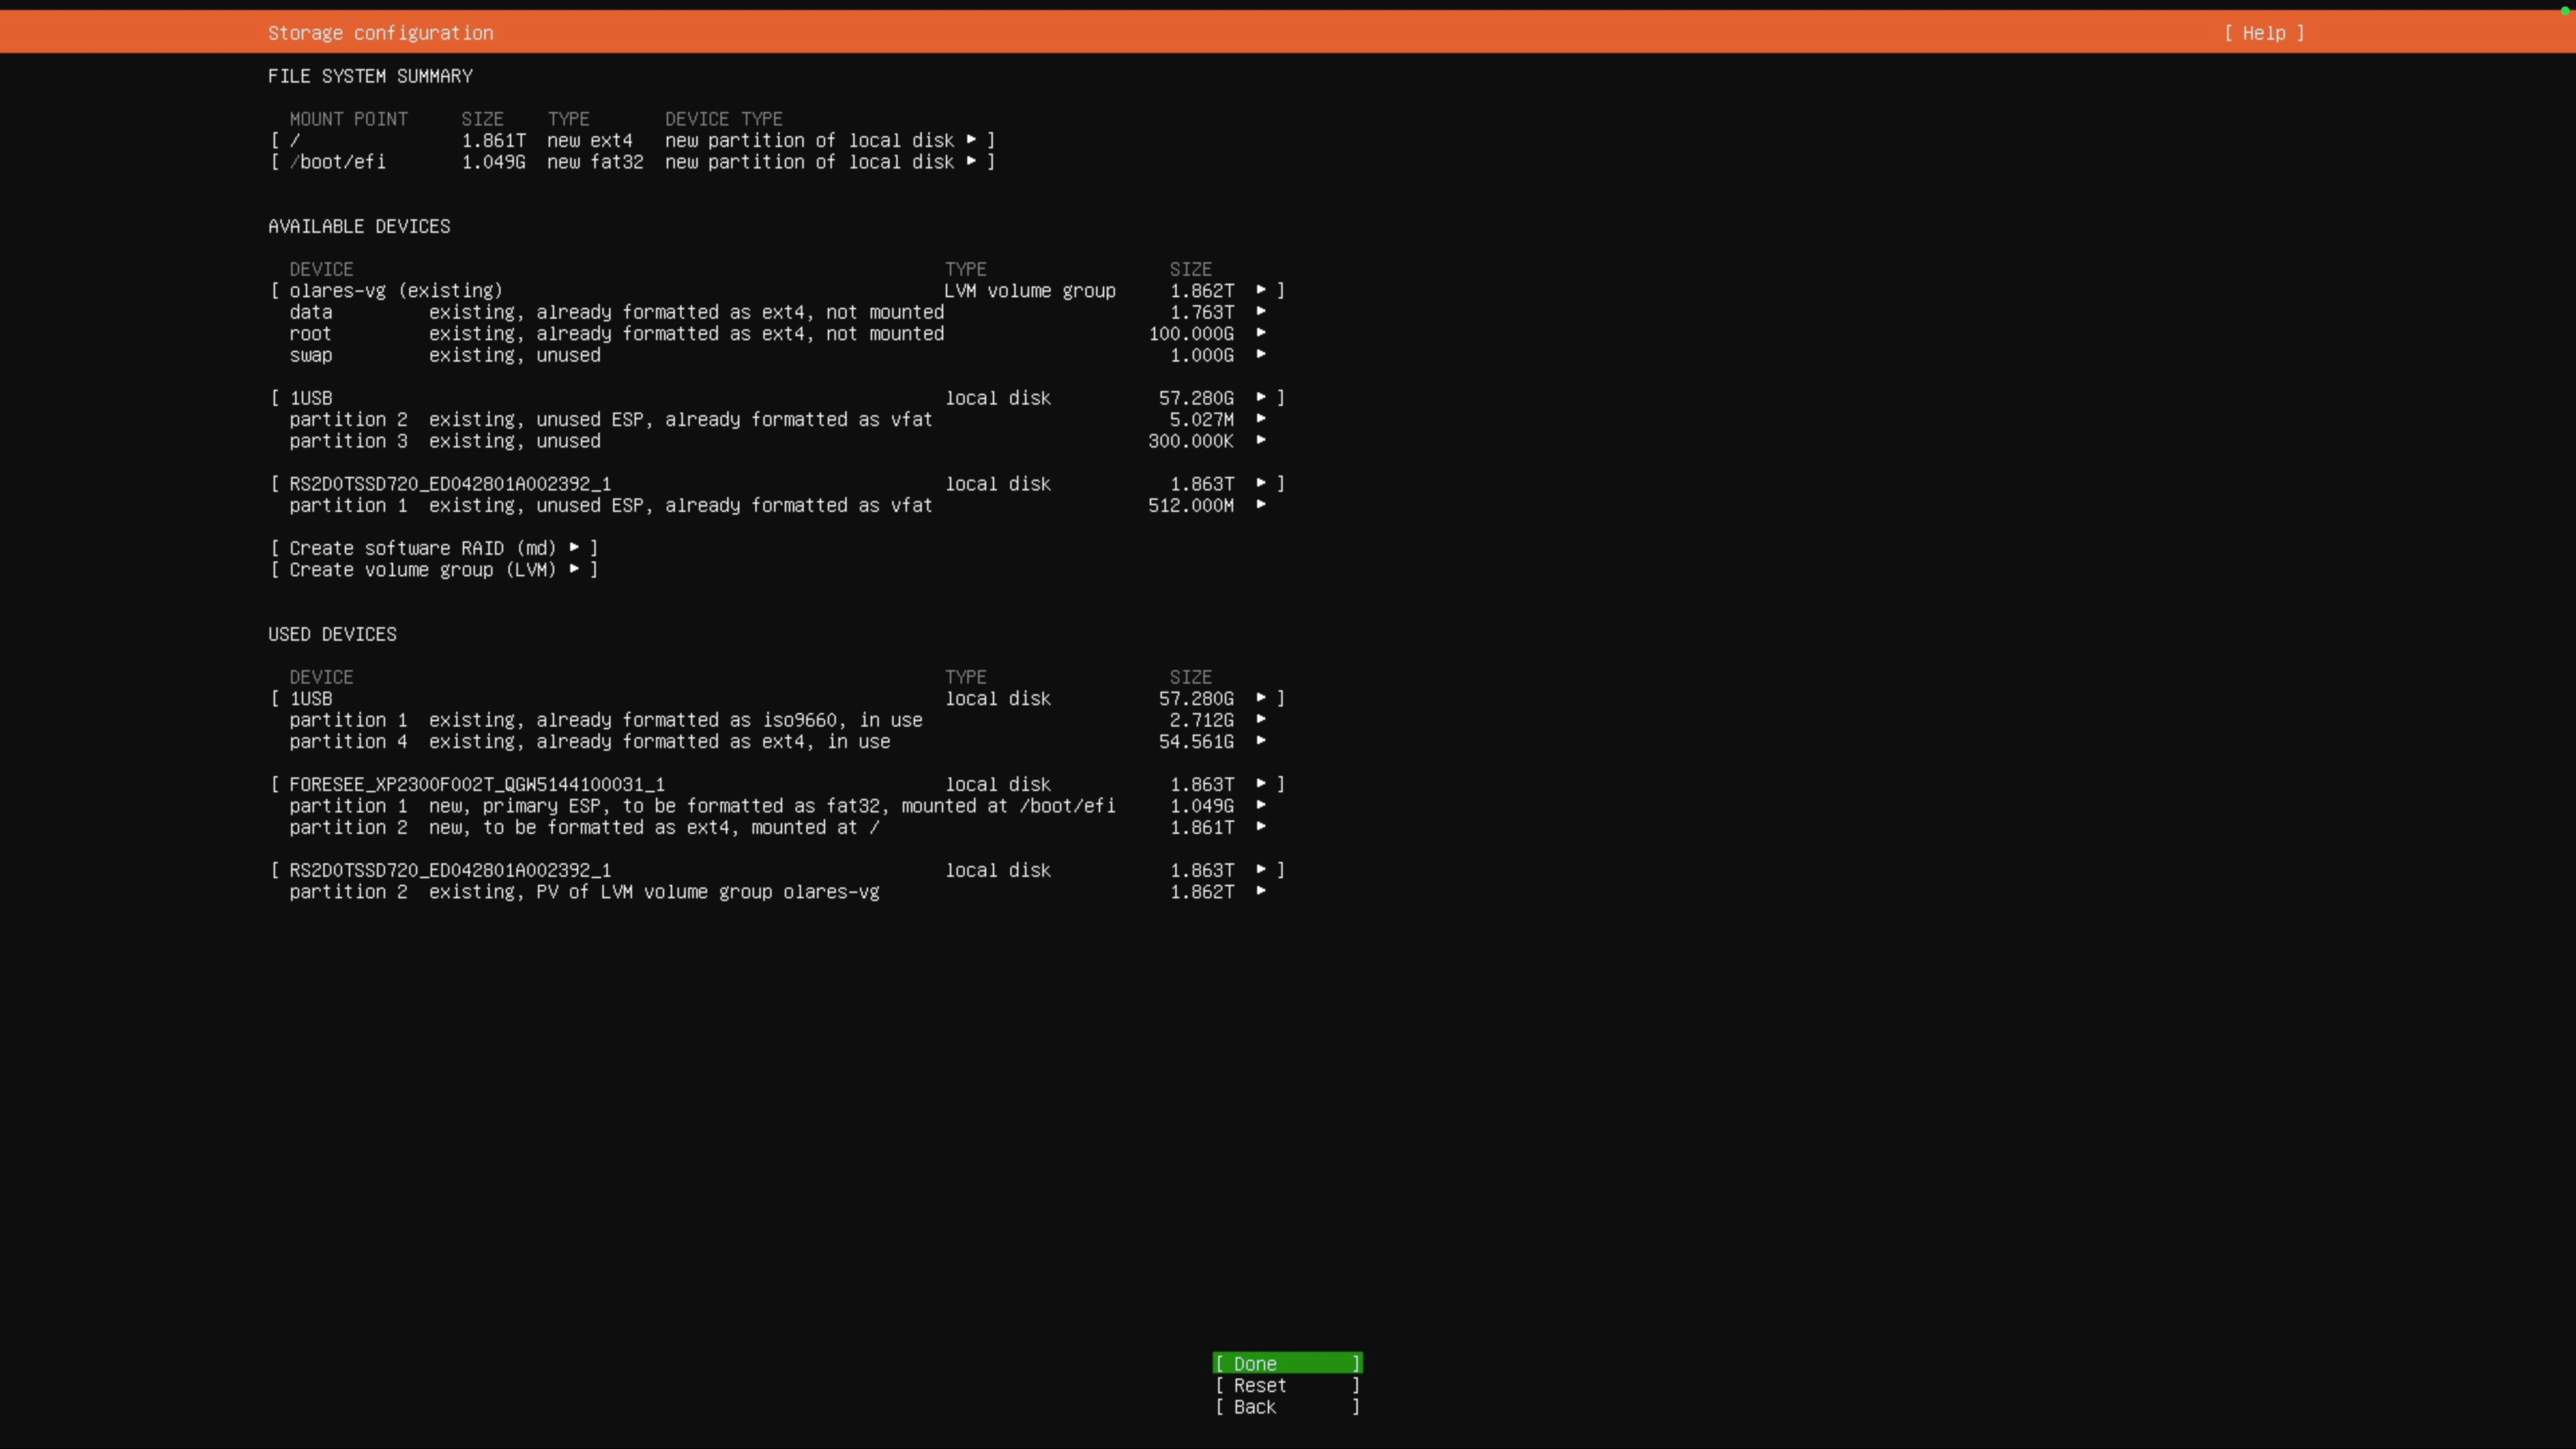
On the Storage configuration summary screen, verify the following details, and then press Enter:
- Under FILE SYSTEM SUMMARY, ensure the system automatically allocates a
/boot/efi(fat32) partition and a/(ext4) standard partition on your target disk. - Under USED DEVICES, ensure only your target disk is in the "to be formatted" status.
- Under FILE SYSTEM SUMMARY, ensure the system automatically allocates a
In the Confirm destructive action window, select Continue, and then press Enter to start the formatting.
On the Profile configuration screen, set up your account, and then press Enter.
On the Upgrade to Ubuntu Pro screen, select Skip Ubuntu Pro setup for now, and then press Enter.
On the SSH configuration screen, select Install OpenSSH server to allow remote terminal management after connecting to the network later, and then press Enter.
The system will begin deployment. Wait for the top banner to display Installation complete.
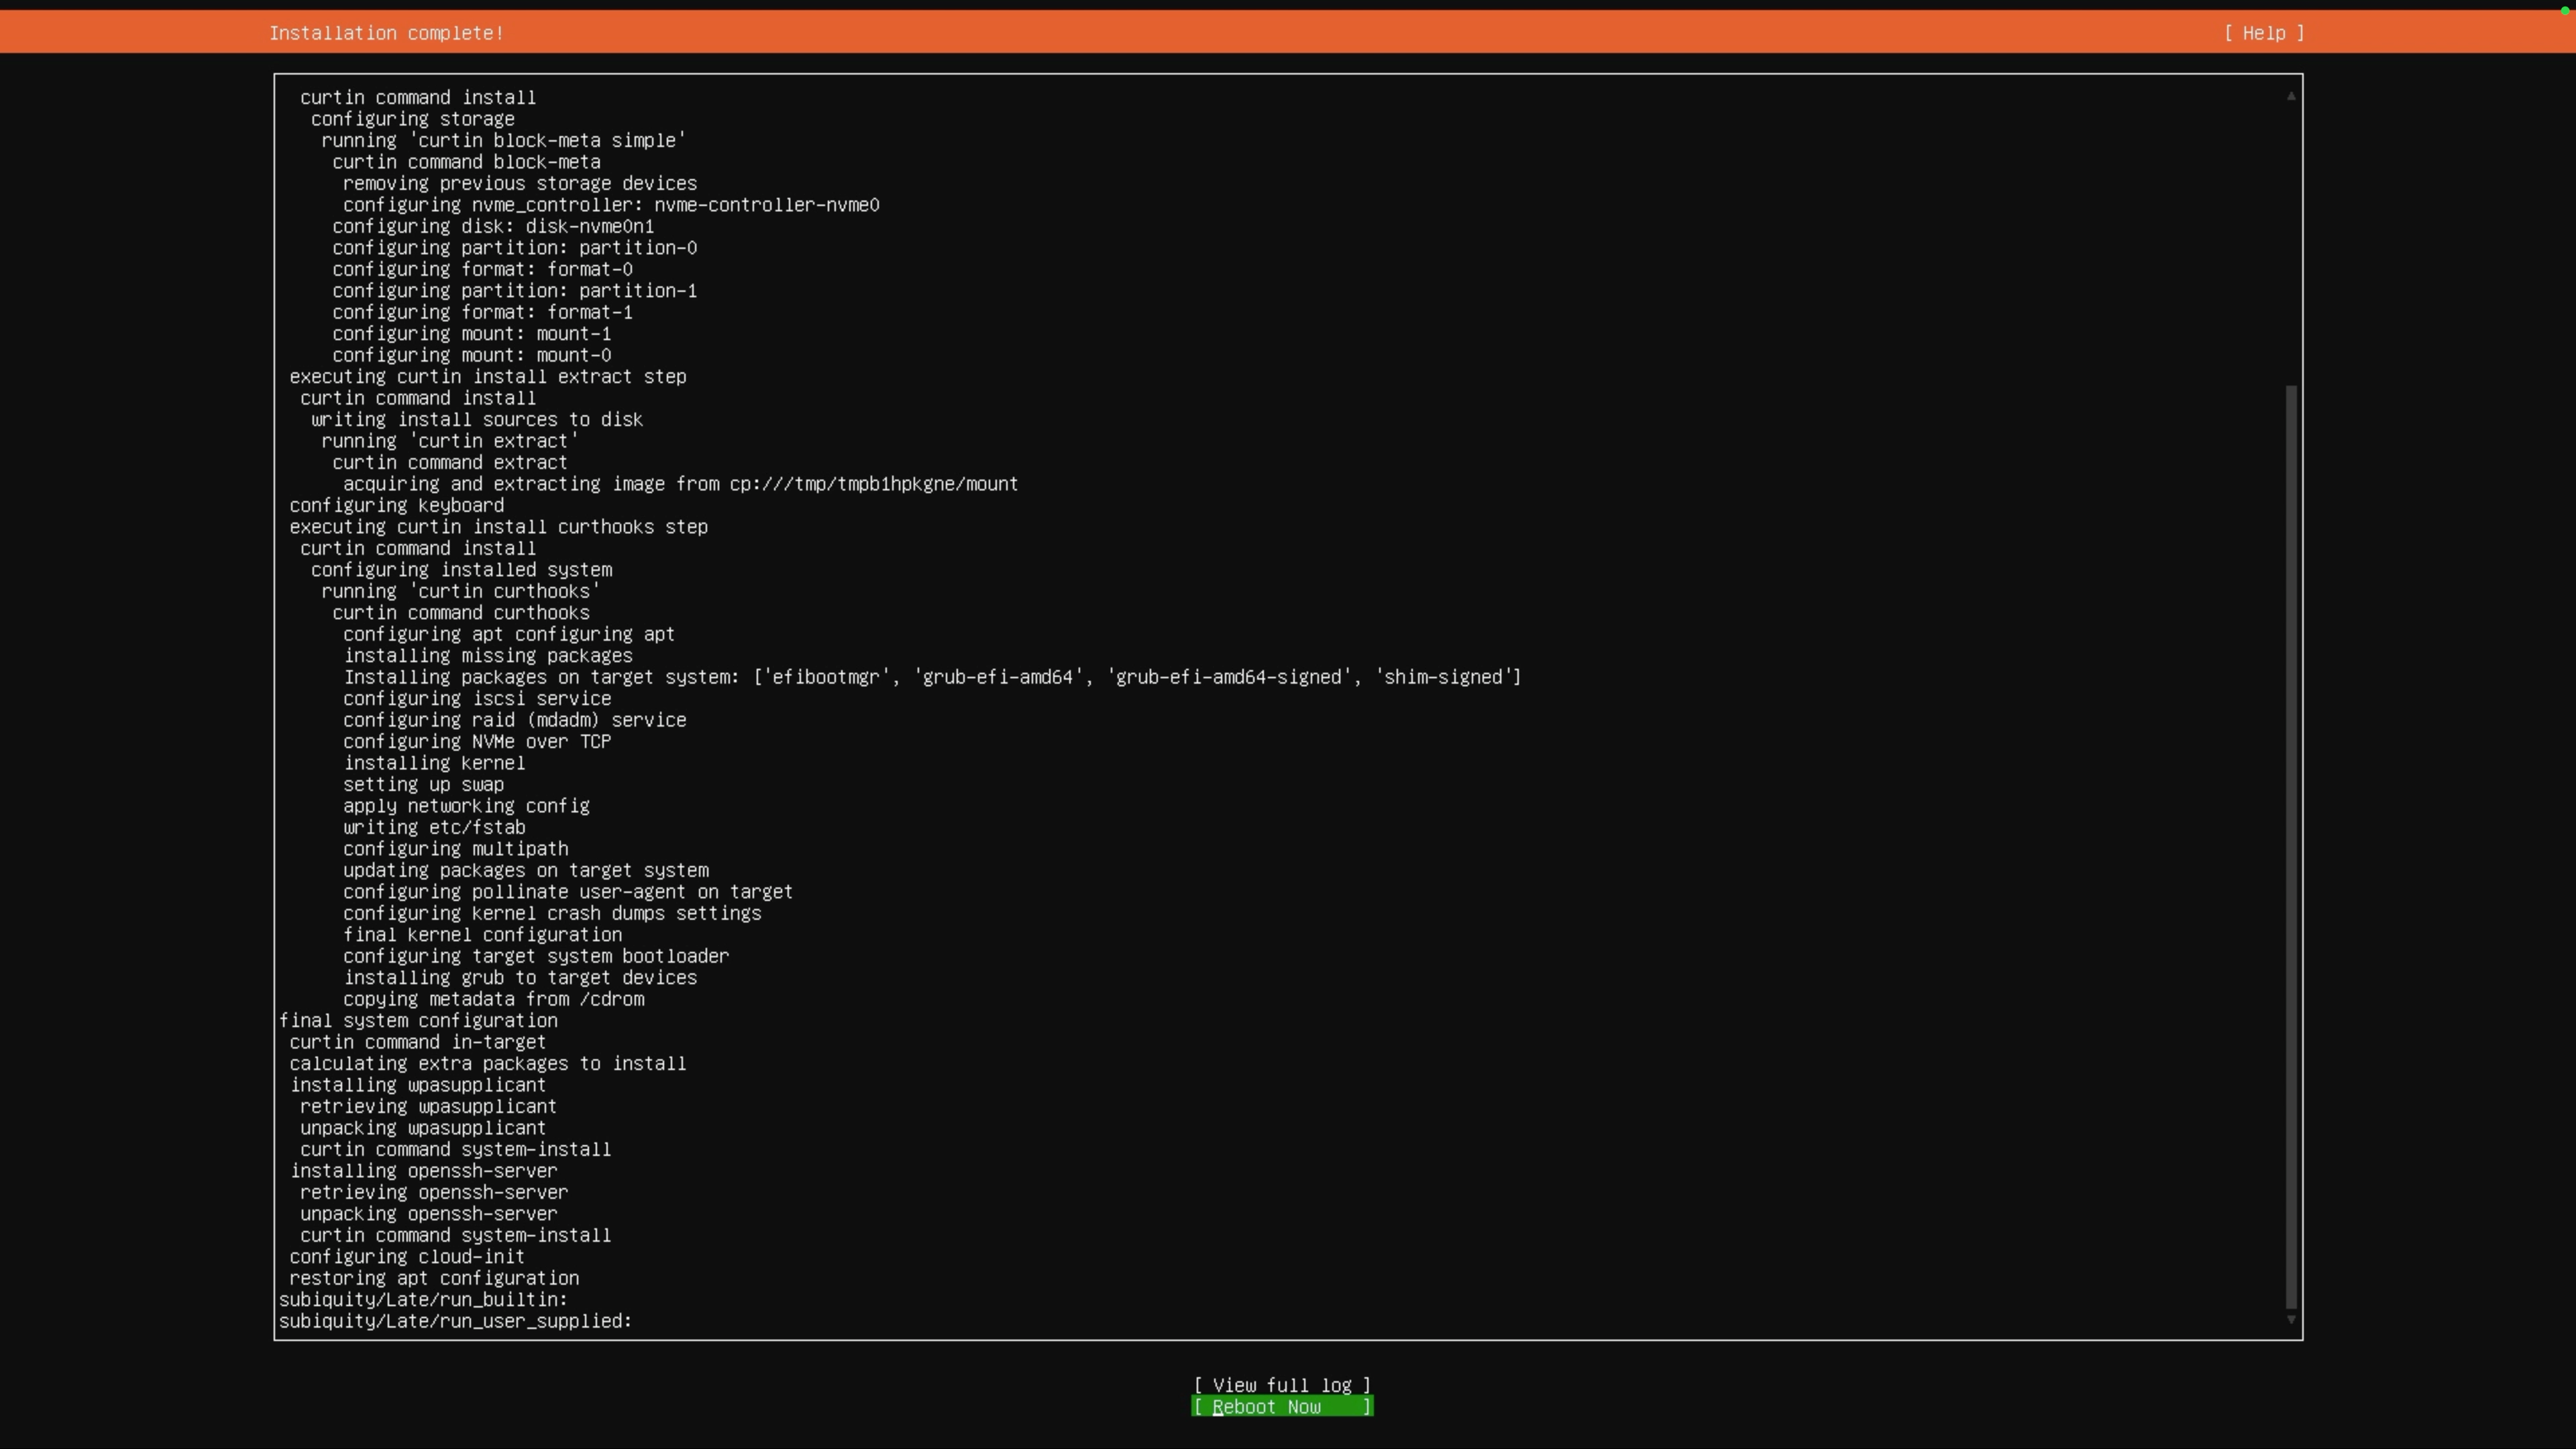
- Select Reboot Now at the bottom, and then press Enter.
- Remove the installation USB drive and press Enter when prompted. The system reboots automatically.
Step 4: Modify the BIOS boot order
After the reboot, the system boots into Olares OS by default. This happens because the installer places its bootloader (GRUB) in the EFI partition of the primary disk, and the motherboard still identifies the original Olares drive as the primary boot device.
Manually update Boot Option #1 to the new drive to force the motherboard to load the newly generated GRUB menu. This menu successfully recognizes both Ubuntu and Olares OS.
Restart Olares One, and press the Delete key repeatedly to enter the BIOS setup.
Go to the Boot tab and locate the Boot Option Priorities section.
Change Boot Option #1 to point to the newly installed drive:
a. Navigate to Boot Option #1, and then press Enter.
b. In the popup window, select the newly installed drive, and then press Enter.
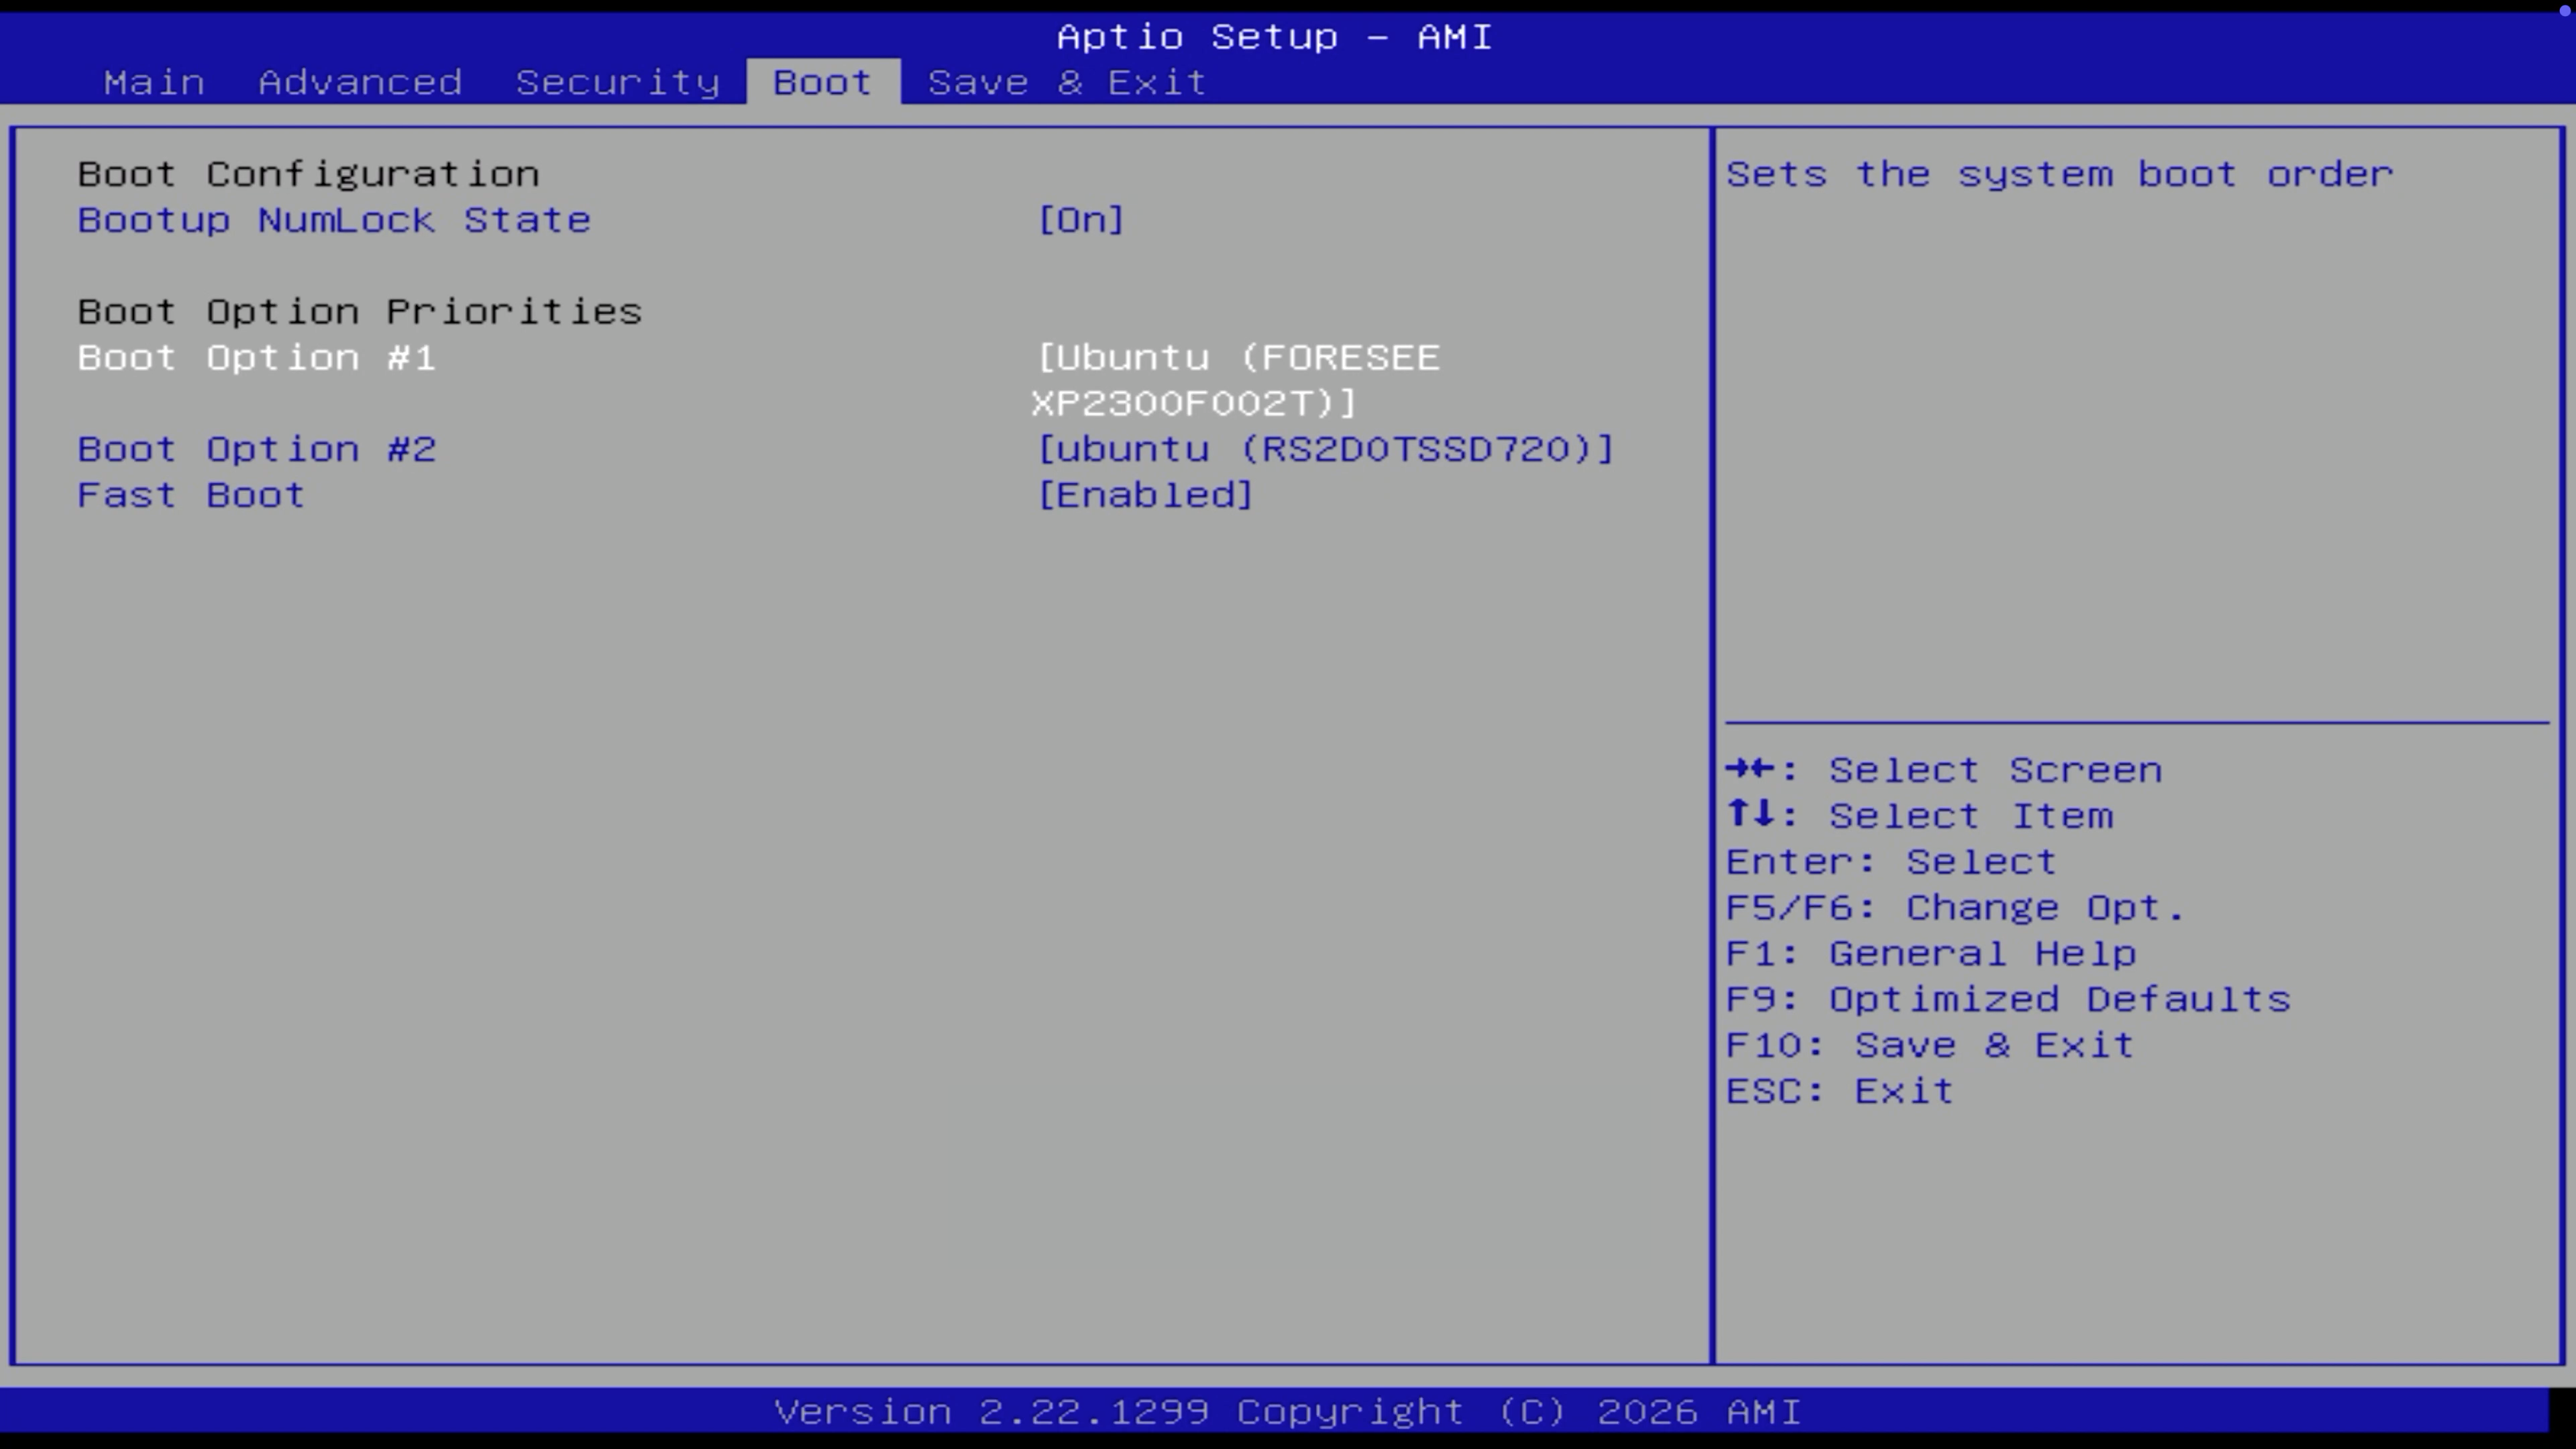
Press F10, then select Yes to save and exit BIOS. The system reboots automatically.
Step 5: Switch between Olares OS and Ubuntu
After rebooting, the GNU GRUB dual-boot menu appears automatically.
Choose which operating system to boot. The system automatically executes the highlighted entry in 10 seconds.
- Boot Ubuntu: Select Ubuntu.
- Boot Olares OS: Select the entry containing Olares, such as Ubuntu 24.04.3 LTS (24.04) (on /dev/mapper/olares-vg-root).
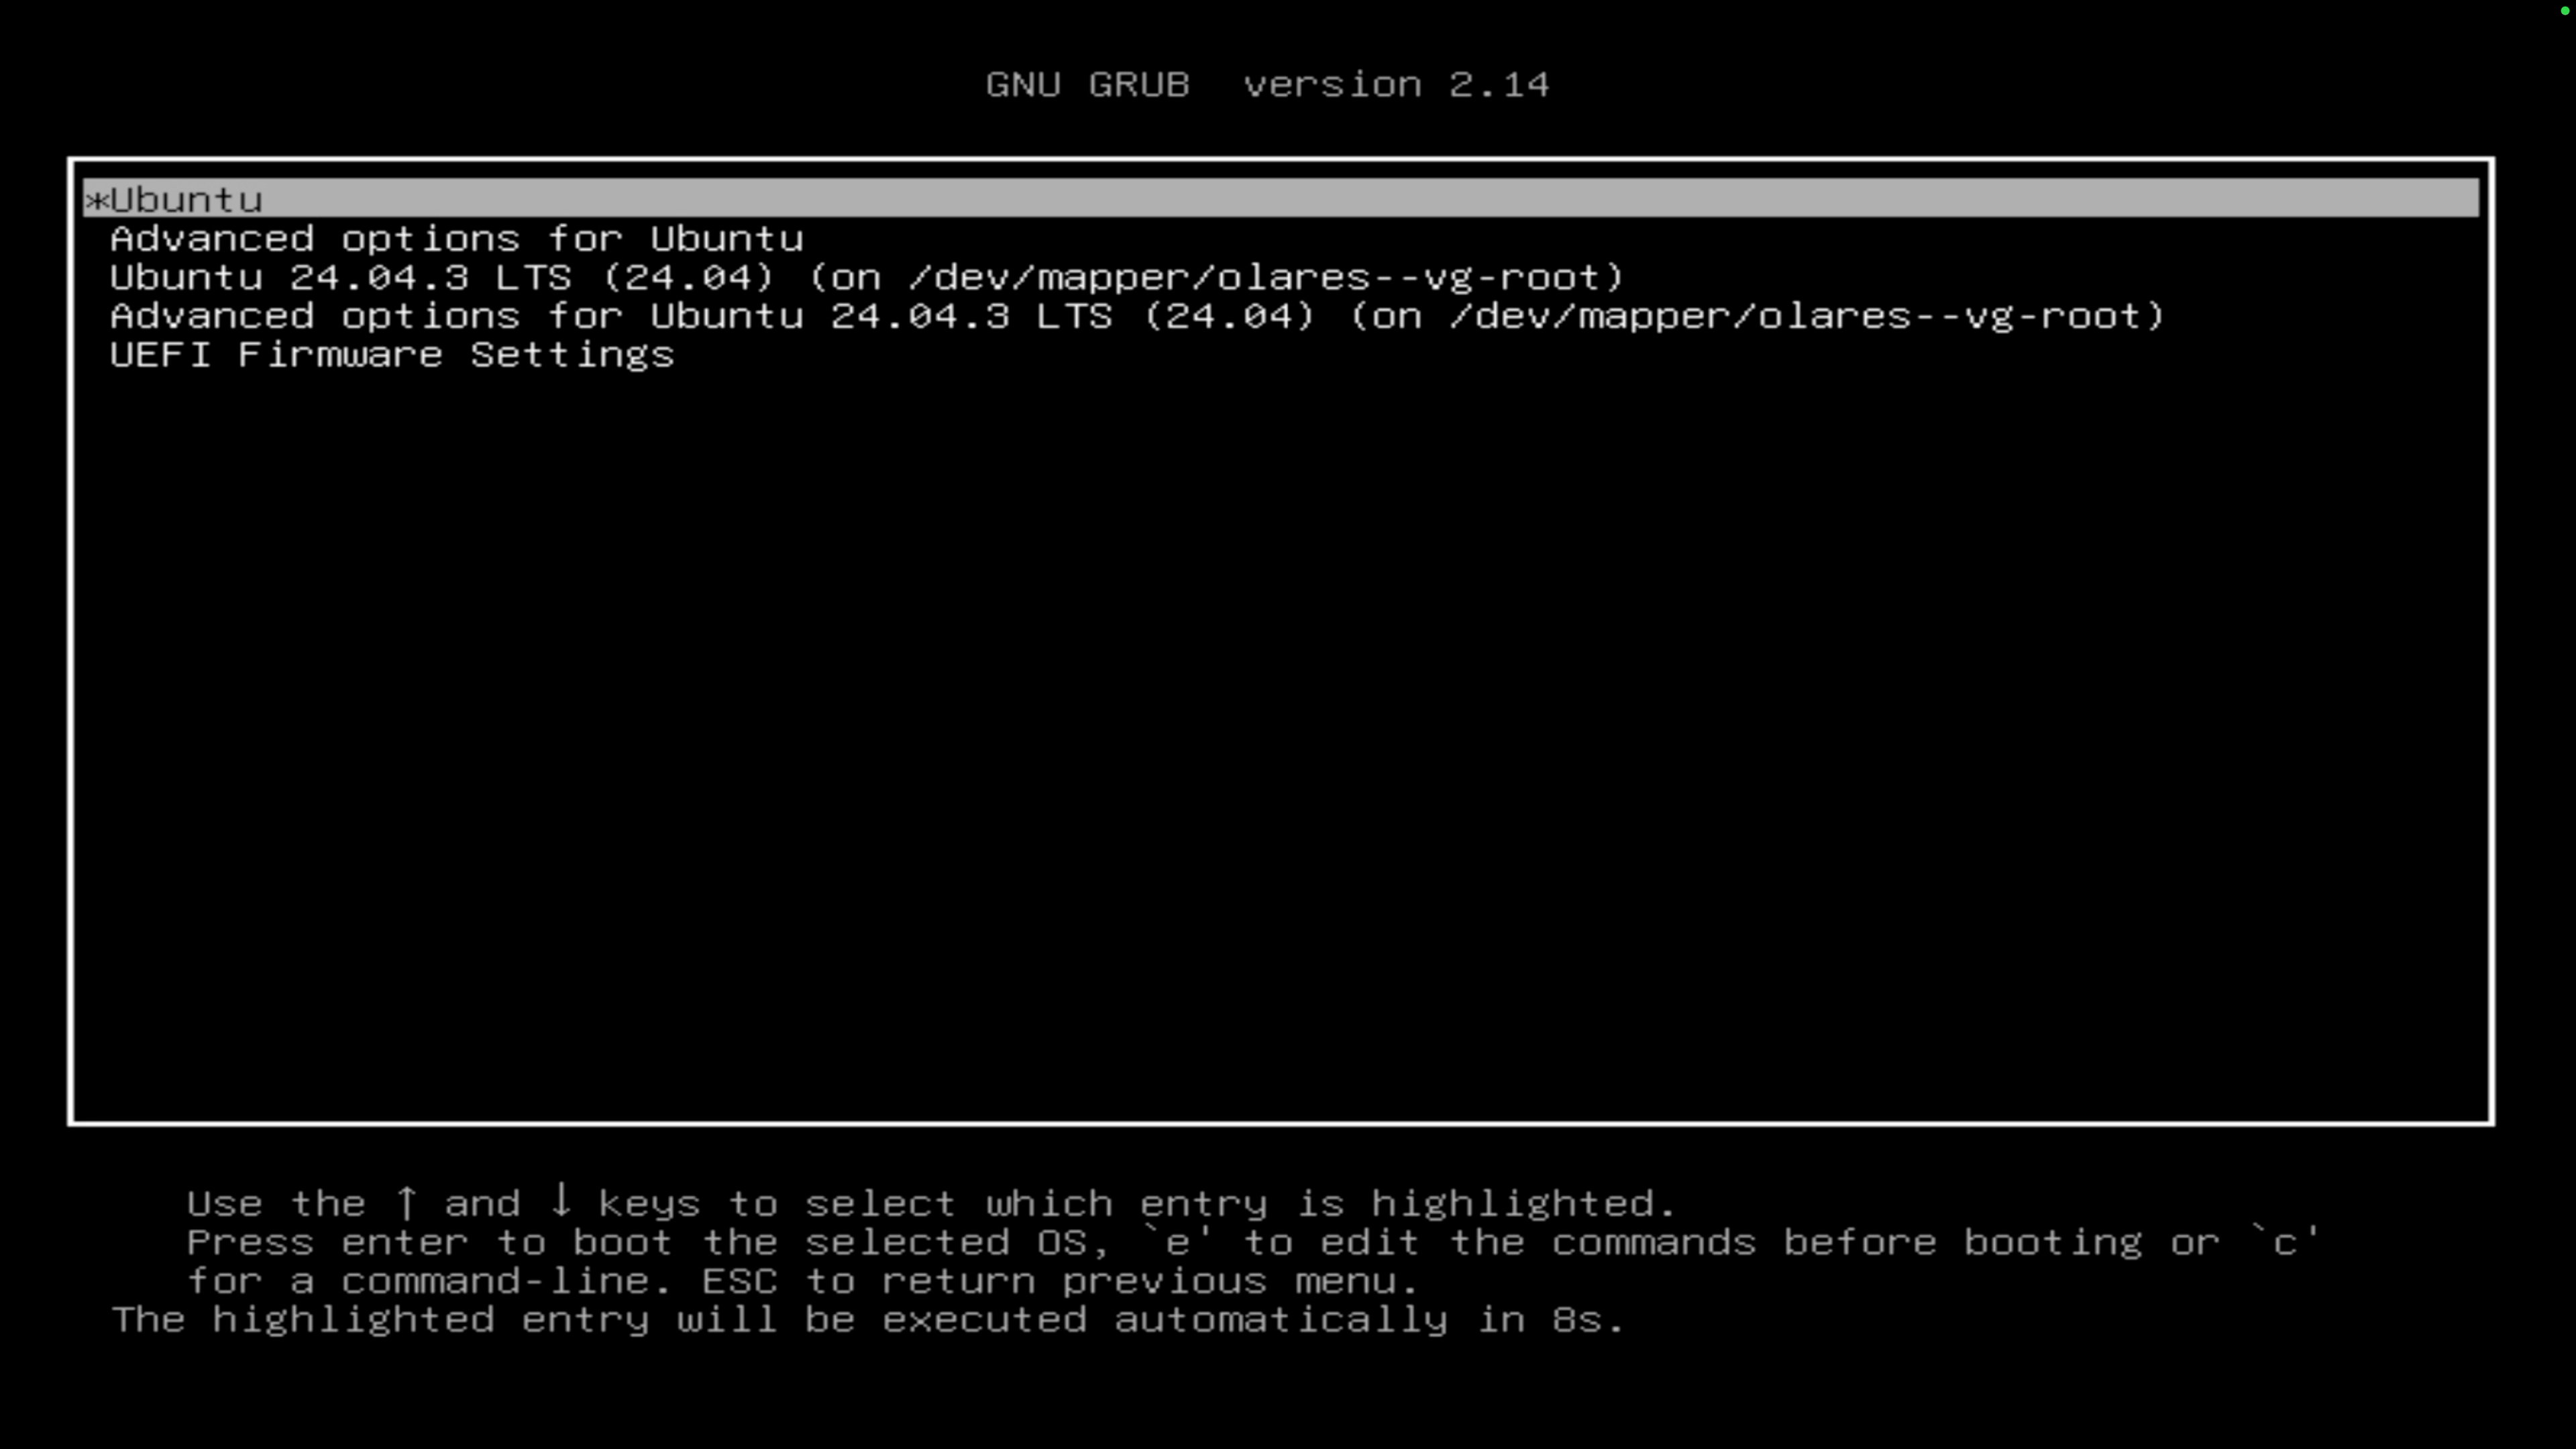
To switch to the other operating system while currently logged in, run
sudo rebootin the terminal and enter your password when prompted. When the GNU GRUB menu appears, choose the system you want to boot.INFO
When you type your password in the terminal, the characters remain invisible for security. Ensure you have entered the correct password and press Enter.