Install Olares on DGX Spark via ISO
This guide explains how to install Olares on NVIDIA DGX Spark using the official ISO image.
Having trouble?
If you run into any issues, submit a GitHub Issue and include your platform, installation method, and error details.
System requirements
- DGX Spark: Ensure your device is connected to a monitor and keyboard.
- USB flash drive: A drive with 8 GB or higher capacity.
- Computer: A Windows, macOS, or Linux computer to create the bootable USB drive.
- Network: An Ethernet cable connecting DGX Spark to your router (recommended for stable connection).
Create a bootable USB drive
Download and install Balena Etcher.
Insert the USB flash drive into your computer.
Launch Balena Etcher and follow these steps:

a. Image: Select the Olares ISO.
b. Target disk: Select your USB drive.
c. Click Flash to write the installer to the USB drive.
Boot from USB drive
Insert the bootable USB drive into DGX Spark.
Restart DGX Spark, then immediately press the Delete key repeatedly to enter the BIOS setup.
Navigate to the Boot tab, set Boot Option #1 to the USB drive, and then press Enter.
Press F4 to save and restart. The system will automatically boot into the Olares installer interface.
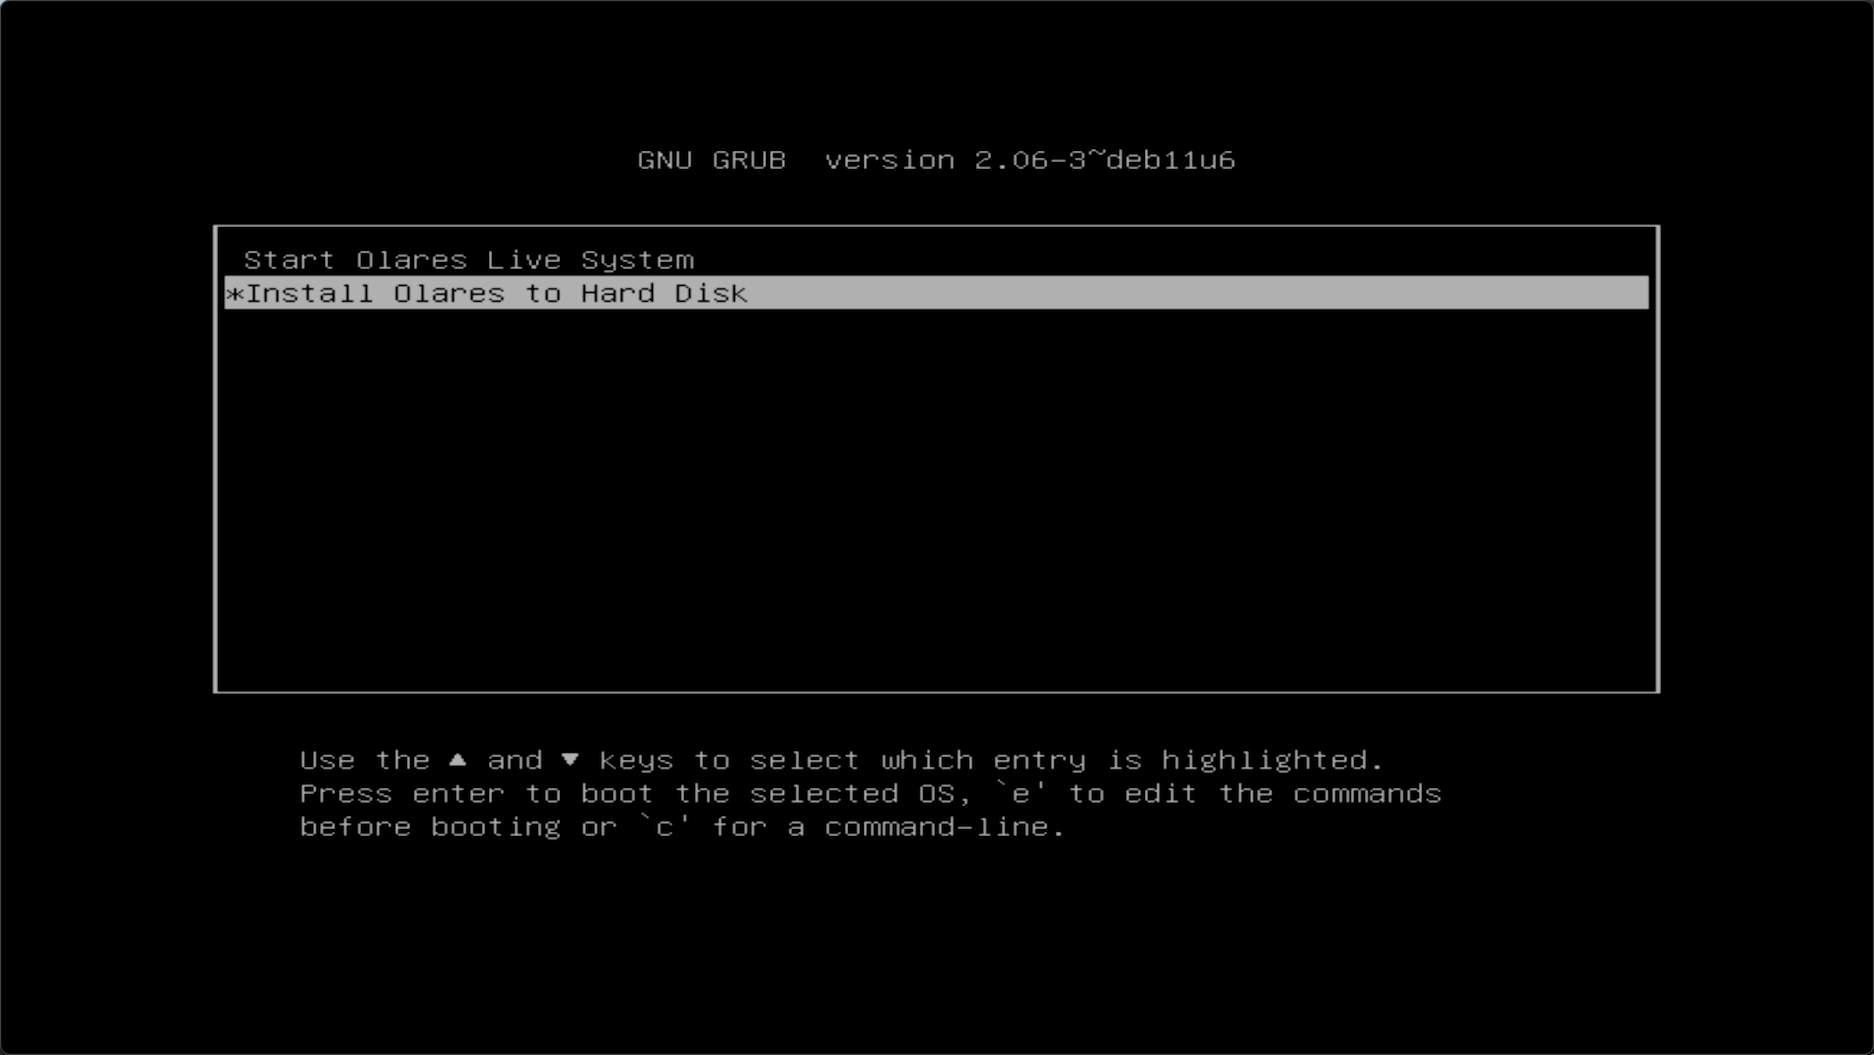
Install Olares
From the Olares installer interface, select Install Olares to Hard Disk and press Enter.
The installer will display a list of available disks (e.g.,
sda 200G HARDDISK). Type/dev/followed by the disk name (e.g.,/dev/sda) to select the installation target. The installation typically takes 4–5 minutes.Note
During installation, you may see prompts related to NVIDIA GPU drivers. Simply press Enter to confirm.
Once you see the message below, the installation has completed successfully:
shellInstallation completed successfully!Remove the USB drive, and manually shut down DGX Spark and then turn it back on.
Important
If you skip this step, the activation process will fail.
To prevent startup delays, turn on DGX Spark and immediately press the Delete key repeatedly to enter the BIOS setup. Set the internal hard drive as the Boot Option #1.
Connect to DGX Spark
Activate Olares
In the LarePass app, on the device you just found, tap Install now.
When the installation completes, tap Activate now.
In the Select a reverse proxy dialog, select a node that is closer to your geographical location. The installer will then configure HTTPS certificate and DNS for Olares.
Note
You can change this setting later on the Change reverse proxy page in Olares.
Follow the on-screen instructions to set the login password for Olares, then tap Complete.

Once activation is complete, LarePass will display the desktop address of your Olares device, such as https://desktop.marvin123.olares.com.
Log in to Olares
Open the Olares desktop address in your browser, and press any key to continue.
On the login page, enter your Olares login password.

You will be prompted to complete two-factor verification. You can confirm the login on LarePass, or manually enter the 6-digit verification code.

INFO
The verification code is time-sensitive. Ensure you enter it before it expires.
Once you've logged in, you'll be directed to the Olares desktop.🎉
Configure GPU memory for AI apps
DGX Spark features a unified memory architecture where the CPU and GPU share 128 GB of LPDDR5x memory. Unlike traditional GPUs with dedicated VRAM, DGX Spark does not distinguish between system memory and GPU memory.
On DGX Spark, Olares uses Memory slicing mode by default for GPU resource management. When you install an AI application, Olares automatically allocates the minimum required memory to ensure the app can start and run properly.
If needed, you can manually adjust the memory allocation for each AI application:
Open Settings from Olares, and then navigate to GPU.
In the Allocate VRAM section, find the target app.
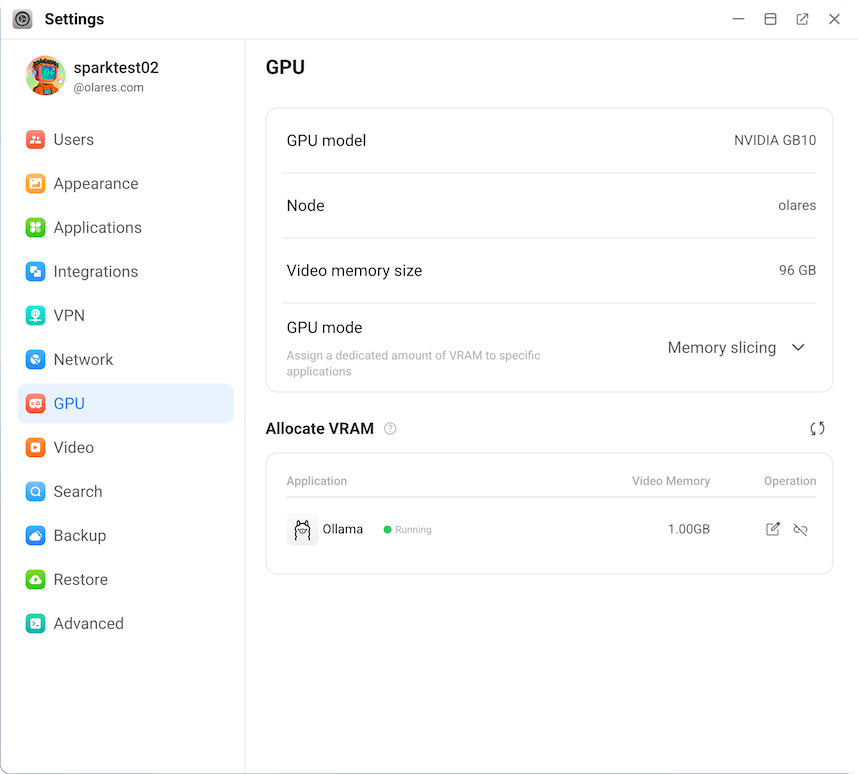
Click edit_square next to the VRAM value.
In the Edit VRAM allocation dialog, enter the desired VRAM amount in GB and click Confirm.
Next step: Protect your Olares ID
You're almost ready to start using Olares! Before diving in, it's crucial to ensure your Olares ID is securely backed up. Without this step, you won't be able to recover Olares ID if needed.