Manage GPU resources for multiple GPUs
This guide explains how to manage GPU modes and app allocation when Olares has multiple GPUs. Each GPU is configured separately.
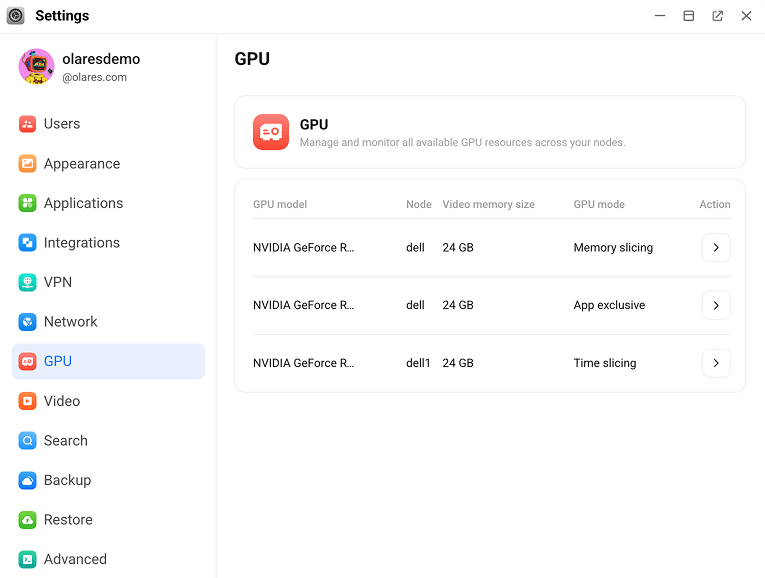
Open GPU settings
This page lists the available GPUs, including each GPU's model, node, total VRAM, and current mode. You can also select a GPU and change its mode.
Go to Settings > GPU.
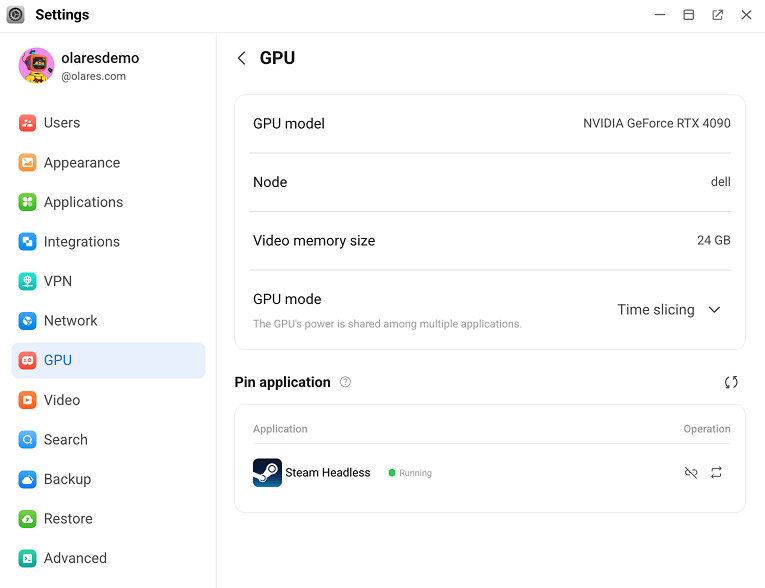
Click the GPU you want to configure.
Choose a mode from the GPU mode dropdown.
Can't find the target app?
If the app still does not appear on the current GPU after you refresh the list, it may already be assigned to another GPU on the same node or on another node.
Check other GPUs to see where the app is currently assigned. If needed, use Switch GPU to reassign it to the target GPU.
Time slicing
INFO
Time slicing is not supported on DGX Spark.
Add an app
In most cases, apps are automatically assigned to an available GPU and appear in the list after GPU scheduling is complete.
If the target app does not appear on the current GPU:
- Wait a few seconds.
- In the Pin application section, click sync to refresh the list.
- If the app still does not appear on the current GPU, check other GPUs to see whether it has been assigned elsewhere.
- If the system still does not complete the assignment automatically, click Bind app to add it manually.
Reassign an app to another GPU
- In the Pin application section, find the app.
- Click repeat.
- Select the target GPU and click Confirm.
The app continues running during this process.
Remove an app's access to this GPU
- If the app is assigned only to this GPU, stop it first.
- Go to Market > My Olares, then select Stop from the dropdown list.
- Or go to Settings > Applications, select the app, then click Stop.
- Return to Settings > GPU.
- In the Pin application section, click link_off, then click Confirm.
Unbind from multiple GPUs
If the app is still assigned to other GPUs on the same node, you can remove it from the current GPU without stopping it.
Memory slicing
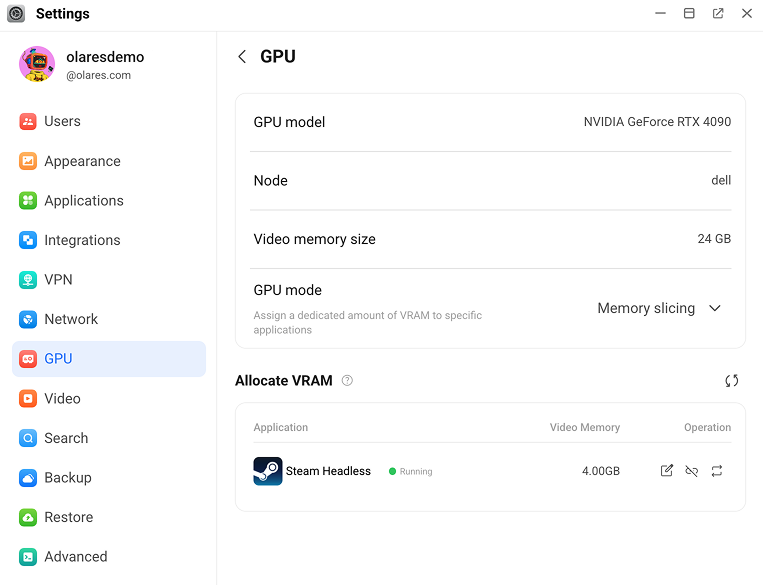
Adjust VRAM allocation
- In the Allocate VRAM section, find the target app.
- Click edit_square next to the VRAM value.
- In the Edit VRAM allocation dialog, enter the desired VRAM amount in GB, then click Confirm.
WARNING
The total VRAM allocated to all apps on the current GPU cannot exceed that GPU's total VRAM.
If the value is lower than the app's minimum requirement, Confirm is disabled.
Add an app
In most cases, apps are automatically assigned to an available GPU and appear in the list after GPU scheduling is complete.
If the target app does not appear on the current GPU:
- Wait a few seconds.
- In the Allocate VRAM section, click sync to refresh the list.
- If the app still does not appear on the current GPU, check other GPUs to see whether it has been assigned elsewhere.
- If the system still does not complete the assignment automatically, click Bind app to add it manually.
Reassign an app to another GPU
- In the Allocate VRAM section, find the app and click repeat.
- Choose the target GPU.
- Click Confirm.
Remove an app's VRAM allocation from this GPU
- If the app is assigned only to this GPU, stop it first.
- Go to Market > My Olares, then select Stop from the dropdown list.
- Or go to Settings > Applications, select the app, then click Stop.
- Return to Settings > GPU.
- In the Allocate VRAM section, click link_off, then click Confirm.
TIP
If the app also has VRAM allocated on other GPUs on the same node, you can remove the VRAM allocation from the current GPU without stopping it.
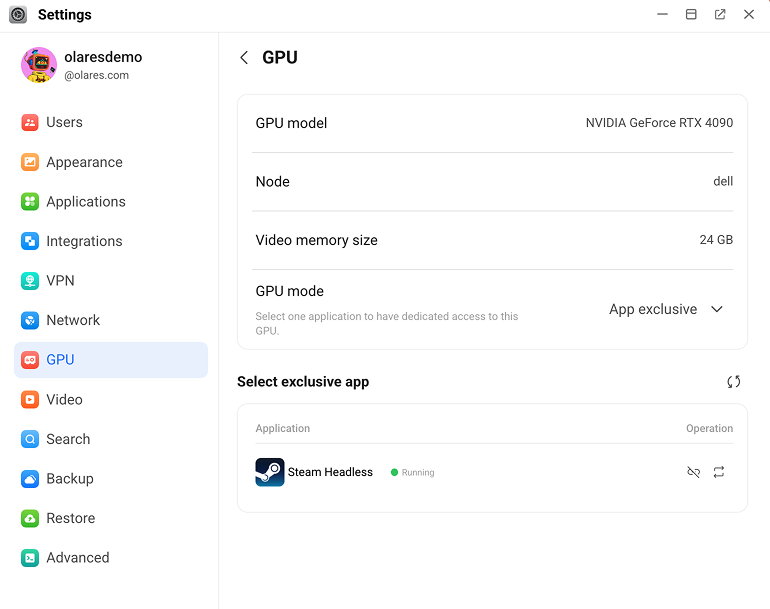
App exclusive
Reassign the exclusive app to another GPU
- In the Select exclusive app section, click repeat.
- Choose the target GPU.
- Click Confirm.
Set the exclusive app
In most cases, Olares automatically selects an available running app for exclusive access after GPU scheduling is complete.
If no app appears on the current GPU:
- Wait a few seconds.
- In the Select exclusive app section, click sync to refresh the list.
- If the app still does not appear on the current GPU, check other GPUs to see whether it has been assigned elsewhere.
- If the system still does not complete the selection automatically, click Bind app to set it manually.
Remove an app's exclusive access to this GPU
- If the app is assigned only to this GPU, stop it first.
- Go to Market > My Olares, then select Stop from the dropdown list.
- Or go to Settings > Applications, select the app, then click Stop.
- Return to Settings > GPU.
- In the Select exclusive app section, click link_off, then click Confirm.
TIP
If the app is also assigned to other GPUs on the same node, you can remove it from the current GPU without stopping it.