Connect AI coding assistants to up-to-date docs with Context7
Context7 is a Model Context Protocol (MCP) server that provides AI coding assistants with real-time, accurate library documentation. Instead of relying on outdated training data, your AI tools can pull the latest docs for any library on demand.
On Olares, you can connect Context7 to Olares-hosted AI agents like Agent Zero, LibreChat, and OpenCode, or to external coding assistants like Cursor and Claude Desktop.
This guide focuses on establishing the MCP connection between Context7 and your AI tools.
Learning objectives
In this guide, you will learn how to:
- Look up library documentation using the Context7 Terminal.
- (Optional) Register an API key for higher rate limits.
- Connect Context7 to Olares-hosted AI agents.
- Connect Context7 to external coding assistants like Cursor.
Prerequisites
Before proceeding, ensure that your AI agents (Agent Zero, LibreChat, OpenCode, etc.) are already fully functional. You must have configured their required settings such as the model provider, model name, and base URLs.
Install Context7
Open Market and search for "Context7".
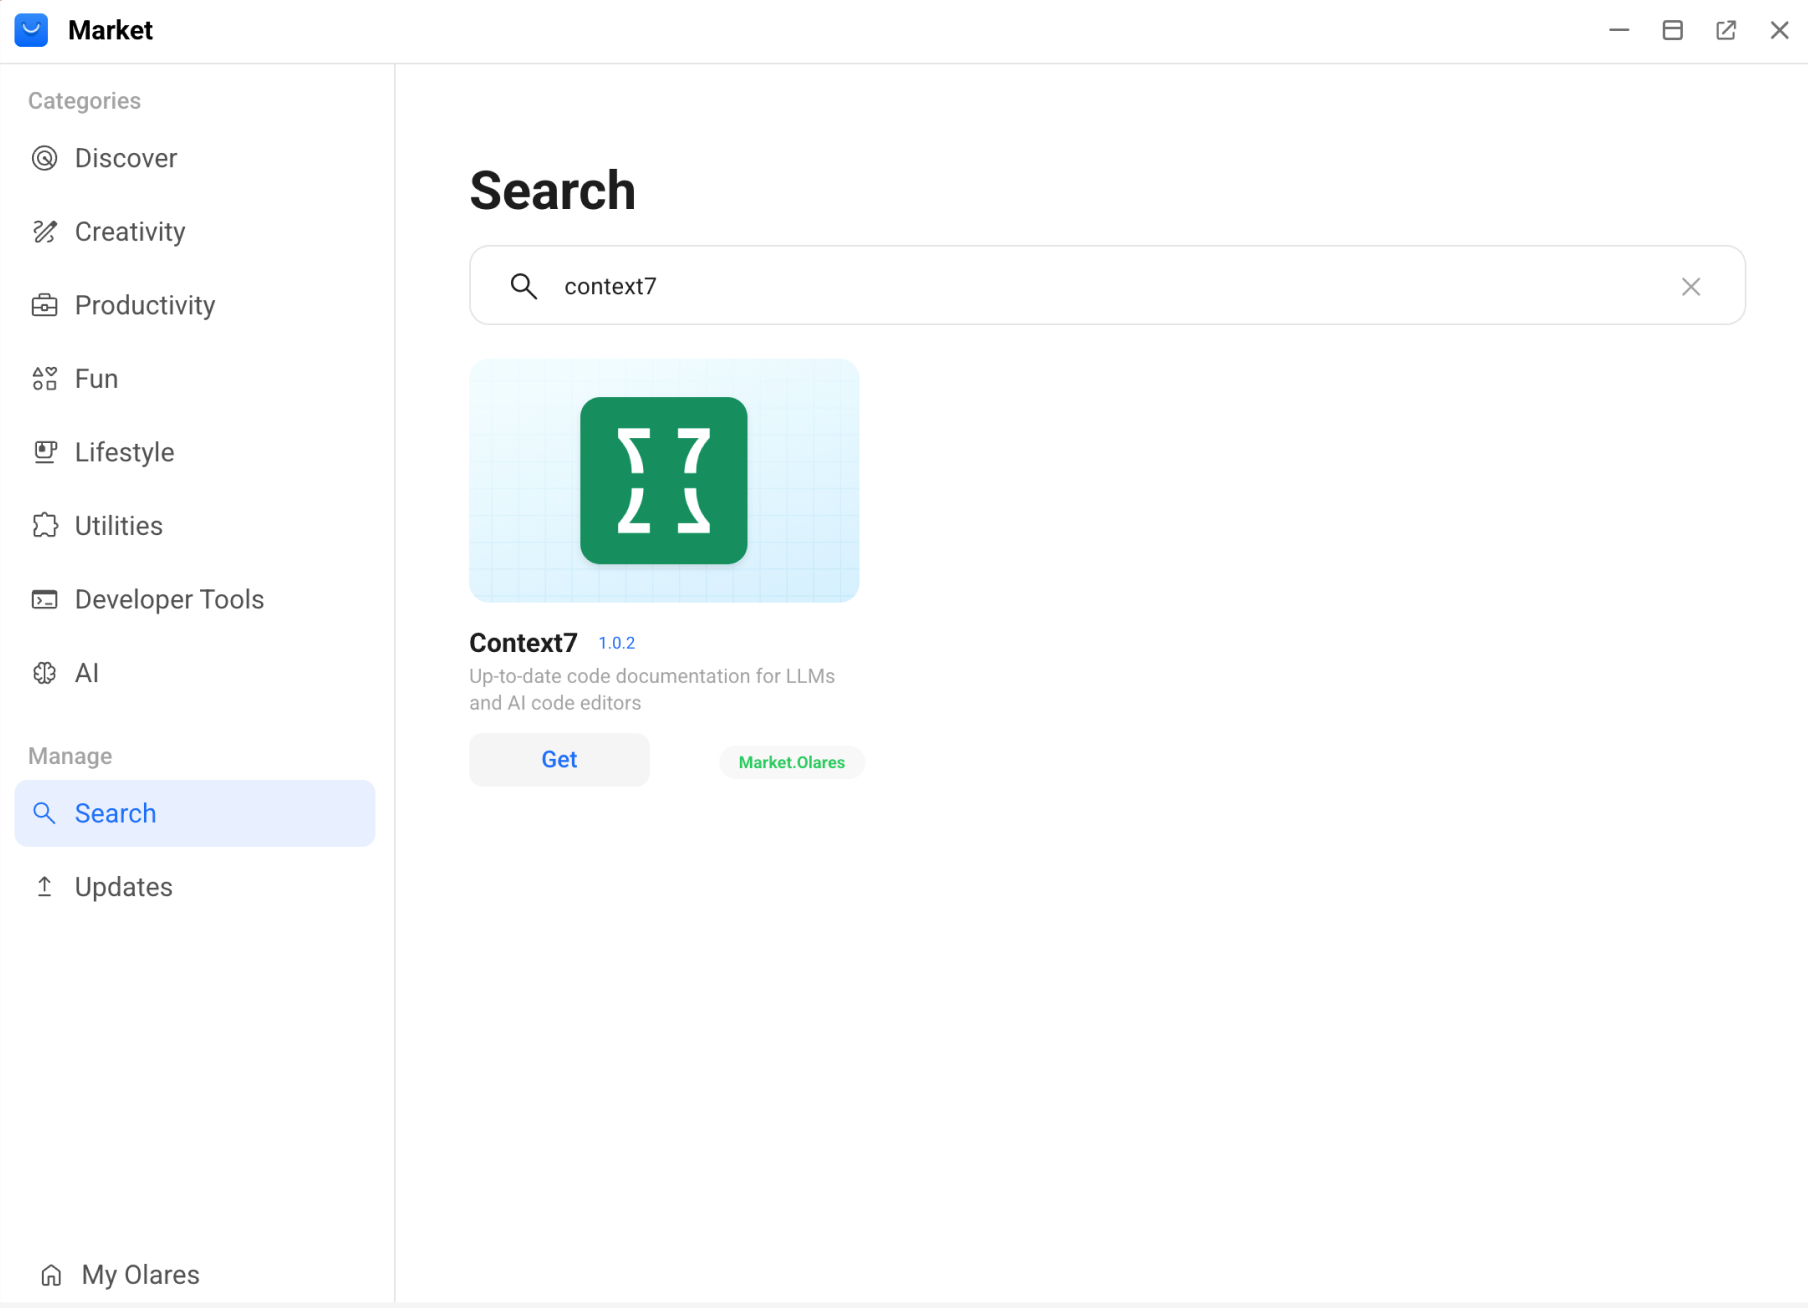
Click Get, and then click Install. Wait for the installation to complete.
Look up documentation with Context7 Terminal
Context7 Terminal allows you to manually search for libraries and retrieve specific documentation. Use it to test queries, verify that Context7 is working, or debug a library’s availability before integrating with an AI agent.
TIP
In practice, you'll typically let AI agents call Context7 automatically via MCP. The Context7 Terminal is mainly useful for manual lookups and debugging.
Search for a library
Find the correct library ID that you’ll use to fetch documentation.
Open Context7 Terminal from the Launchpad.
Use
ctx7 library <library-name> "your-query"to find a library by name, where"your-query"describes what you want to do.bash# Example: Search for React-related libraries using "hooks usage" ctx7 library react "hooks usage" # Example: Search for Next.js using "routing" ctx7 library nextjs "routing" # Example: Search for Express using "middleware" ctx7 library express "middleware"The output returns matching library IDs (e.g.,
/reactjs/react.dev) that you can use in the next step.bashTitle: React Context7-compatible library ID: /reactjs/react.dev Description: React.dev is the official documentation website for React, a JavaScript library for building user interfaces, providing guides, API references, and tutorials. Code Snippets: 2781 Source Reputation: High Benchmark Score: 85.1When multiple results are returned, the best match is usually the one with the closest name, highest snippet count, and strongest reputation.
Fetch documentation
Retrieve detailed, up‑to‑date content for a specific library using its ID.
Use ctx7 docs "library-id" "your-query", where "your-query" describes what you want to know in natural language.
# Example: Fetch React 19 docs about the 'use' hook for async data
ctx7 docs "/reactjs/react.dev" "How to use the 'use' hook for async data in React 19?"

# Example: Ask how to filter documents in React
ctx7 docs "/reactjs/react.dev" "find and filter documents"
For more information, see the Context7 CLI reference.
(Optional) Register and configure an API key
Context7 supports both anonymous and authenticated usage:
- Anonymous mode: Works out of the box with no registration. Suitable for occasional queries.
- Authenticated mode: Recommended if you make more than 50 daily queries, need lower latency, or want access to private knowledge bases.
To configure an API key:
- Go to the Context7 dashboard.
- In the API Keys section, click Create API Key.
 3. Optionally enter a name for the API key, click Create API Key, and then copy the key which starts with
 ctx7sk.
Save the key now
Save the key now. You will not see it again.
- Click Done.
- In Olares, open Settings, and then go to Applications > Context7 > Manage environment variables.
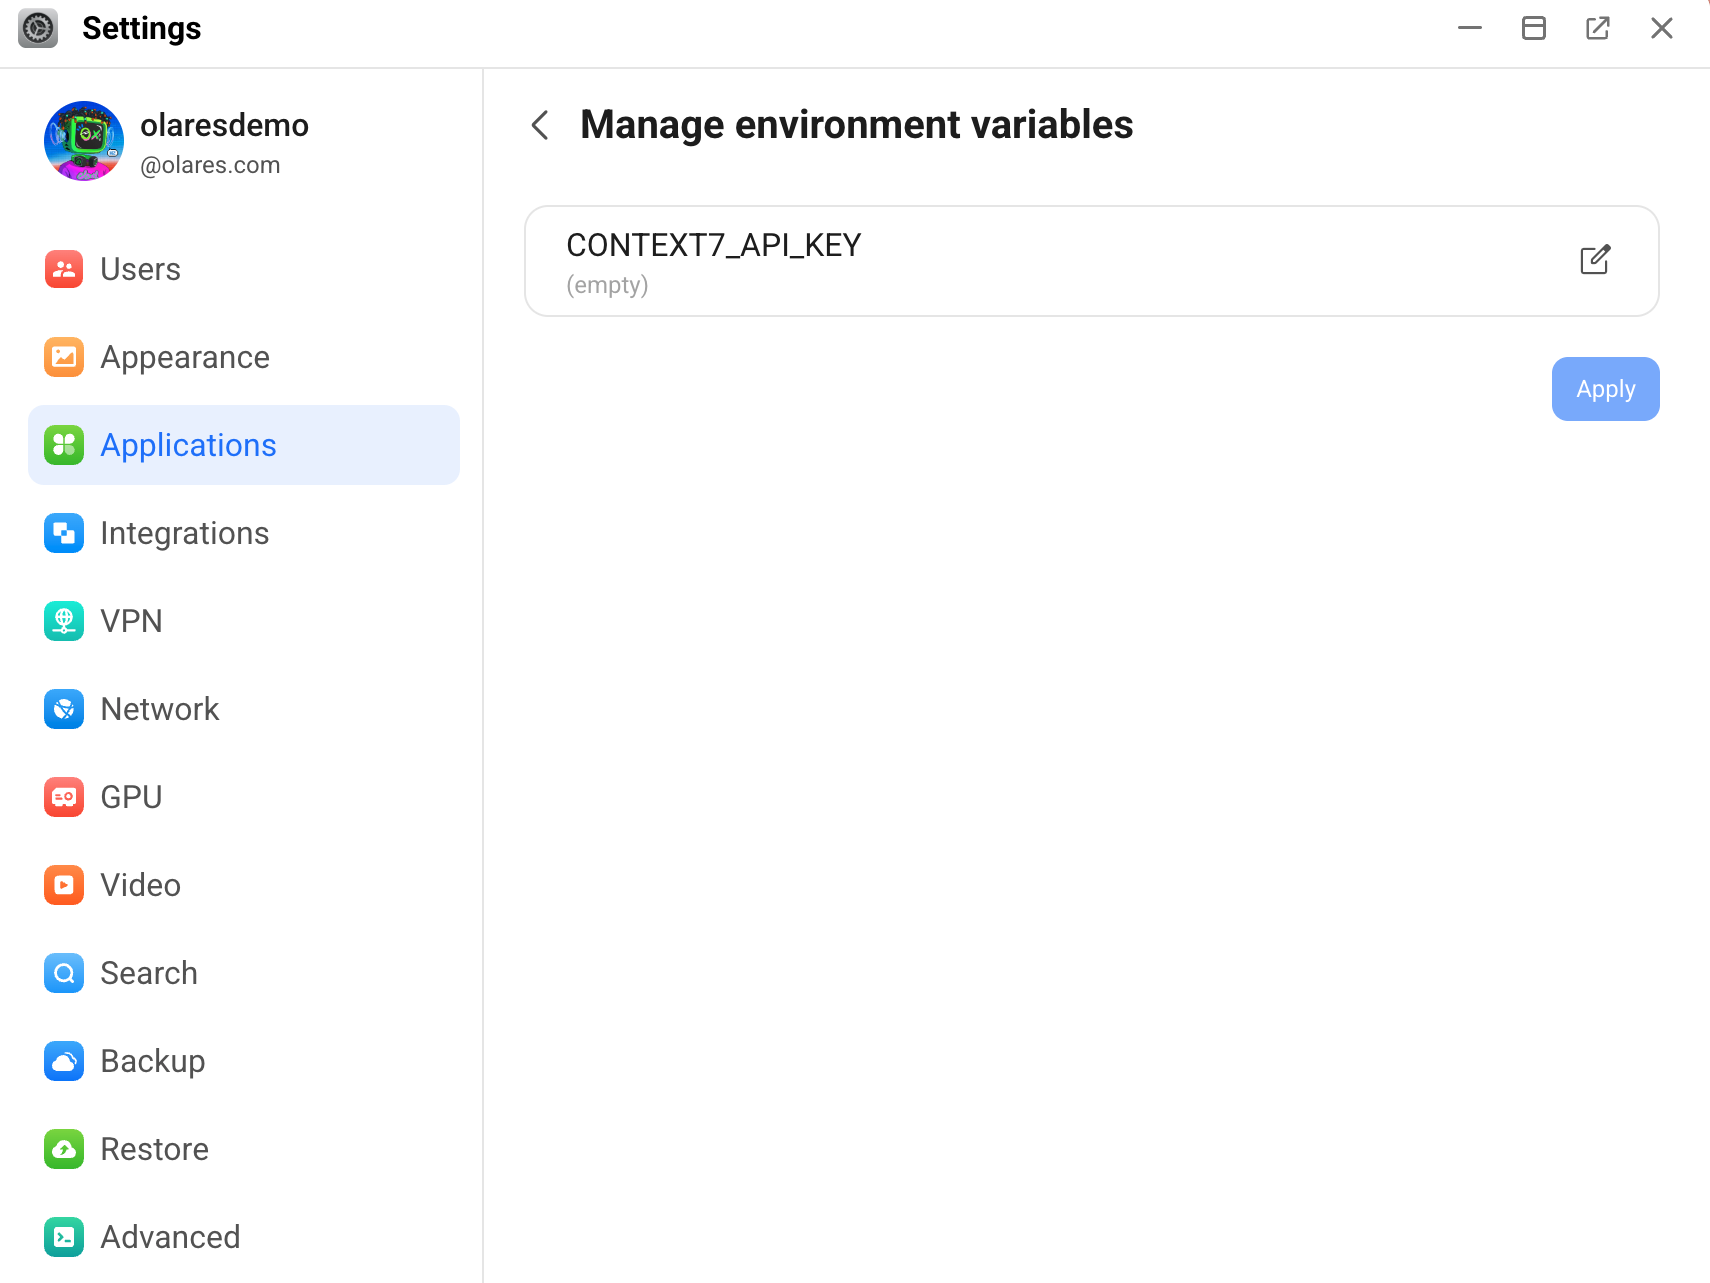
Click edit_square, paste your API key, and then click Confirm.
Click Apply. The Context7 app restarts automatically.
To verify that the API key is correctly configured, run a query in Context7 Terminal, and then check the Context7 dashboard.
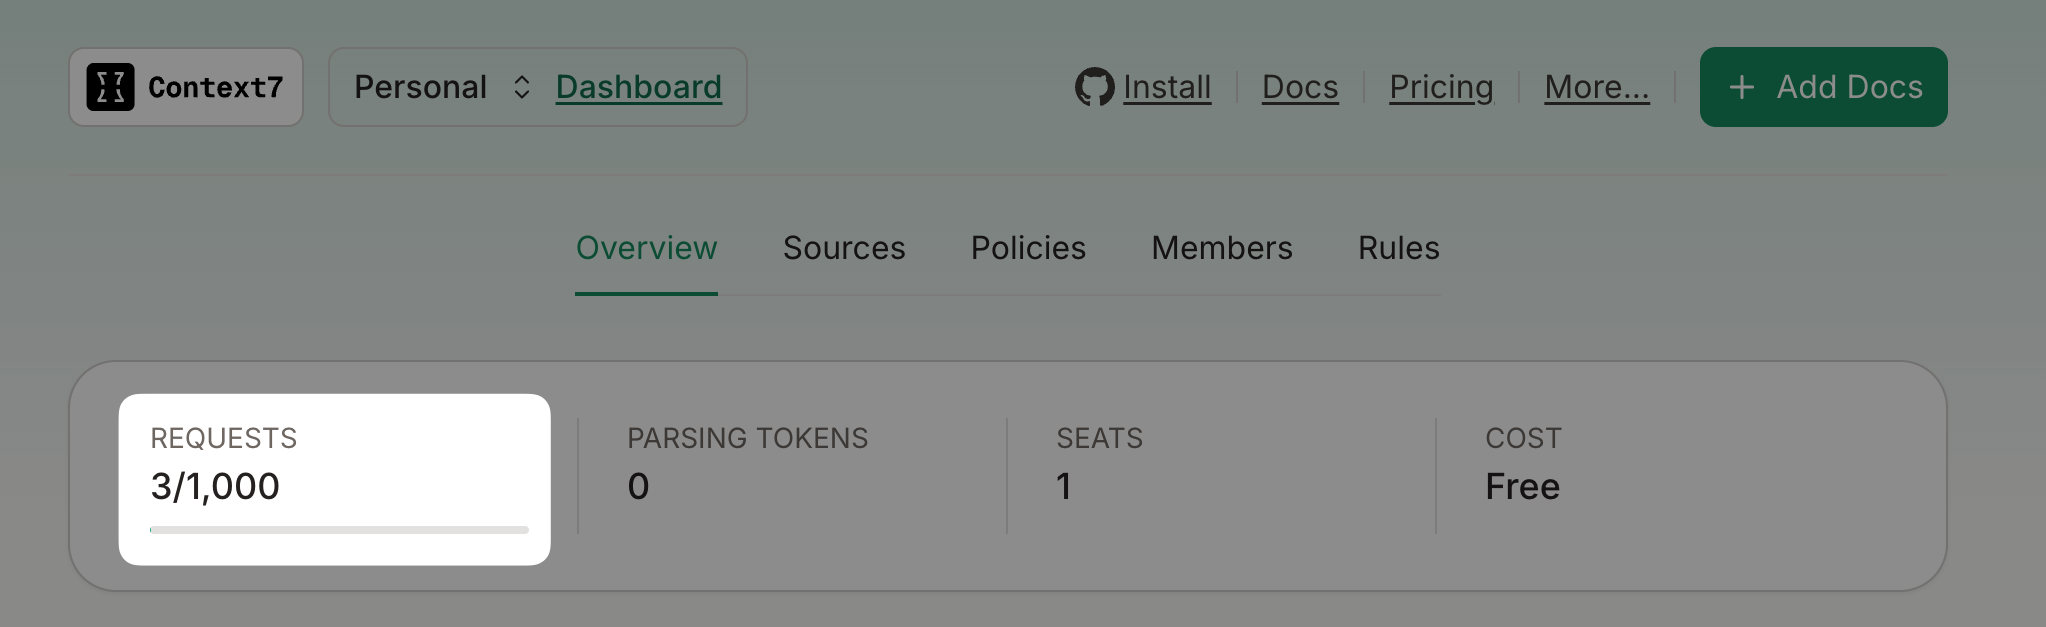
The REQUESTS number (i.e., the API call count) indicates that Context7 on Olares is using the key for authenticated requests.
Connect Context7 to Olares apps
Before proceeding, ensure that you have configured the necessary settings within each agent app, such as the model provider, model name, and base URL.
Obtain MCP endpoint
To use Context7 with Olares-hosted AI agents, you need to obtain the MCP endpoint URL first, and then configure Context7 in your preferred agent app.
Open Settings, and then go to Applications > Context7 > Context7 MCP.
Copy the endpoint URL. For example,
https://f86d25051.olaresdemo.olares.com.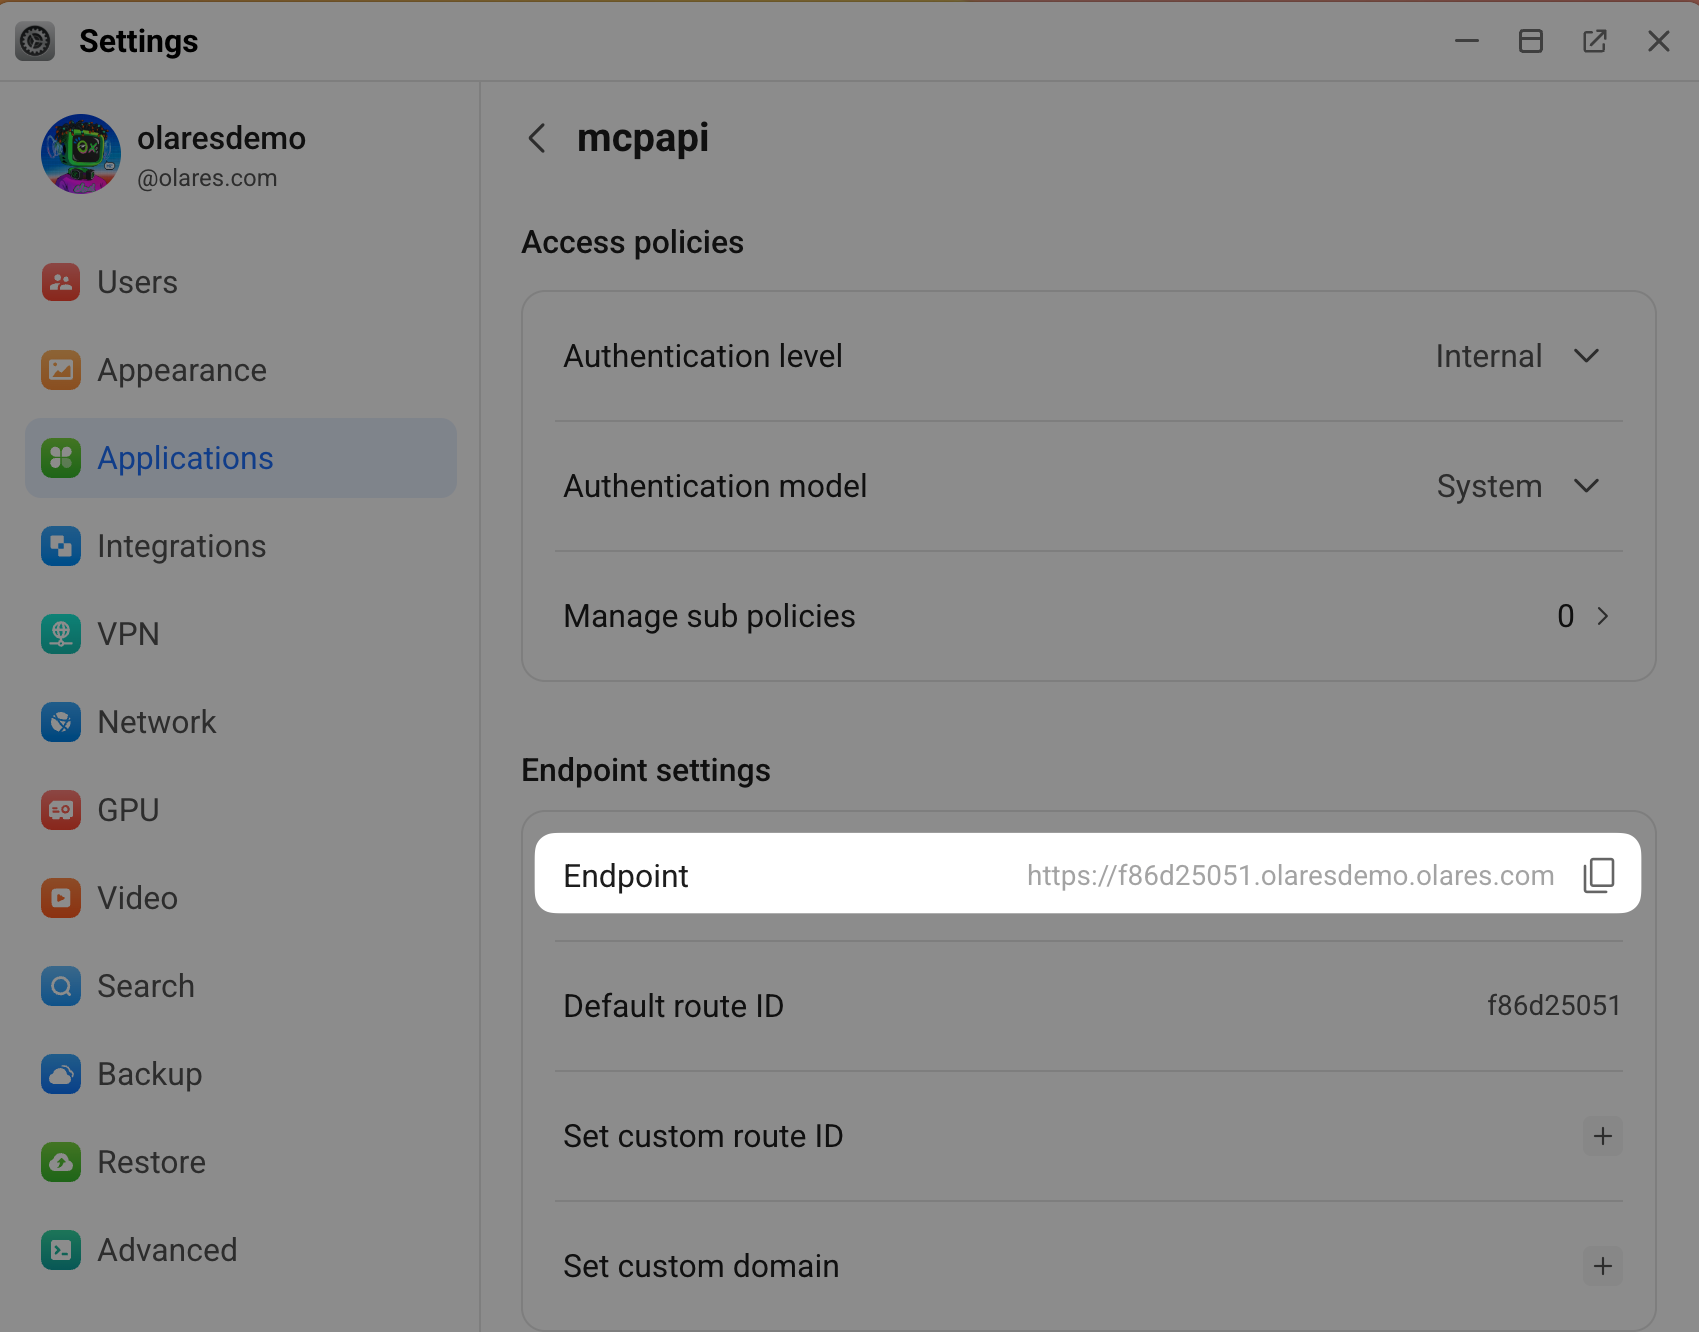
Agent Zero
Add Context7 as an MCP server in Agent Zero, then configure your model provider to enable the agent to call the documentation tools.
Open Agent Zero, go to Settings > MCP/A2A, and then click Open.
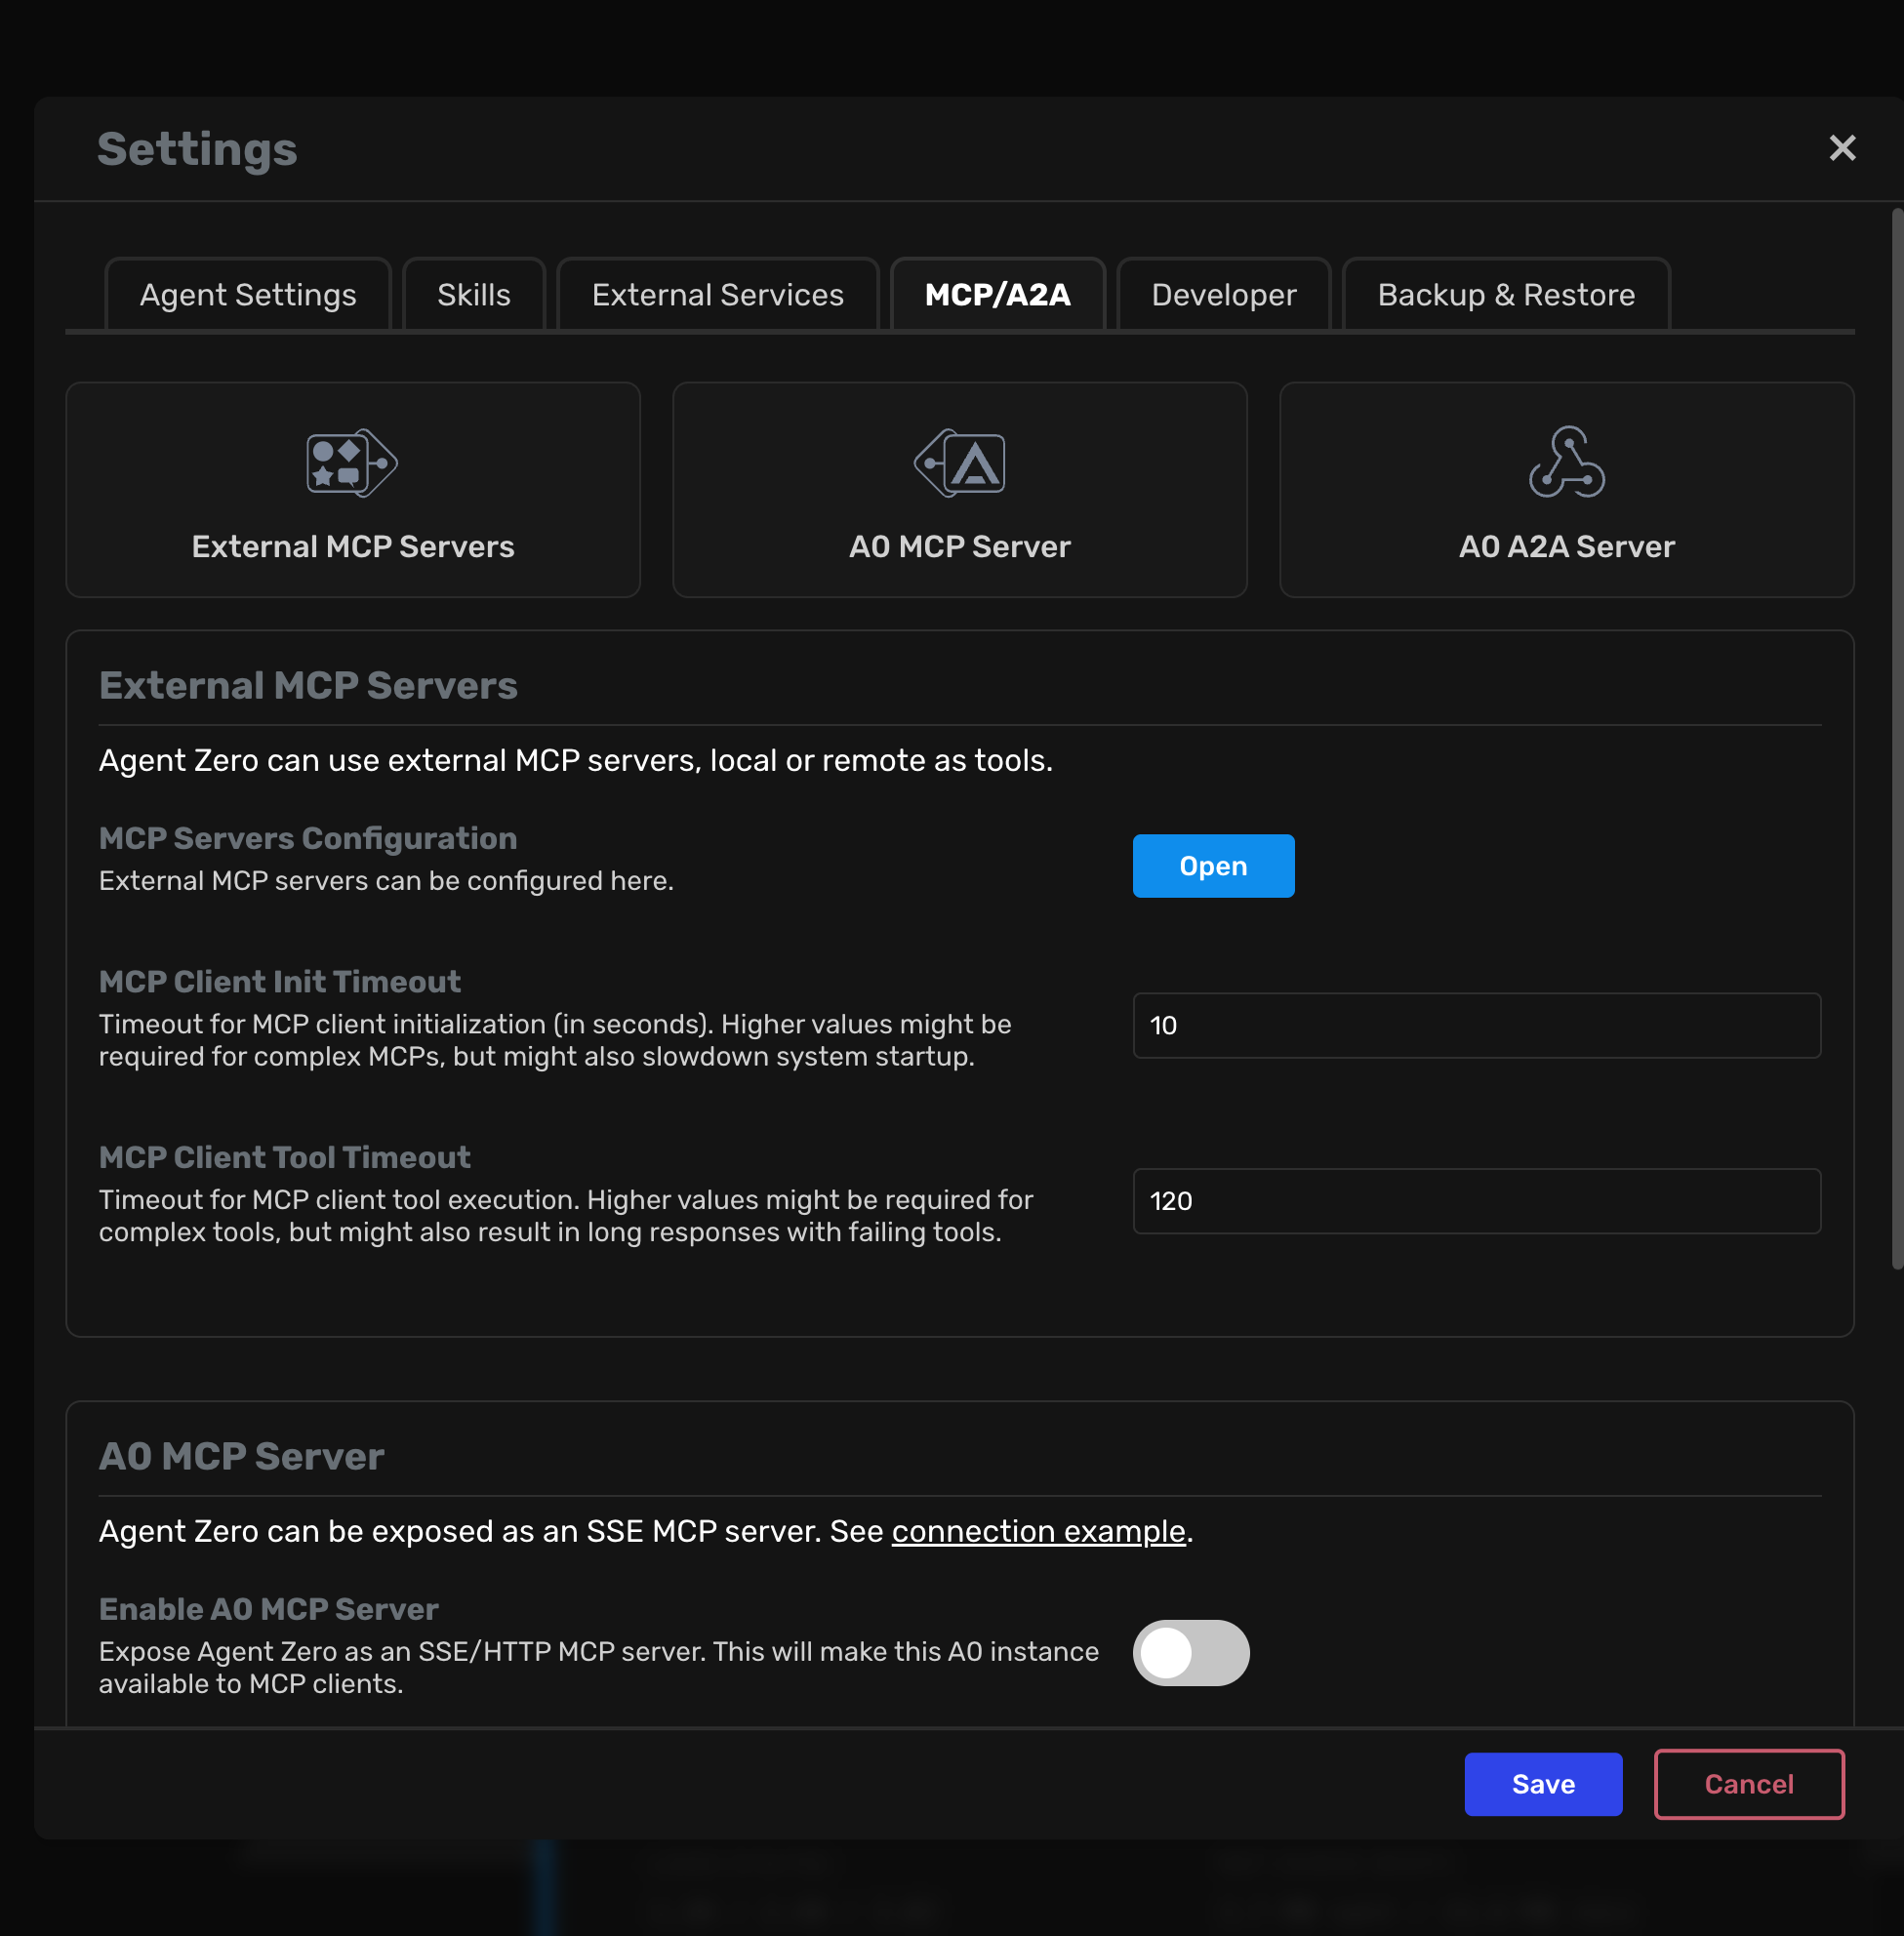
In the MCP Servers Configuration window, add a new MCP server with the following configuration. Replace
<your-context7-endpoint>with your Context7 MCP endpoint:json{ "mcpServers": { "context7": { "type": "streamable-http", "url": "<your-context7-endpoint>/mcp" } } }For example,
json{ "mcpServers": { "context7": { "type": "streamable-http", "url": "https://f86d25051.olaresdemo.olares.com/mcp" } } }Click Apply now, and then close the window.
Click Save.
Start a conversation. For example,
textUse Context7 to look up the latest React 19 documentation. How do I fetch data with the new use hook inside a Server Component? Show me a code example.When Context7 is called successfully, you'll see the communication process with MCP and the solution proposed for your question.

LibreChat
Enable the Context7 MCP server in LibreChat and select it from the chat input to start using live documentation.
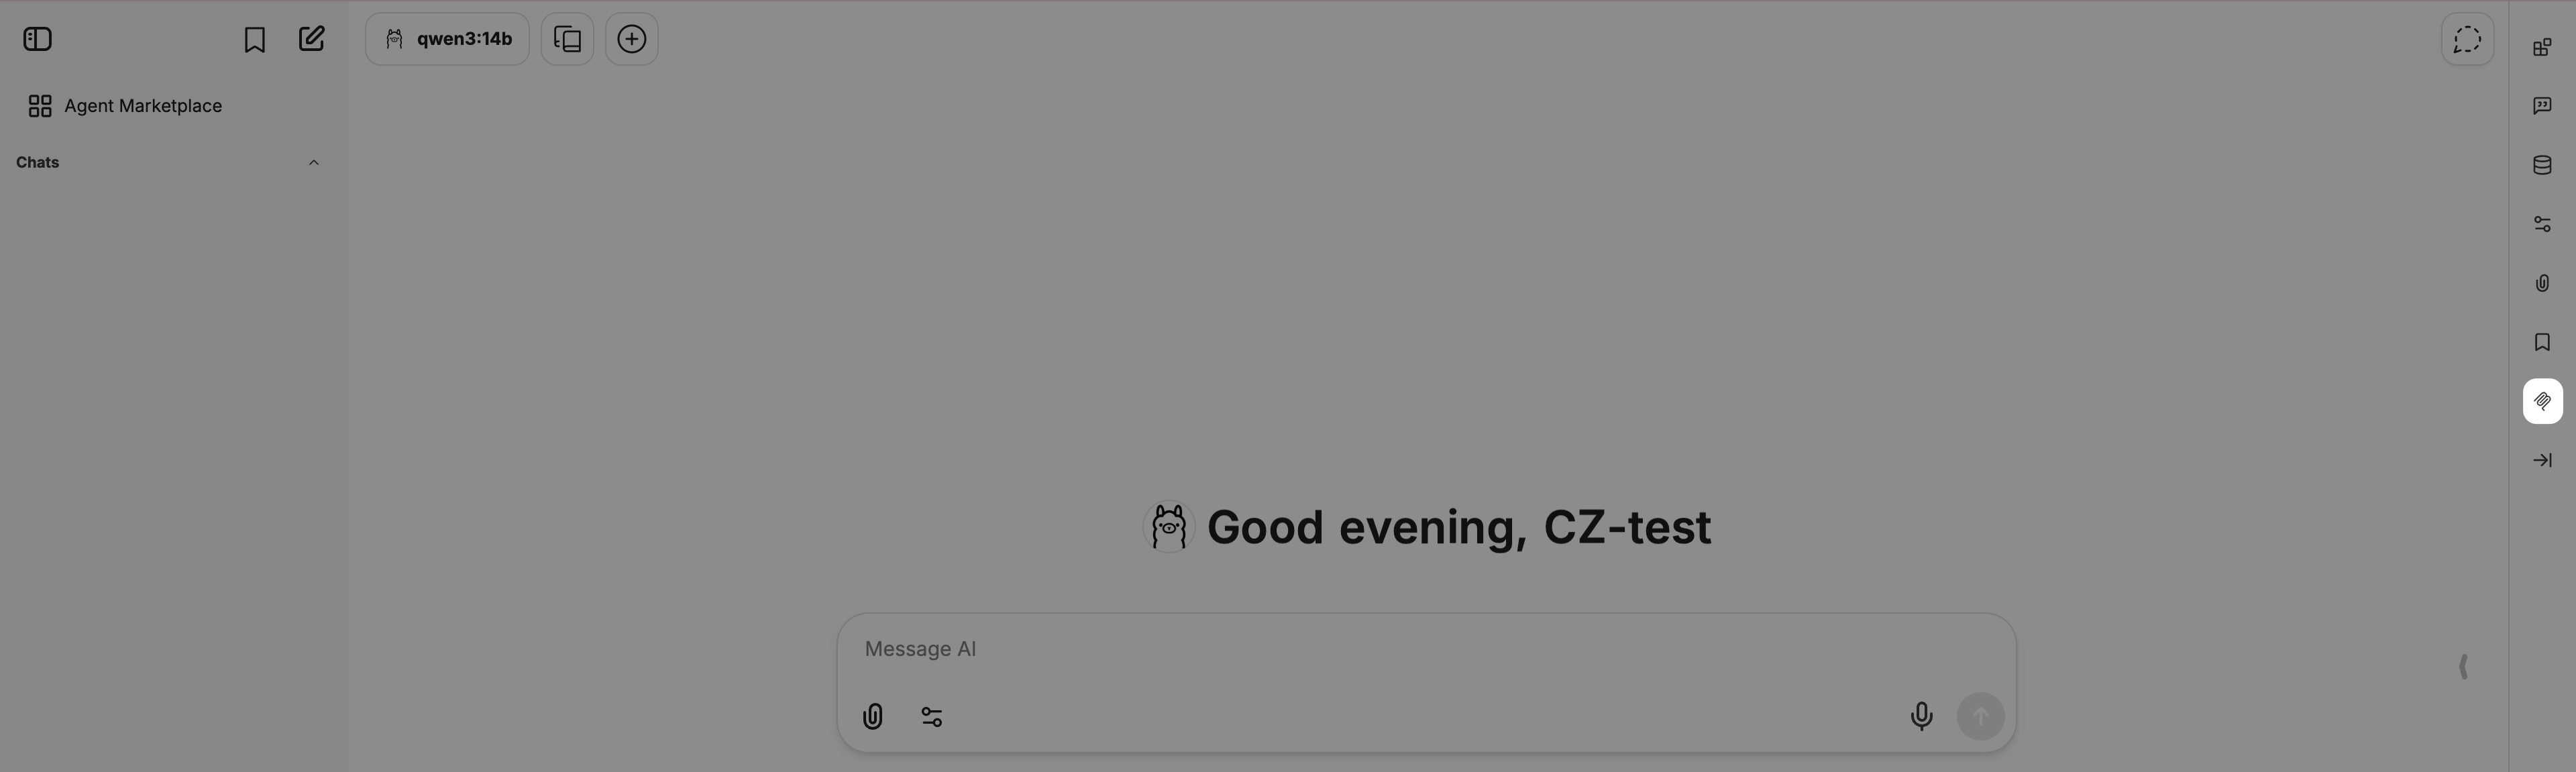
Open LibreChat, and then click the MCP Settings icon on the right sidebar.
Click add_2 next to Filter MCP servers by name.
In the Add MCP Server window:
a. Name: Enter a server name such as
context7.b. MCP Server URL: Enter the URL in the format of
<your-context7-endpoint>/mcp. Replace<your-context7-endpoint>with your Context7 MCP endpoint.c. I trust this application: Select this option.
d. Click Create. You get the
MCP server created successfullymessage.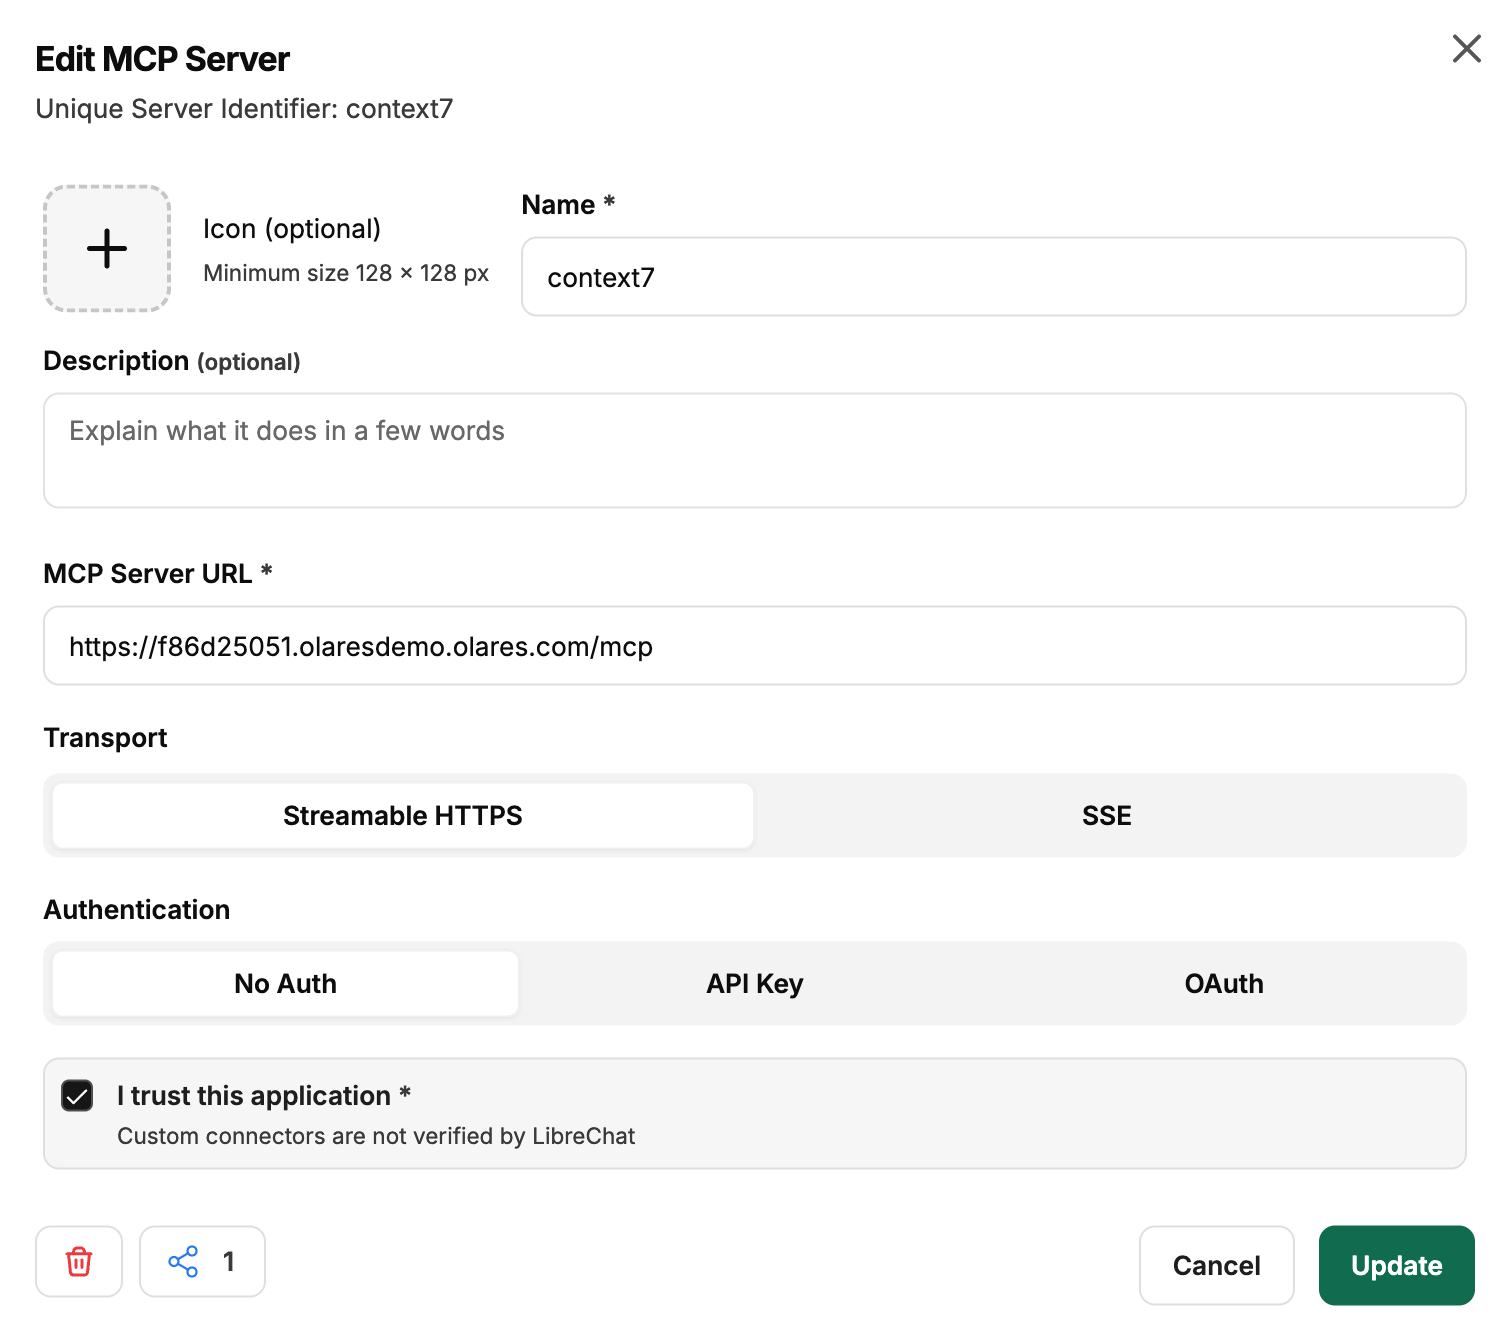
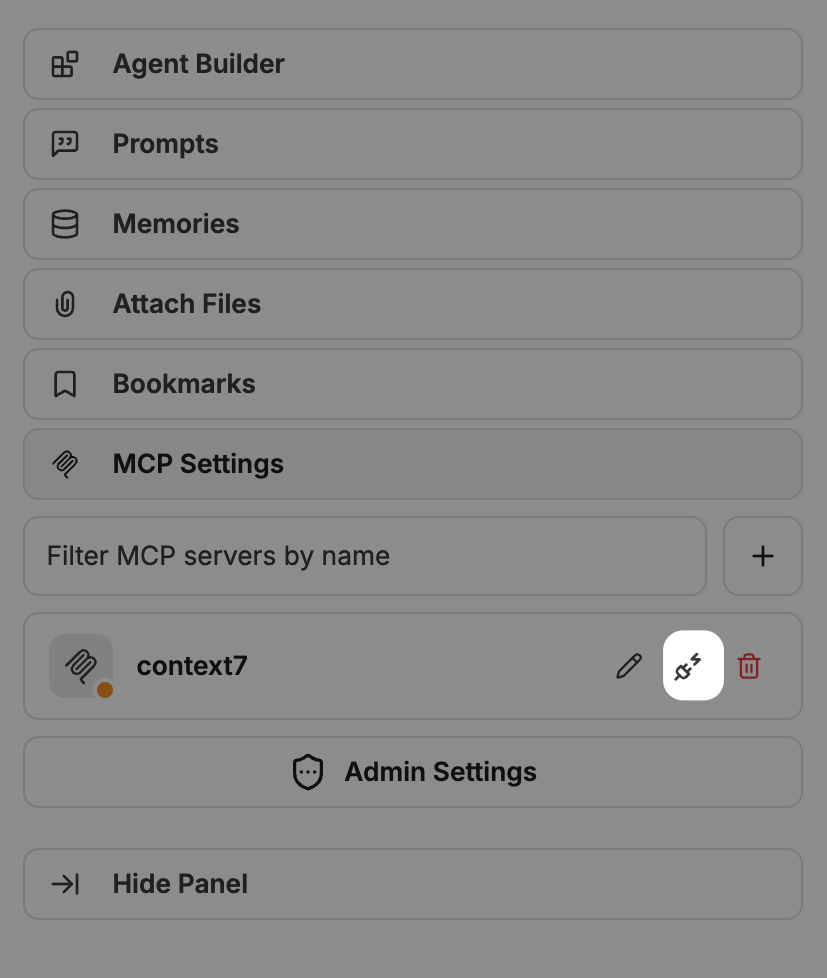
On the right sidebar, find the newly added MCP server context7, and then click the Connect icon.
In the chat window, ensure context7 is selected from the MCP Servers list.

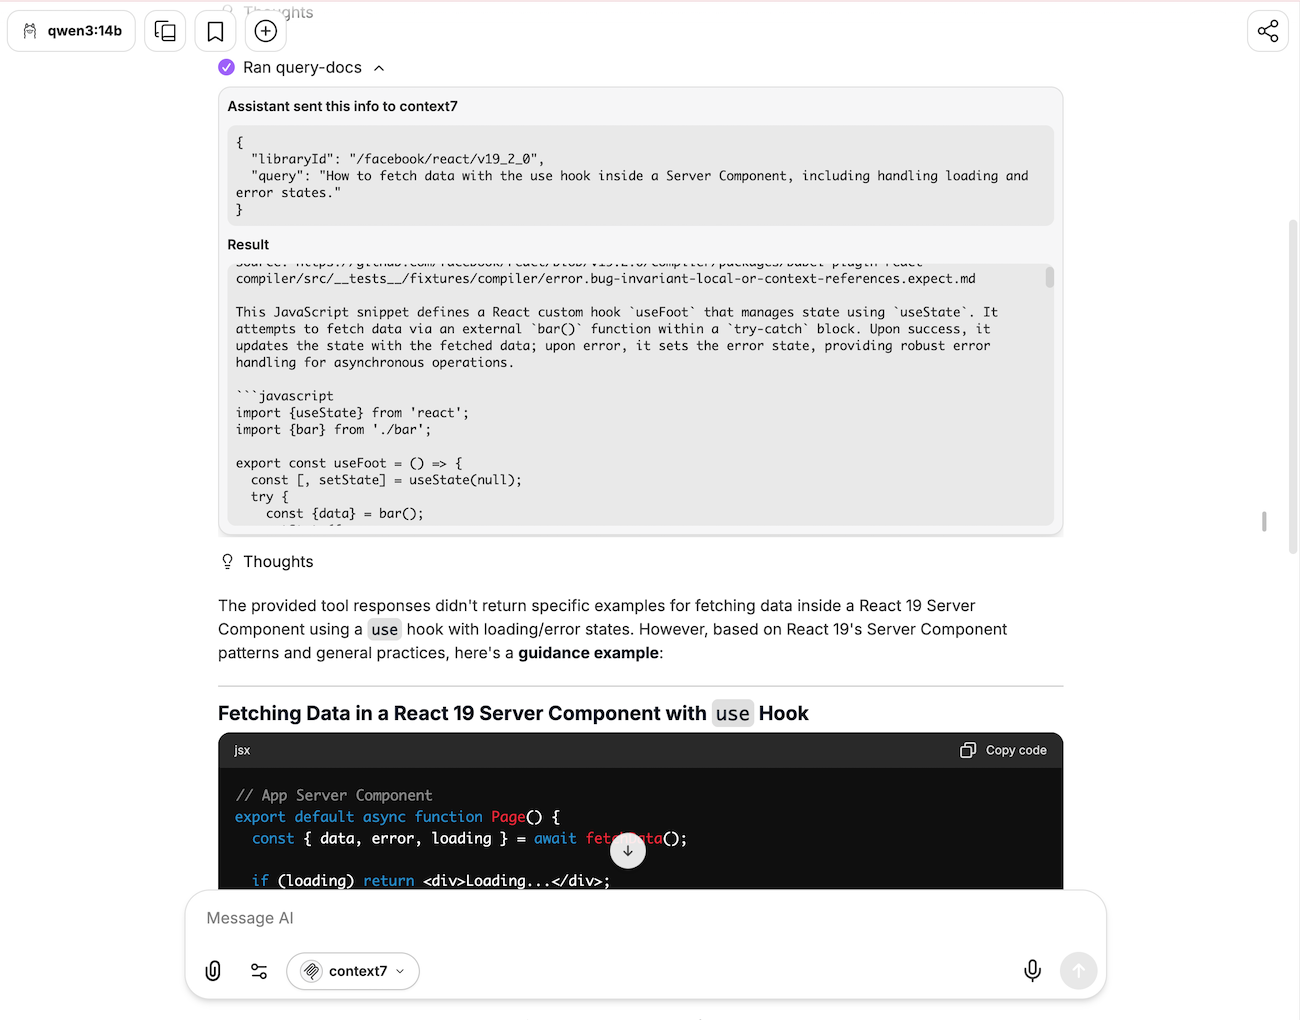
Ask a question. For example,
textUse the context7 to look up React 19 documentation. Then show me how to fetch data with the use hook inside a Server Component, including handling loading and error states.You will see from the responses that the info was sent to Context7, which indicates the integration is working.
OpenCode
Create a configuration file to register Context7 as a remote MCP server, then restart the OpenCode container to load it.
Open OpenCode, and then click terminal in the upper-right corner.
Enter the following command to create the configuration file. Replace
<your-context7-endpoint>with your Context7 MCP endpoint.bashcat << 'EOF' > /home/opencode/.config/opencode/opencode.json { "$schema": "https://opencode.ai/config.json", "mcp": { "context7": { "type": "remote", "url": "<your-context7-endpoint>/mcp", "enabled": true } } } EOF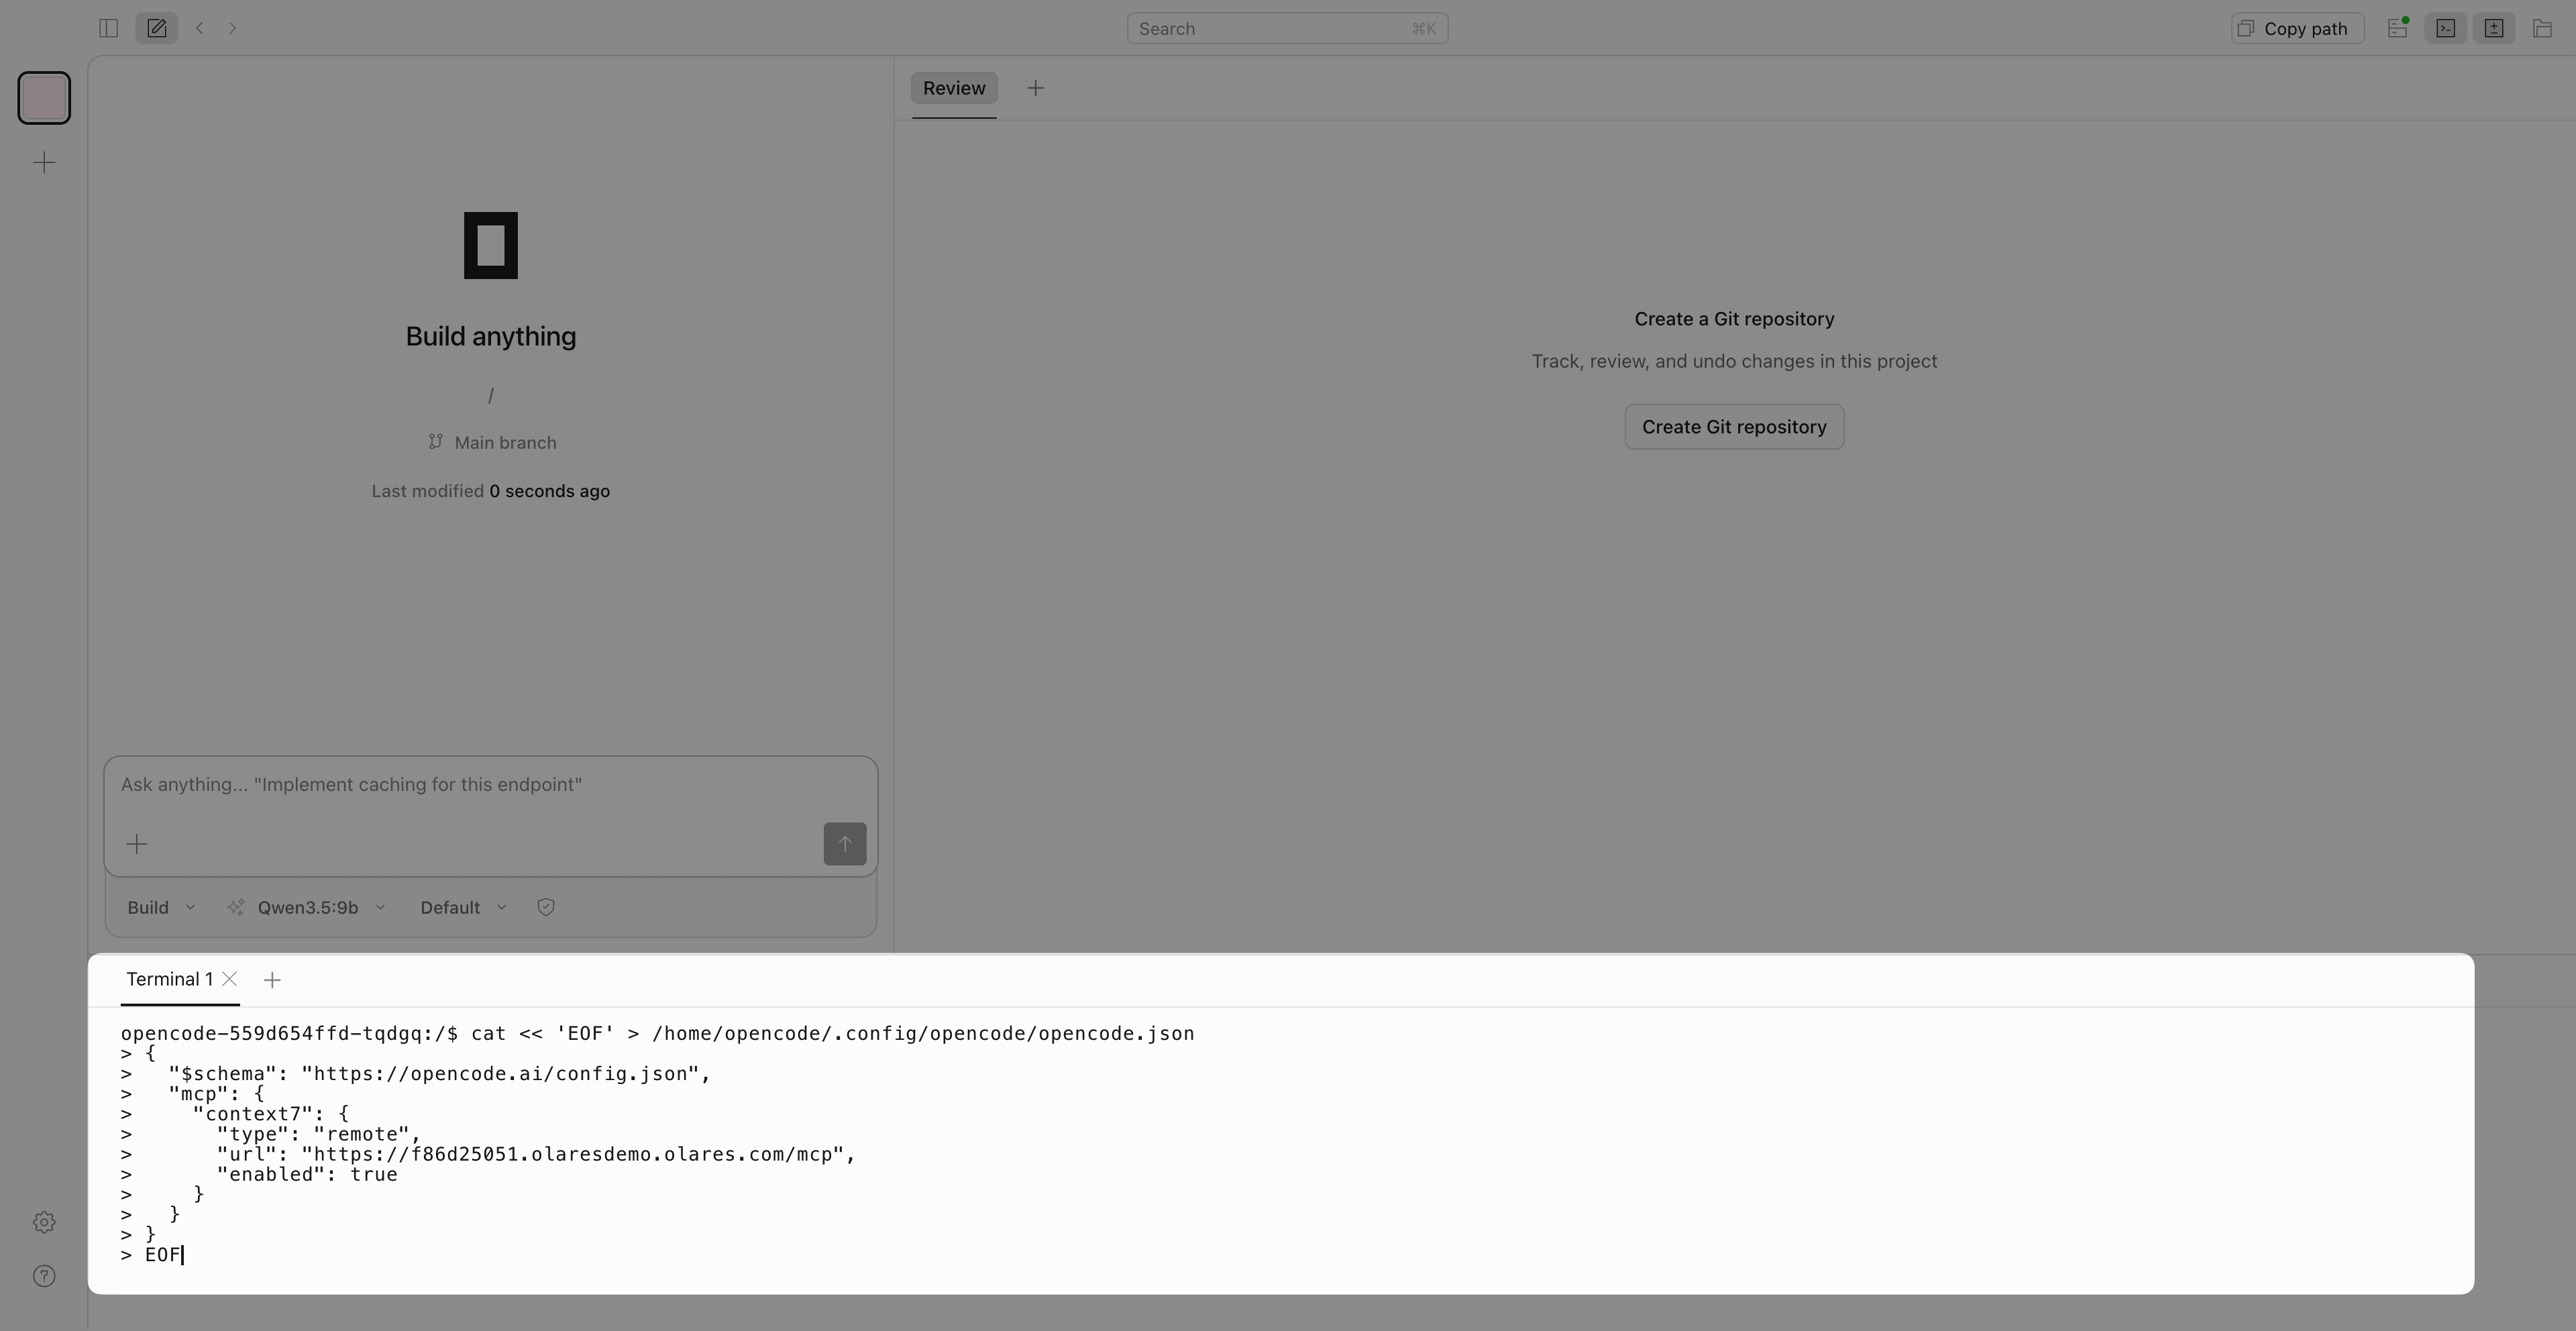
Open Control Hub, find the opencode deployment, and then click Restart.
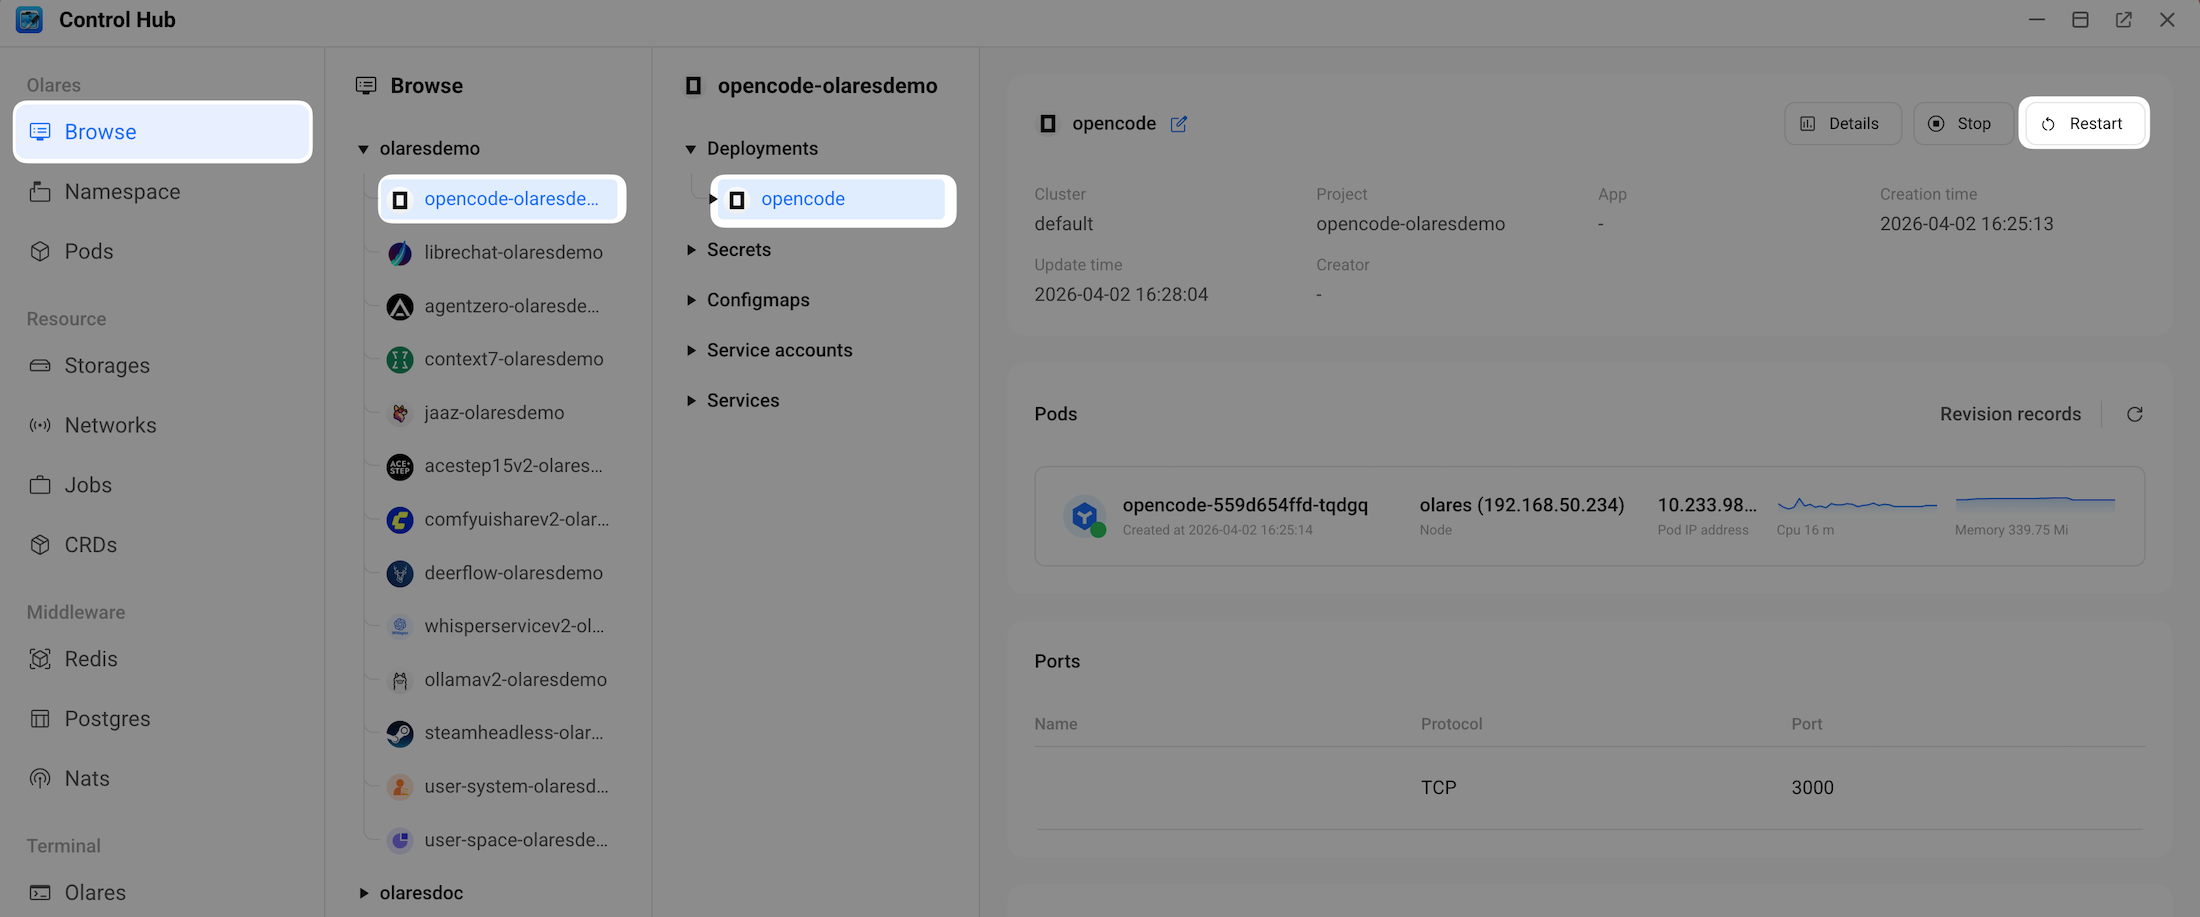
Wait for the status indicator to turn green.
Reopen OpenCode.
Click the Status icon in the upper-right corner, click the MCP tab, and then verify that context7 is enabled.

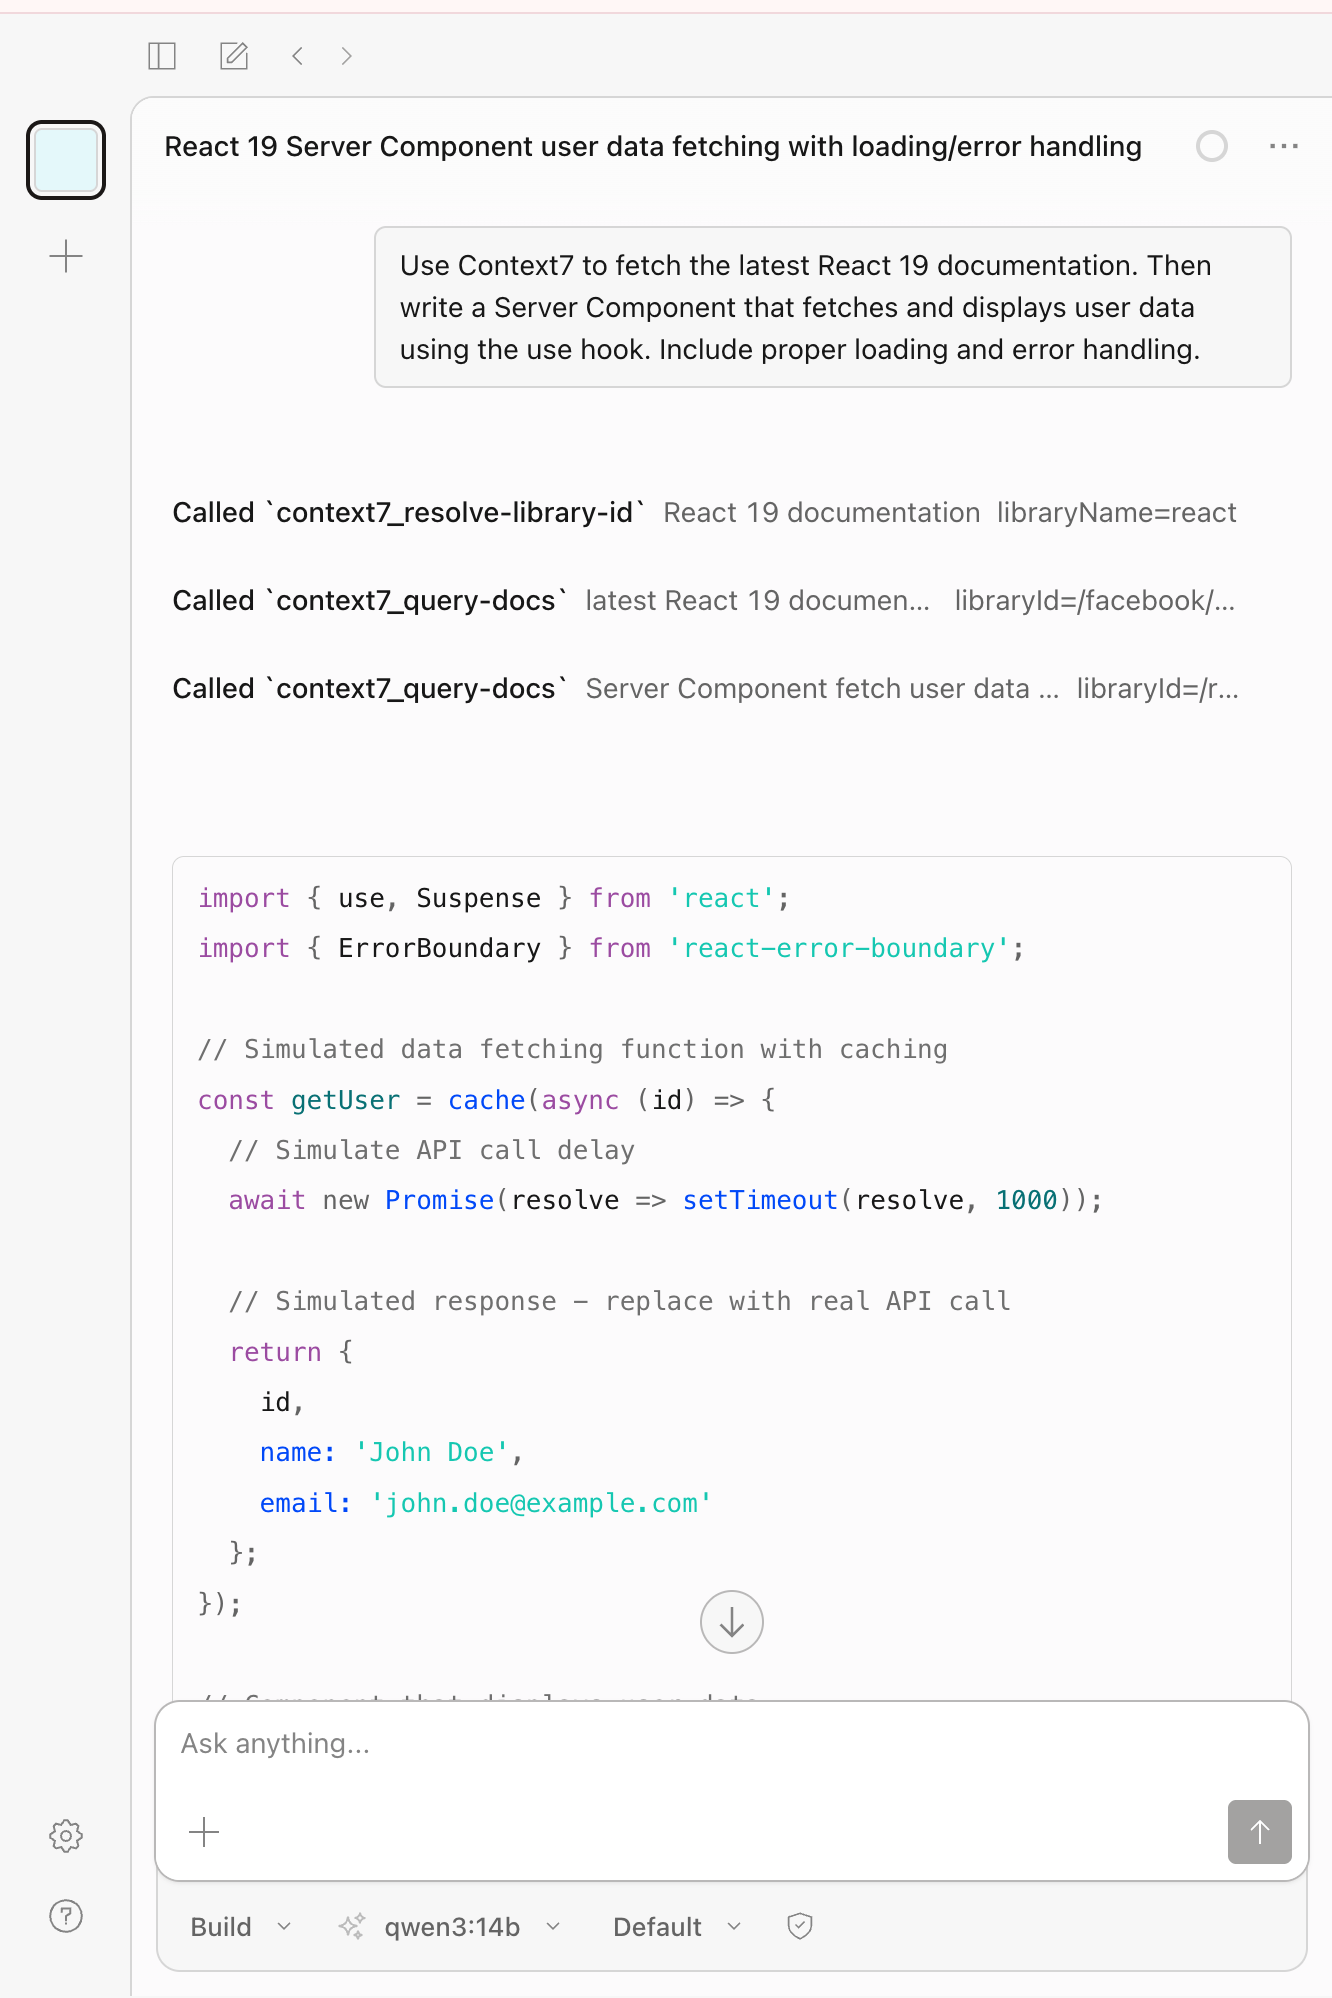
In the chat, ask a question. For example,
textUse Context7 to fetch the latest React 19 documentation. Then write a Server Component that fetches and displays user data using the use hook. Include proper loading and error handling.You will see the process of calling context7 to produce the response, which indicates the integration is working.
Connect external clients via MCP
You can also connect Context7 to coding assistants running on your computer, such as Cursor or Claude Desktop. This section uses Cursor as an example.
Open the LarePass desktop client on your computer, and then enable VPN connection to connect to Olares.
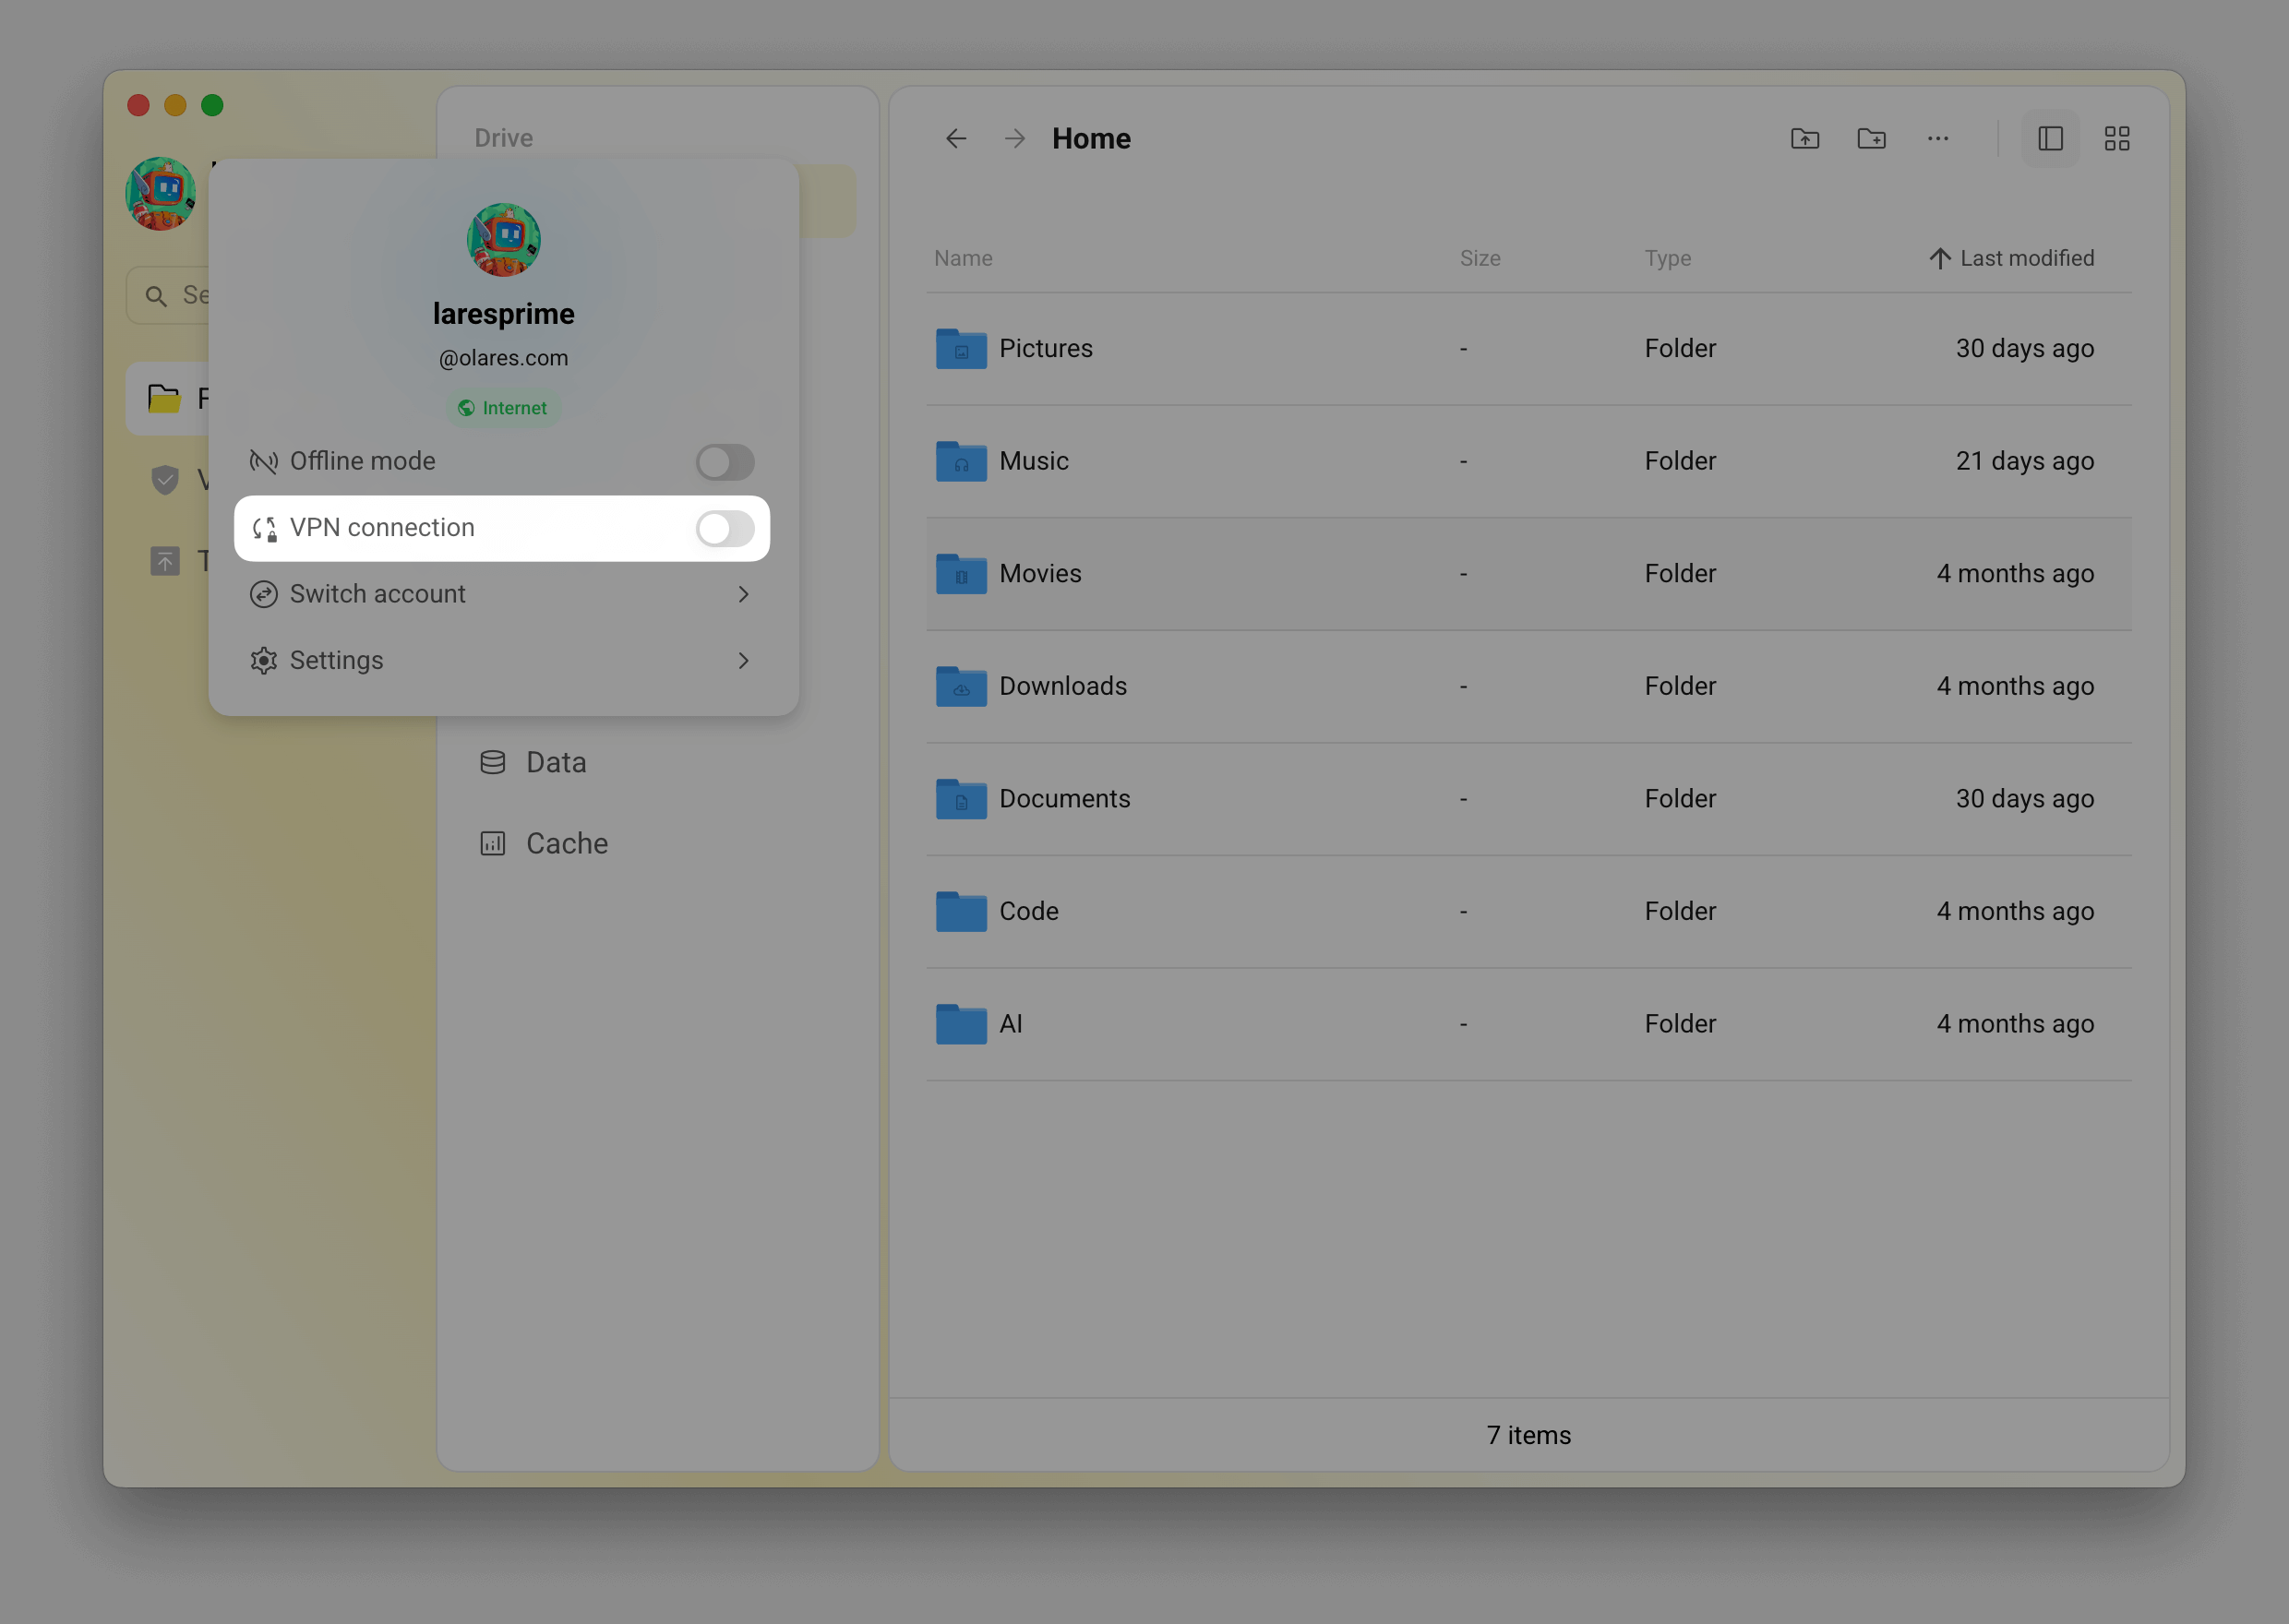
On the same local network?
If your computer and Olares are on the same LAN, you can skip VPN and use the
.localdomain instead. Replacehttps://f86d25051.{username}.olares.comwithhttp://f86d25051.{username}.olares.localin the config in Step 3. For details, see Use.localdomain.Open Cursor, and then go to Settings > Tools & MCP > Add custom MCP.
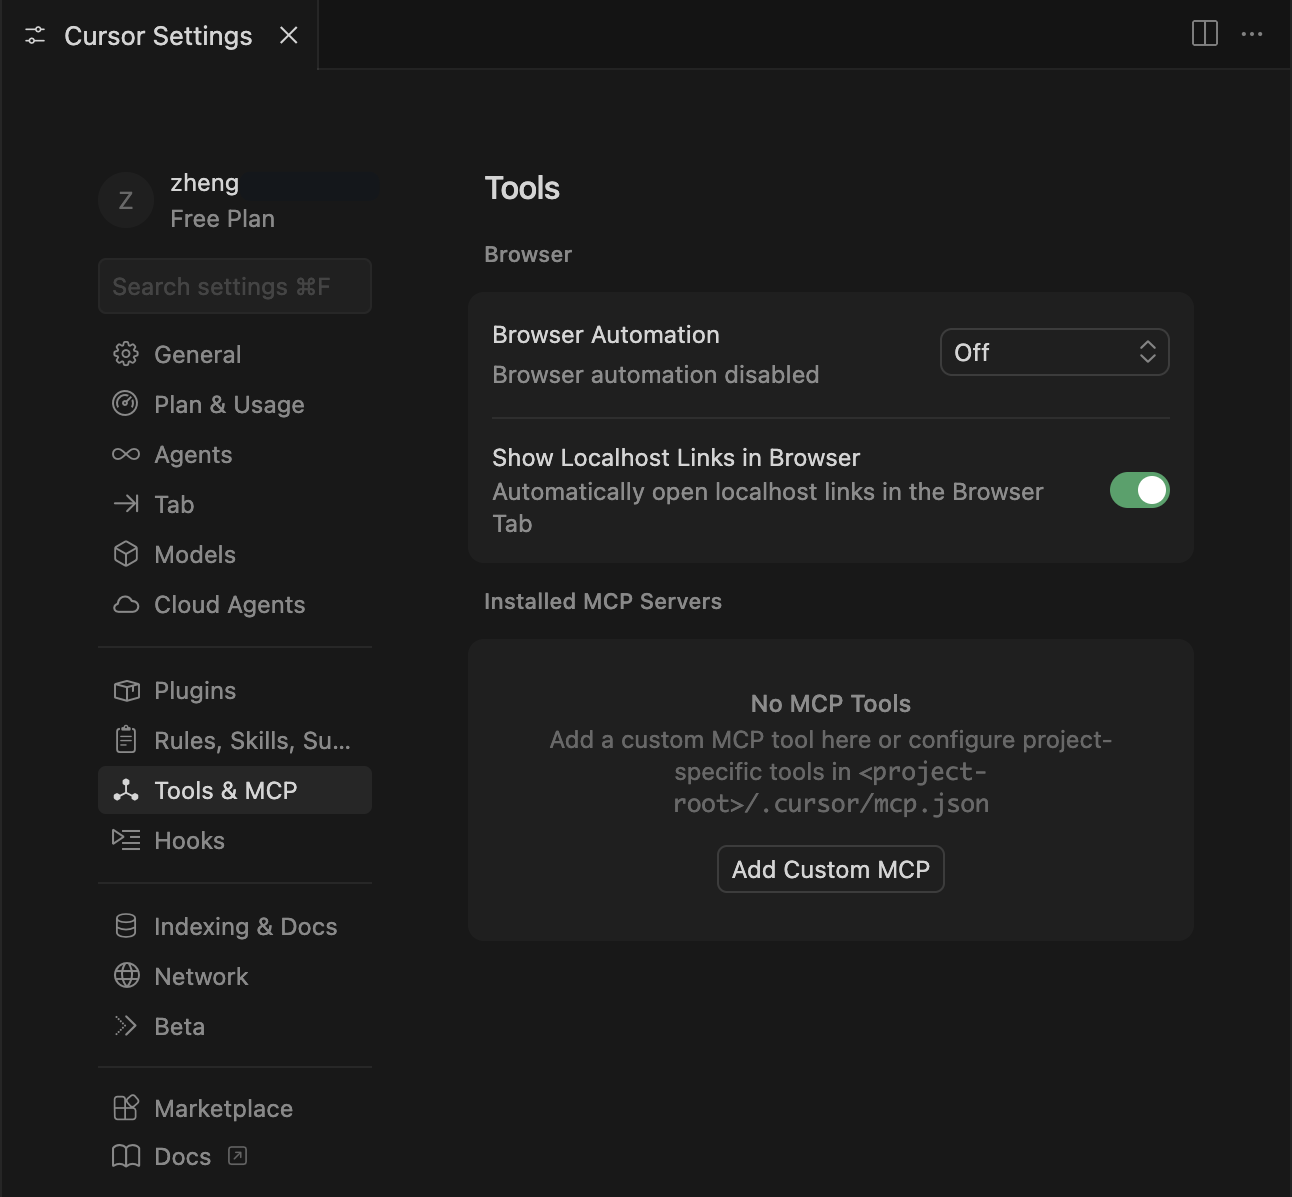
Enter the following configurations in the
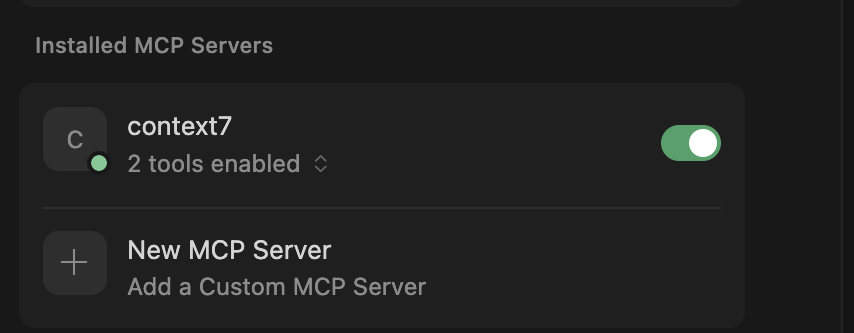
mcp.jsonfile. Replace<your-context7-endpoint>with your Context7 MCP endpoint.json{ "mcpServers": { "context7": { "url": "<your-context7-endpoint>/mcp" } } }Save the changes. Now Context7 is enabled.
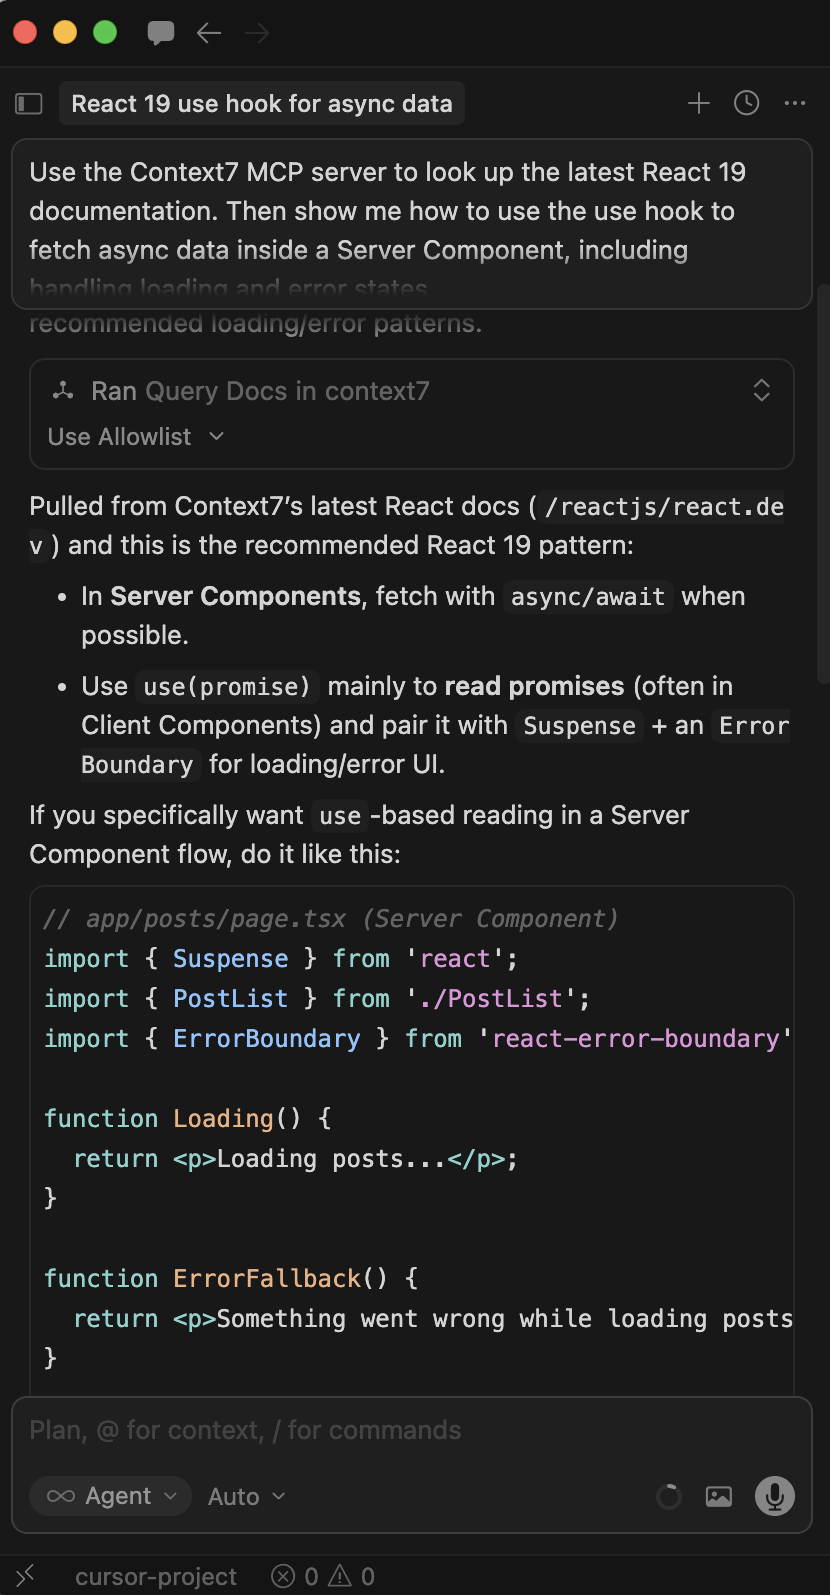
Ask in the chat. For example,
textUse the Context7 MCP server to look up the latest React 19 documentation. Then show me how to use the use hook to fetch async data inside a Server Component, including handling loading and error states.When Context7 is called successfully, you'll see the tool-use notifications in Cursor's response.
Other MCP clients
The same approach works for Claude Desktop and other MCP-compatible tools. Use the configuration format and replace <your-context7-endpoint> with your Context7 MCP endpoint.
{
  "mcpServers": {
    "context7": {
      "url": "<your-context7-endpoint>/mcp"
    }
  }
}Manage Context7 skills
Context7 supports installable skills that extend its capabilities. You can search, install, and manage skills using the Context7 Terminal.
Search and install skills
Discover available skills from the marketplace and install them to extend Context7’s capabilities (e.g., PDF processing, testing frameworks).
# Search for skills by keyword
ctx7 skills search pdf
ctx7 skills search "react testing"

# Browse all skills in a repository
ctx7 skills info /anthropics/skills

# Install a specific skill
ctx7 skills install /anthropics/skills pdf

# Get skill suggestions based on your project
ctx7 skills suggest
List and remove skills
View installed skills and remove those you no longer need.
# List installed skills
ctx7 skills list

# List skills for a specific client
ctx7 skills list --claude
ctx7 skills list --cursor

# Remove a skill
ctx7 skills remove pdf
For more information, see the Context7 Skills Marketplace.
FAQs
Can I call the Olares-hosted Context7 API from external programs?
No. The Context7 instance on Olares serves as an MCP server for AI assistants, not as a general-purpose API endpoint. If you need programmatic API access, use the official Context7 API at context7.com.
Why is my AI still hallucinating (giving wrong or outdated answers)?
Your AI might not realize it has access to Context7. Unless you explicitly ask it to use Context7, it might fall back on its own training data, which could be outdated.
To fix this issue, add a phrase like “Use Context7” to your question. For example, ask "Use Context7 to find how to use the use hook in React 19" instead of "How do I use the use hook in React 19".
Common issues
Manual configuration required for OpenCode on ARM-based machines
If you are running OpenCode V1.0.4 on an ARM-based machine, the terminal command does not apply the configuration changes correctly. Instead, you must configure it manually via the Files app:
Open Files and navigate to Application > Data > opencode > .config > opencode.
Right-click
config.jsoncand select Rename. Rename the file toconfig.jsonso you can edit it directly in Files. OpenCode recognizes both extensions.Double-click
config.jsonto open it, and then click edit_square to enter the edit mode.Paste the following
mcpJSON block into the file. Replace<your-context7-endpoint>with your Context7 MCP endpoint.json"mcp": { "context7": { "type": "remote", "url": "<your-context7-endpoint>/mcp", "enabled": true } }Click save to save the changes.